
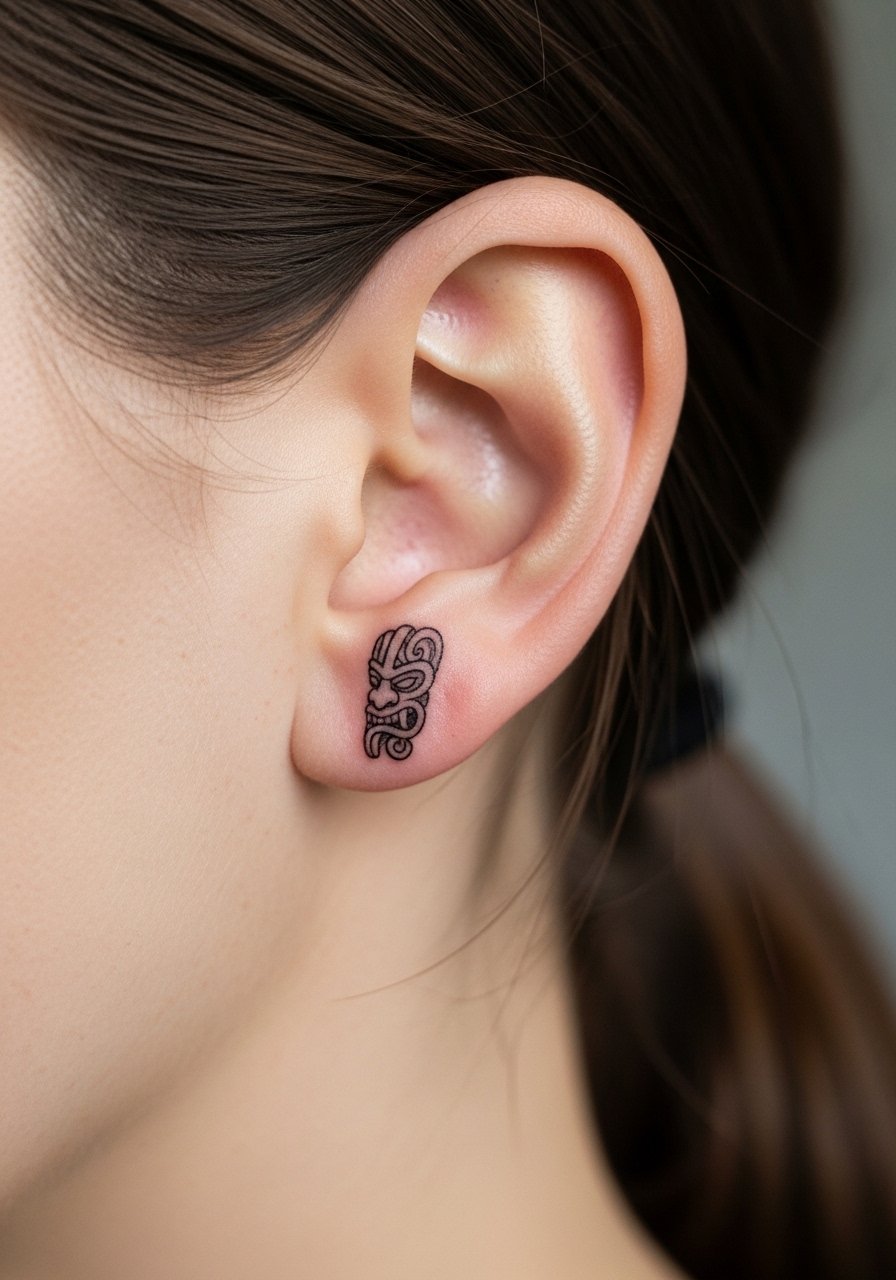
I kept sketching tiny koru patterns, then feeling uneasy when the conversation turned to what those shapes actually mean. The moment it clicked was at a shop in Wellington, when an artist quietly asked if my design respected lineage or was just decoration. Since then I have learned to pick small Maori-inspired marks that read clean, sit well with my life, and honor the culture that created them.
These nine picks are for someone who wants a discreet, respectful Maori-inspired tattoo that reads modern and calm. They are low-fuss, cost-conscious, and designed for coverability at work when needed. I tested variations across five shops I have visited and kept notes on what heals best, how long sessions run, and what aftercare actually matters. Your skin does most of its magic fixing between 10 PM and 2 AM. Pretty much everyone says dry skin is their biggest glow killer.
1. Single Koru Inner Wrist
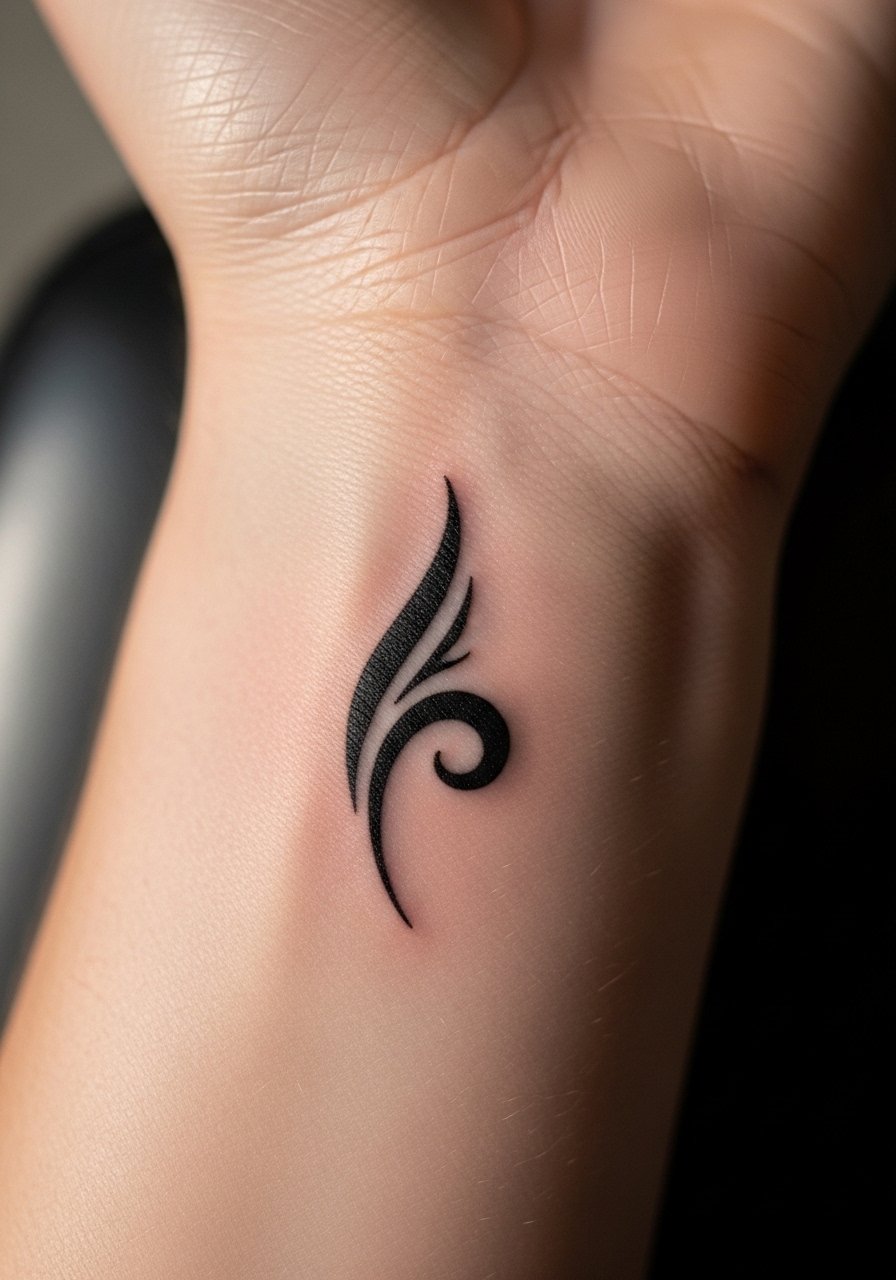
Style/Technique: Koru linework
Pain Level: 3/10
Session Time: 20 to 40 minutes
Best For: Wrist placement, first-timers, anyone wanting a coverable piece
A single koru drawn with a clean one-line curve reads like a quiet nod rather than a full sleeve. It works because the koru’s spiral contains movement in a tiny footprint, so it looks intentional and modern. This fits someone nervous about visibility or with desk work. Budget is low, session time short, and touch-ups are easy. Do a 24-hour patch test with any aftercare balm to check for reactions. After cleaning, pat dry and apply a thin layer of a fragrance-free healing balm like fragrance-free soap for gentle wash and petroleum-free-healing-ointment for moisture.
Mistake to Avoid: Rushing the stencil placement, which makes the tiny spiral sit off-center on the wrist.
2. Thin Forearm Band With Wave Accent
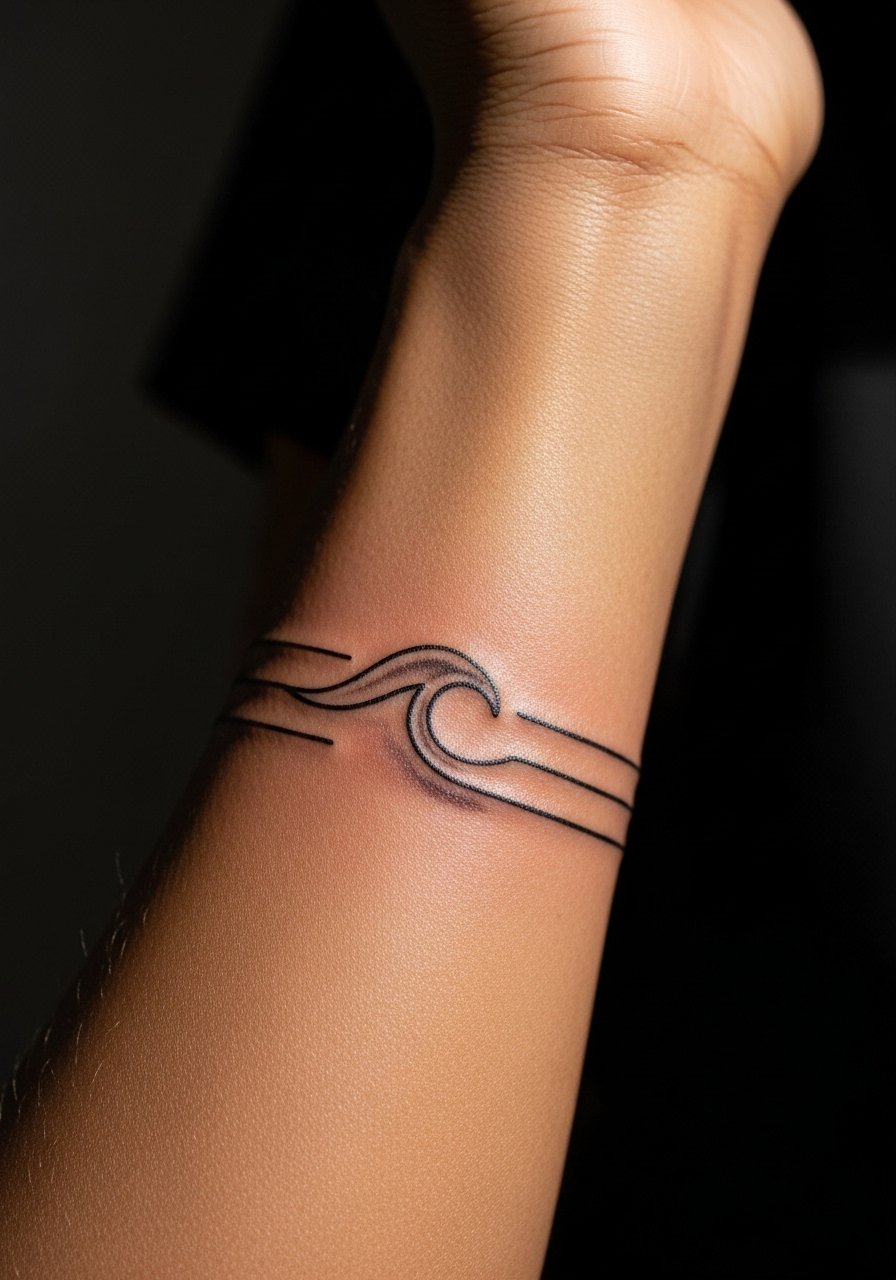
Style/Technique: Linear band with single-wave detail
Pain Level: 4/10
Session Time: 30 to 60 minutes
Best For: Forearm visibility, people who want a band that can be layered visually
A slim forearm band uses negative space and one small wave to suggest oceanic connection without heavy filling. It feels modern and tidy and complements both warm and cool undertones. Works for medium budgets and a single session. Clean the area thoroughly before your appointment to avoid pore-clogging, then follow the artist’s wash routine. A thin layer of a healing balm within three minutes of patting dry helps prevent excessive scabbing. Pair with a light anti-bacterial soap like antibacterial-gentle-soap and a breathable bandage while sleeping the first night.
Mistake to Avoid: Letting thick ointment puddle under the band, which blurs linework during healing.
3. Tiny Hei Matau Above the Collarbone
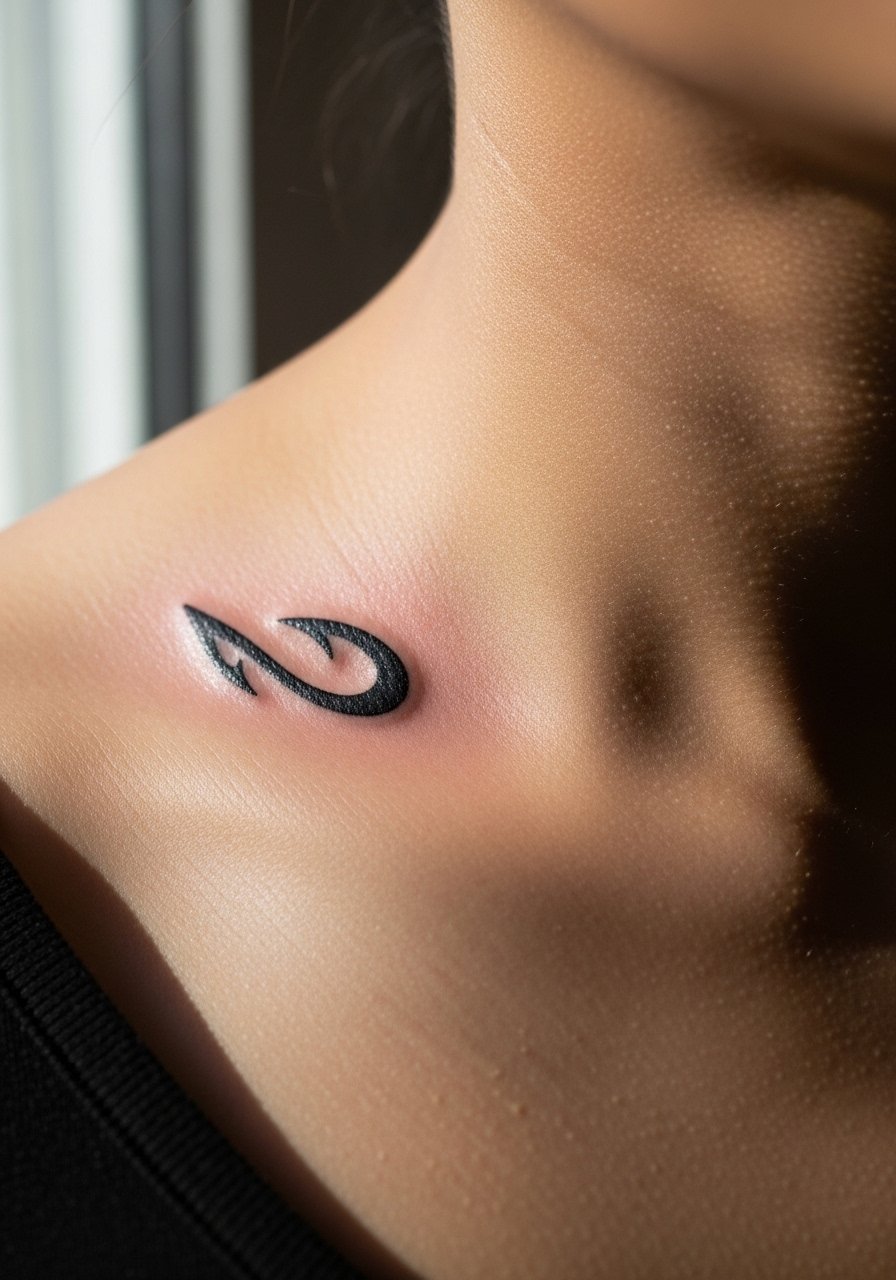
Style/Technique: Micro hei matau outline
Pain Level: 2/10
Session Time: 15 to 30 minutes
Best For: Collarbone placement, those wanting a hint of symbolism visible in low-cut tops
A tiny hei matau near the collarbone reads as jewelry in motion. It works visually because the hook shape follows natural contours, so it looks deliberate and elegant. This suits people who want meaningful, coverable art that still shows when dressed for evenings. Expect a short appointment and an easy at-home routine. Do a patch test if you plan to use a plant-based balm. Keep the area hydrated but not saturated, and sleep in a loose shirt to avoid rubbing. A silicone scar sheet can help finish crisp edges after weeks if needed.
Mistake to Avoid: Sleeping on the fresh tattoo which causes fabric drag and faded edges.
4. Micro Manaia Behind Ear
Style/Technique: Micro decorative manaia outline
Pain Level: 3/10
Session Time: 20 to 35 minutes
Best For: Behind-ear, coverable with hair, people who prefer symbolic accents
A behind-the-ear manaia is an intimate placement that reads like a charm. The small scale keeps it subtle while the shape references guardian motifs. It fits someone who wants cultural nods without a full traditional panel. Aftercare must account for hair oils and sweat. Wash gently and avoid heavy creams; a light, fragrance-free lotion applied within three minutes after washing keeps the skin supple. Consider probiotics and hydration to support skin repair internally, since gut support speeds recovery and reduces inflammation.
Mistake to Avoid: Using fragranced perfumes near the healing area, which irritate and increase scabbing.
5. Single Wave Ankle Loop
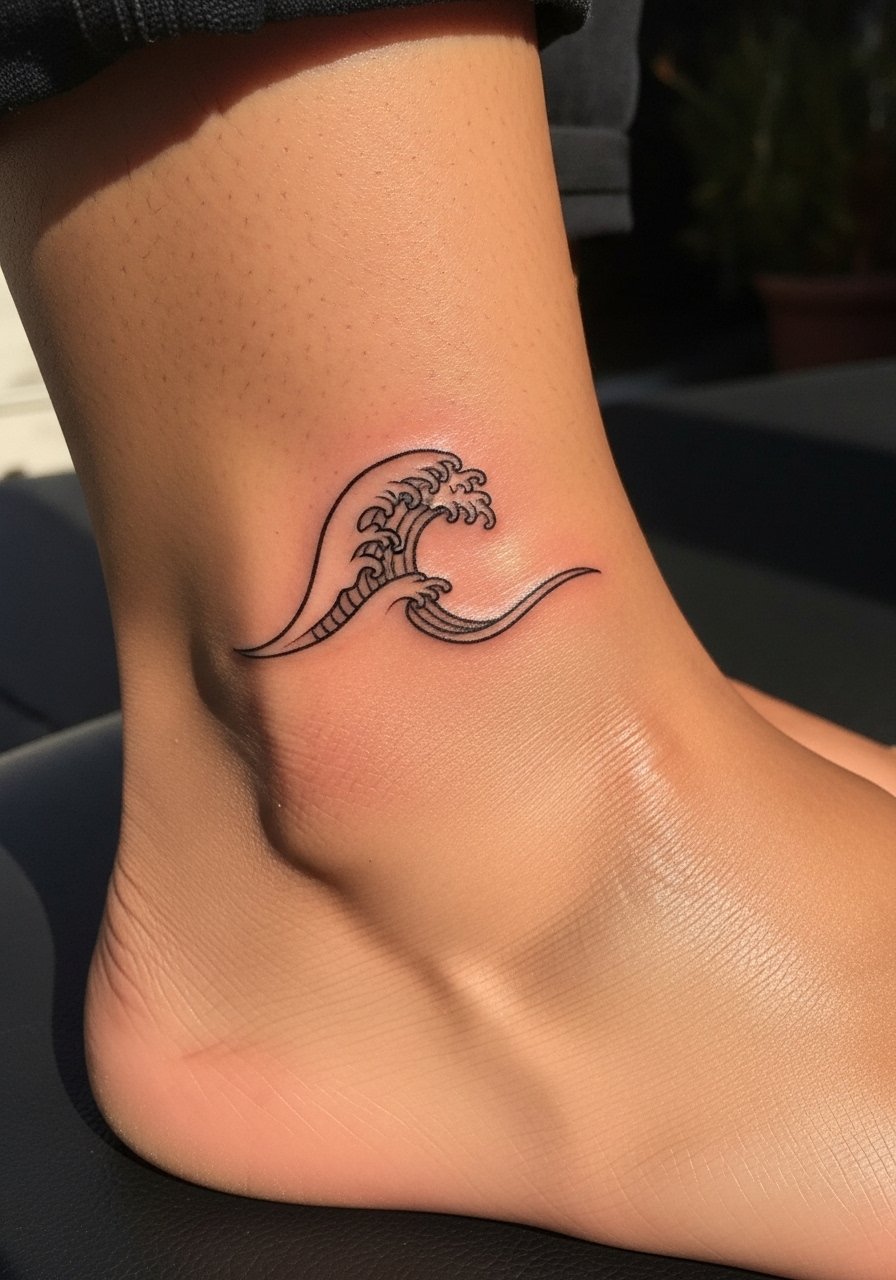
Style/Technique: Wave loop, single-line
Pain Level: 4/10
Session Time: 25 to 45 minutes
Best For: Ankle placement, active lifestyles, people who want something that pairs with jewelry
A single wave loop around the ankle reads like a whispered connection to the sea. It works because the line follows the ankle’s curve, creating motion that looks good with sandals. This is low budget and low commitment. Cleanse after activity to avoid trapped sweat. Apply a breathable dressing if you will be walking a lot the first two days. Remember the sleep repair window when planning heavy activity right after inking, since rest helps healing most between 10 PM and 2 AM.
Mistake to Avoid: Wearing tight socks that rub the fresh tattoo during the first week.
6. Minimal Finger Stitch Line
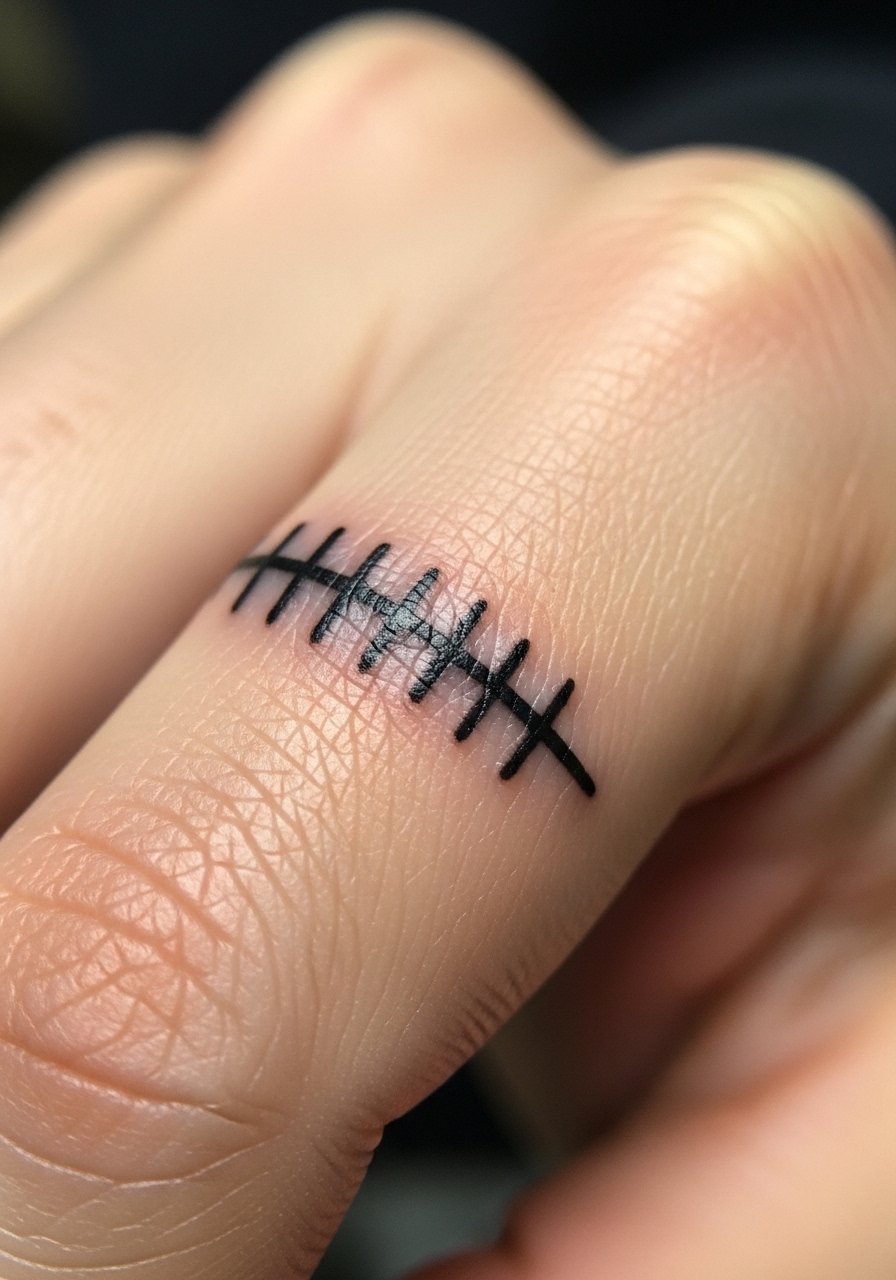
Style/Technique: Micro-stitch single line
Pain Level: 5/10
Session Time: 15 to 30 minutes
Best For: Finger placement, people who want a tiny visible token
A stitch line along the finger edge gives a handcrafted, subtle effect. It works visually because movement of the hand makes the line read lively. Finger tattoos need more care because that skin is thin and moves. Use a thin wash-and-dry routine then dab on a small amount of a healing balm. Expect fading and possible touch-ups. Avoid soaking hands in water for long stretches the first two weeks, and do a 24-hour patch test for new creams to avoid allergic pigment reactions.
Mistake to Avoid: Over-moisturizing the finger which causes the pigment to spread and blur.
7. Pebble Dot Maori Motif Near Rib
Style/Technique: Dotwork motif cluster
Pain Level: 6/10
Session Time: 40 to 70 minutes
Best For: Rib placement, people who want a private piece with texture
A cluster of small pebble dots forms a motif that feels organic and modern. It works because dotwork creates texture without heavy solid fills, so the design ages softly. This fits someone who wants a private piece that can peek out in swimwear. Rib tattoos need careful breath control during the session and patient healing. Keep the area clean and avoid tight waistbands. If you exfoliate before the appointment, stop two days prior to avoid irritated skin. Use a gentle fragrance-free soap and a thin layer of healing ointment as directed.
Mistake to Avoid: Scrubbing the area while dry, which breaks skin and delays healing.
If any of these designs have you ready to actually try one, here is a short list of the small kit I reach for when booking and caring for minimalist Maori-inspired work.
Tiny Tattoo Kit Essentials
Aftercare basics:
- fragrance-free soap (~$6) for first-week washes.
- petroleum-free-healing-ointment (~$12) for moisture that avoids pore-clogging.
Protection & tools:
- breathable-tattoo-bandage (~$10) for overnight protection.
- silicone-scar-sheet (~$20) for smoothing edges after initial healing.
Prep & hygiene:
- green-soap-replacement (~$8) if your shop recommends it.
- alcohol-free-saline-spray (~$9) for gentle cleaning on the go.
8. Tiny Tiki Sternum Accent
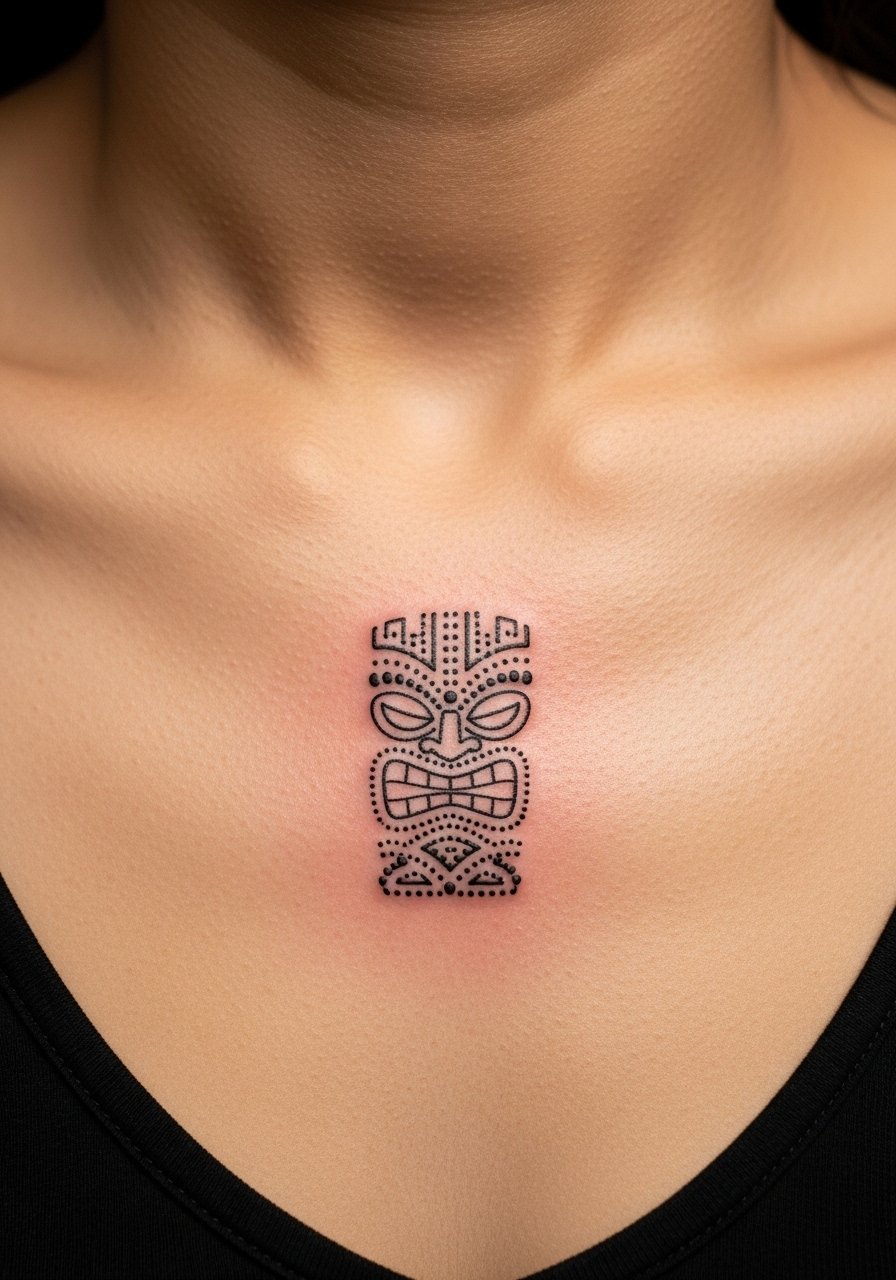
Style/Technique: Micro tiki motif with open negative space
Pain Level: 5/10
Session Time: 30 to 50 minutes
Best For: Sternum or chest, people wanting discreet symbolic marks
A minimalist tiki at the sternum reads like an amulet without heavy blackwork. It works because the negative space keeps it light and lets clothing choices change visibility. This suits those who want an intimate piece that does not demand large time or budget. Expect tenderness; chest skin moves with breathing so healing benefits from rest and low friction clothing. Patch test any topical to avoid allergic flare. If you plan nightly creams, apply within three minutes after gentle washing to thread hydration into the epidermis.
Mistake to Avoid: Applying too much ointment which traps sweat and invites infection.
9. Narrow Rib Line With Subtle Spiral
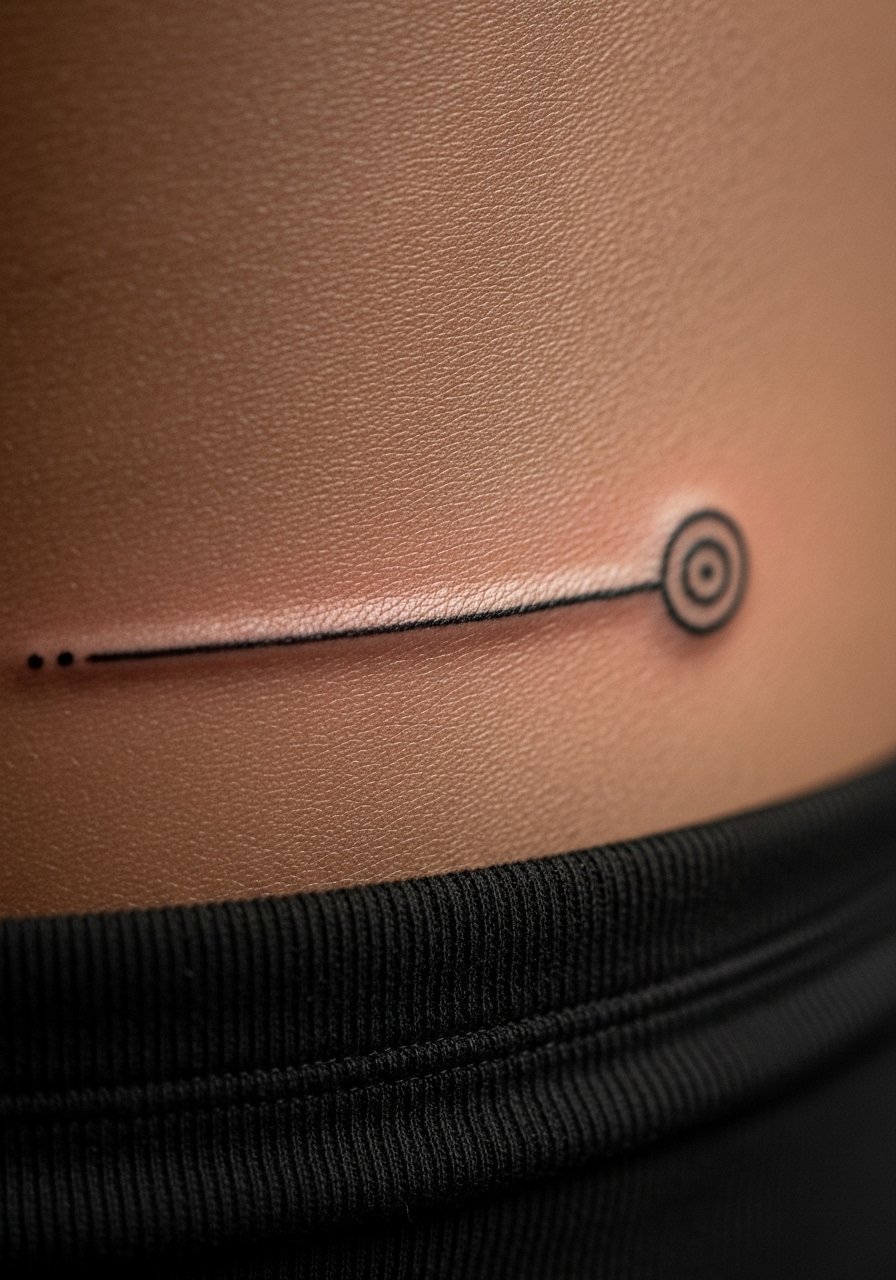
Style/Technique: Narrow contour line with spiral terminus
Pain Level: 6/10
Session Time: 45 to 75 minutes
Best For: Side rib placement, people who like elongating shapes that read personal
A narrow rib line ending in a subtle spiral creates movement along the body. It looks intentional and modern, and fits those who want something sculptural and private. Healing can be finicky on the ribs; plan sessions when you can rest and avoid tight bras. Hydration stacking helps here, drink water and use a small amount of hyaluronic serum topically if cleared by your artist. Probiotics can help reduce inflammatory flare during healing and support skin recovery from the inside out.
Mistake to Avoid: Scheduling intense cardio the day after inking and risking sweat-induced irritation.
Small Ink Habits That Matter
Keep a 24-hour patch routine. Apply a pea-sized amount of any new balm to your inner forearm and wait 24 hours. Then try the product on a fresh tattoo only if there is no reaction. I use petroleum-free-healing-ointment for patch testing.
Wear loose clothing while sleeping. Tight fabrics tug and smear fresh lines. Pick breathable cotton shirts you do not mind staining, like plain-cotton-tee.
Plan sessions around rest. Your skin does most of its magic fixing between 10 PM and 2 AM, so prioritize sleep after a session to give pigment the best chance to settle.
Rotate gentle cleaning and short moisturize windows. Cleanse with a mild soap, pat to dampness, then apply a thin film of balm within three minutes for balanced hydration.
Space touch-ups intentionally. Expect fingers and ankles to need a second pass. Wait until the skin is fully healed before booking, not before four weeks.
