
I had three drawers full of lids, a counter that collected mail, and a pantry shelf that rebelled every time I opened the door. For two weeks I ignored it because it felt like a weekend project I did not have. Then I stopped pretending I needed more storage and started moving things into deliberate homes instead. It changed the kitchen faster than I expected.
Short context: This guide walks a practical route you can do in a few afternoons with mostly inexpensive gear. I cover basic zones, storage ratios, drawer fixes, and a simple weekly reset that keeps the system working. I learned this after trying it in three rentals and restyling the layout four times, so these are the steps that stuck.
What You'll Need
Containers & Organizers
- Clear stackable food storage set (~$25-60)
- Adjustable bamboo drawer dividers (~$15-30)
- Under-shelf risers (~$12-25)
- 2-tier lazy susan turntable (~$20-40)
Labels & Accessories
- Portable label maker (~$15-40)
- Waterproof kitchen labels (~$8-15)
Under-sink & Misc
- Tension rod for under-sink (~$8-18)
- Collapsible silicone bins (~$10-25)
Step 1: Empty, Sort, and Touch Everything
Pull everything off the shelf. Yes, everything. Laying items out makes decisions real. I work in three piles: keep in kitchen, relocate, toss/donate. For cooking surfaces I keep just 2 to 3 frequently used tools within arm reach. Use a clear container set to group like items so you can see the weight and texture of what remains. I timed this once and it took me 45 minutes for a medium pantry, which felt long at first and then paid back every morning.
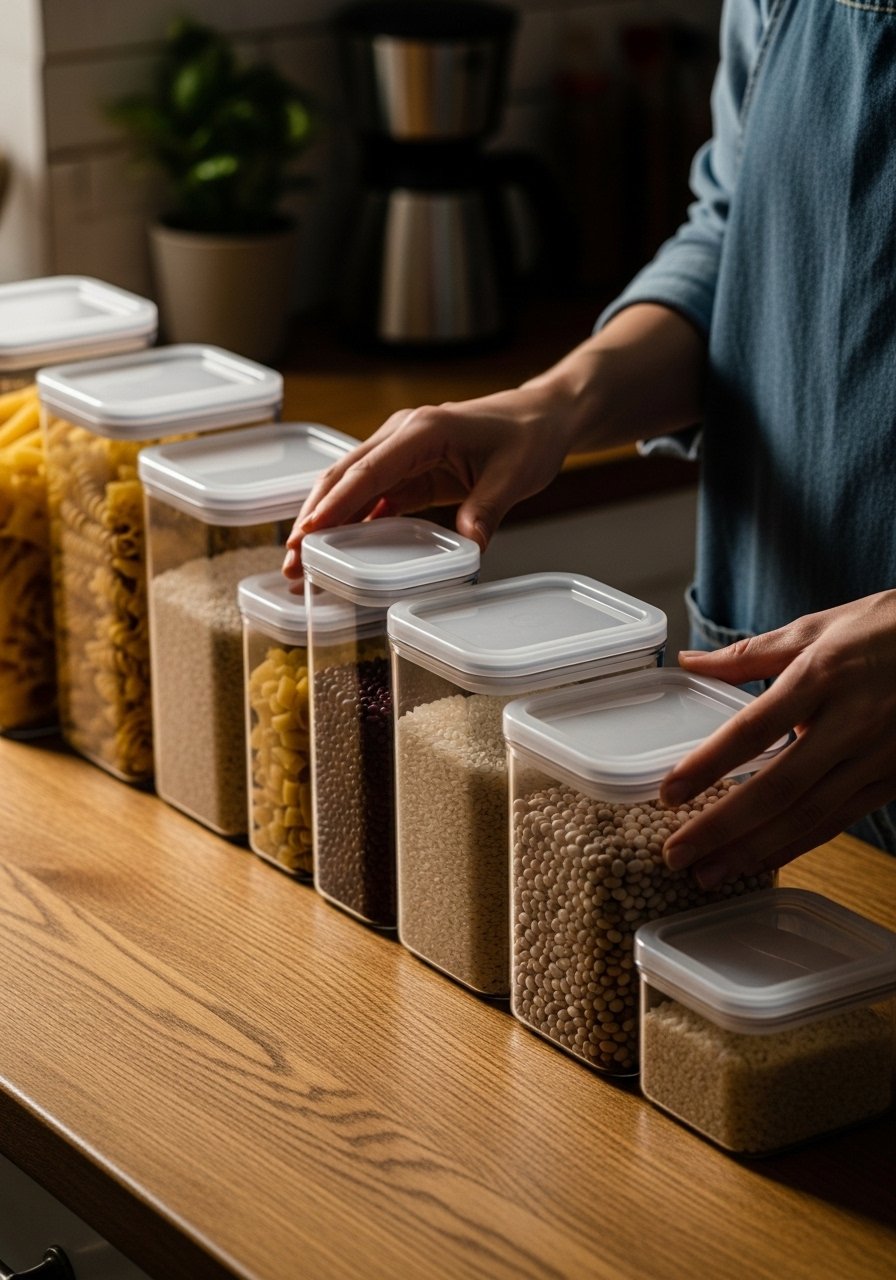
I used a clear stackable food storage set to corral packets and a collapsible silicone bin for overflow. The principle here is store-by-frequency, which means things you reach for daily sit at eye level or lower.
Mistake to Avoid: Throwing items back into place without sorting creates the exact same clutter you started with.
Step 2: Create Zones by Activity, Not by Item
Most people start by grouping all baking or all snacks together. I found it works better to zone by task: prep zone, baking zone, coffee zone, kid-snack zone. That way bowls, spatulas, and baking sheets that get used together live together. Allocate one shelf per zone or use a riser to double vertical space in each zone, aiming for about a 2:1 shallow-to-deep shelf ratio so small items do not get lost behind tall jars.
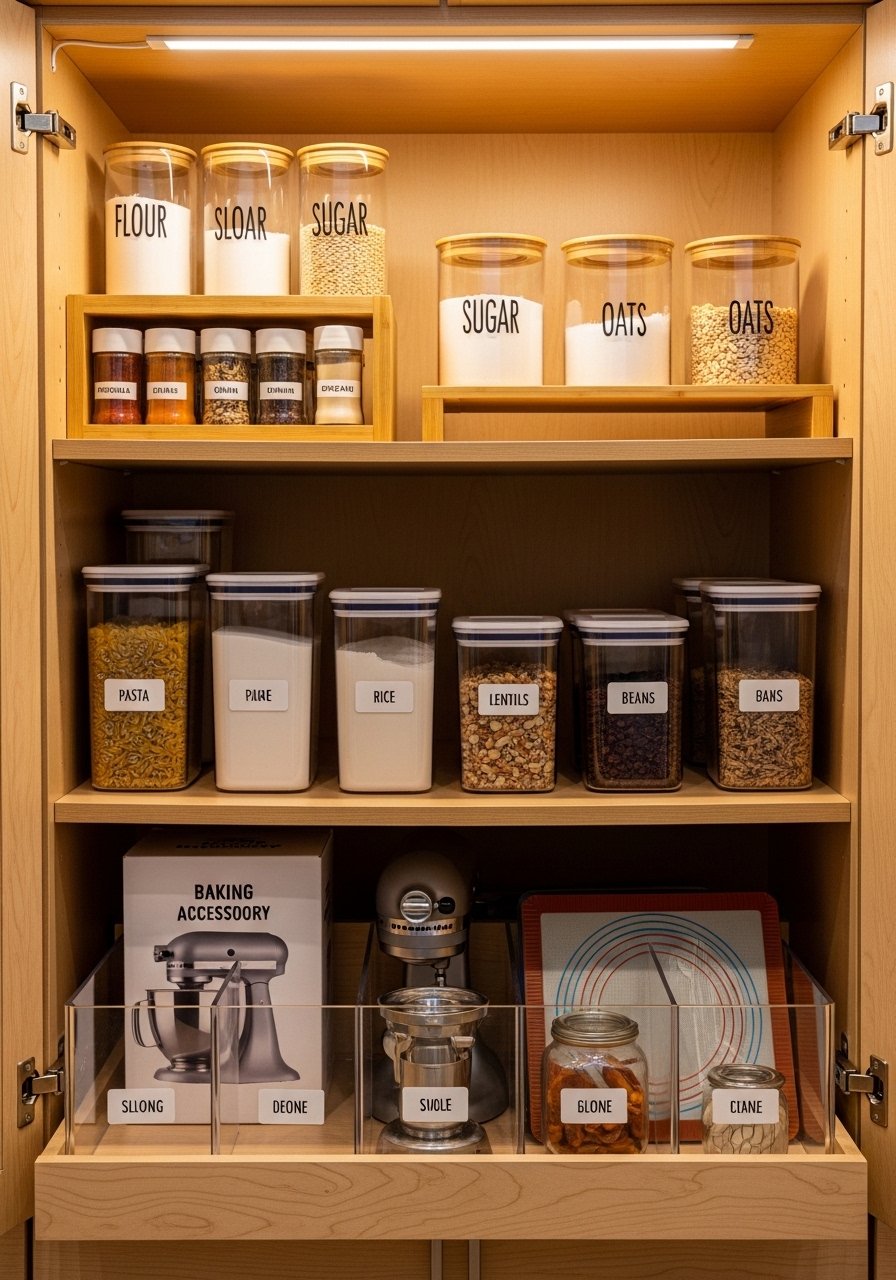
Place daily prep tools in the lowest cabinet near the counter. For the coffee station I used a 2-tier lazy susan turntable to keep syrups and filters accessible. I almost skipped zoning because it felt fussy, but after a week I noticed making dinner was smoother.
Mistake to Avoid: Treating the pantry like a pile rather than a set of stations makes cooking take longer and feel messier.
Step 3: Tame Drawers with Dividers and Angles
Open drawers and feel the mess. Drawers are tactile chaos by design unless you add structure. I split utensils from gadgets and keep items that sit flat toward the front. Use adjustable bamboo dividers to create shallow compartments about 3 to 4 inches wide for utensils and 1.5 to 2 inch gaps for flat tools. Add a small tray for stray miscellaneous things and empty it weekly.
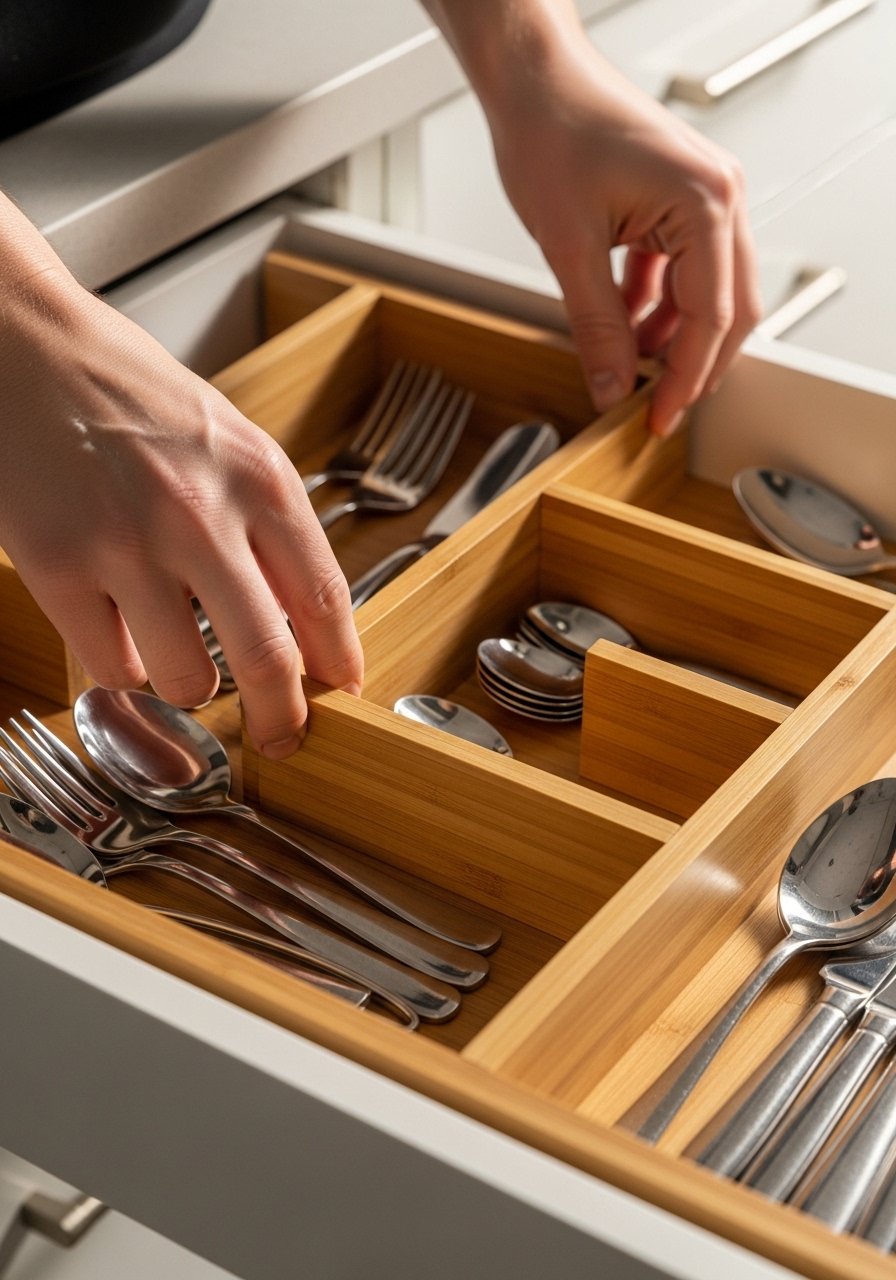
I used adjustable bamboo drawer dividers and a slim portable label maker to label the underside of the drawer fronts. Honestly this step frustrated me at first because I wanted symmetry, but function beats symmetry in drawers.
Mistake to Avoid: Leaving a drawer as a "catch-all" means you recreate junk every time you pull something out.
Step 4: Use Vertical Space and Under-Shelf Hacks
Look up. Shelves often waste two or four inches of vertical space. Under-shelf risers buy you a second layer for plates or snack boxes. For cabinet doors, mount small hooks or slim racks for lids or measuring spoons. I added a tension rod under the sink to hang spray bottles by their nozzles. The sound of the cabinet closing with everything organized felt oddly satisfying, a soft click instead of a thunk.
I installed under-shelf risers and a tension rod for sprays. After trying this in three rentals I learned to measure twice, install once. A quick rule: leave at least 1.5 inches clearance so lids and hands have room.
Mistake to Avoid: Over-stuffing the new vertical layers removes the benefit and makes grabbing things awkward.
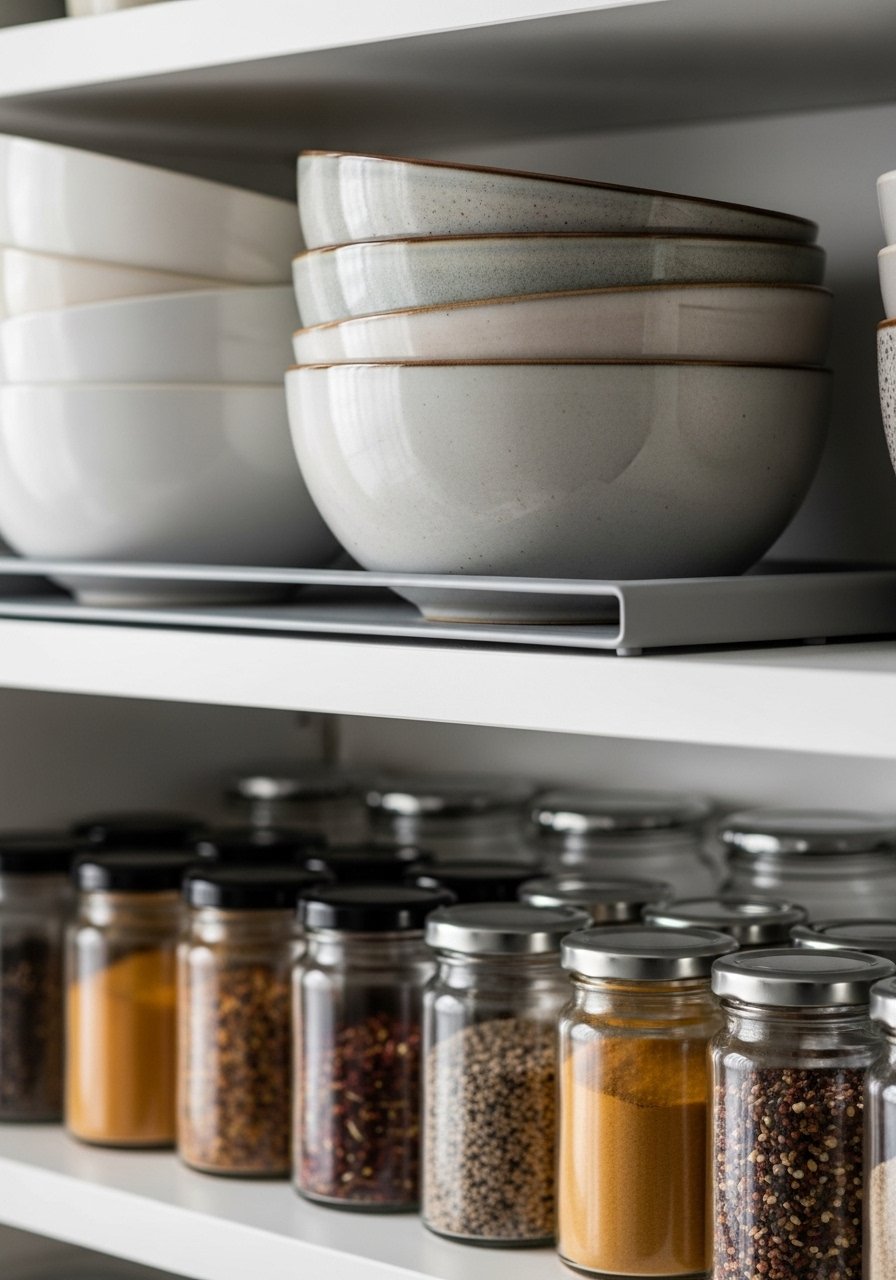
Step 5: Corral the Pantry with Clear Containers and Labels
Swap mismatched boxes for clear containers so you can see quantity at a glance. I use uniform jars for grains and stackable containers for snacks. Label everything with durable waterproof labels and use the same wording style so your eye reads the shelf quickly. A working ratio I use is one measuring scoop per large container and one small jar for daily use. The visual win is immediate — the pantry looks lighter because the textures are consistent.

I used the clear stackable food storage set again and labeled with waterproof kitchen labels. My first attempt was bad. The second was barely better. The third one clicked and has stayed tidy.
Mistake to Avoid: Leaving products in their original boxes creates visual noise and hides how much you actually have.
Step 6: Set a 10-Minute Weekly Reset Routine
A 10-minute habit keeps order without the dread. I pick one consistent day, open one cabinet, wipe a shelf, rotate anything expiring, and return stray items to their homes. This weekly nudge prevents the slow creep back to chaos. Most people end up spending between $500 and $800 when they finally commit to refreshing a room. The weekly reset saves that impulse because you rarely need a full redo.

I put a small collapsible bin near the door for donation items so clearing takes seconds. I have restyled this room four times and this short maintenance habit is the step that prevents repeat overhauls.
Mistake to Avoid: Thinking organizing is a one-off project leads to the same mess returning in weeks.
Kitchen Organization Tips
Keep a small daily drawer: Make a tiny designated drawer for frequently grabbed items like scissors and tape. Use adjustable bamboo drawer dividers to avoid it becoming a junk drawer.
Rotate by visibility: Store bulk backup items on the top shelf and seasonal cookware in labeled boxes. A clear container set helps you spot what is nearly empty.
Leave intentional empty space: Don’t fill every shelf. A little breathing room makes the whole cabinet look organized and reduces visual clutter.
Buy one uniform container size: Pick two sizes of clear containers and stick to them. Uniformity reduces the mental load when you put things away.
Use door real estate: Slim racks or adhesive hooks on pantry doors are perfect for wraps, cutting boards, or lids. They feel light but add serious storage.
Corral small appliances: Keep the heaviest or bulkier appliance in a lower cabinet. Put reading-heavy items like manuals in a labeled folder so you do not stack paper on counters.
Label the bottoms of shelves: If you share kitchen duties, a small label on the underside of a shelf makes it obvious where things belong when someone else tidies.
Make It Yours
This system works because it follows the store-by-frequency principle and values small, repeatable actions over big one-day fixes. Start with one drawer or one shelf so you get a quick win. The tactile satisfaction of lids clicking into place and the lighter sound of cabinet doors closing are what keep this lasting. Pick one tiny habit to keep it up and the kitchen will stay easier to use and calmer to be in.
