
I almost did not try the fishtail because it looked fiddly in videos. I gave it a shot on a Tuesday night when I did not want to think. My first braid was tight and sad. The third one finally clicked. After washing and restyling about fifteen times, I learned a few shortcuts that save time and make the braid look relaxed, not forced.
I wrote this for hair that wants texture, not sculpted perfection. If your hair is straight, wavy, curly, or coily, the method adapts with small changes. Expect 10 to 20 minutes the first few tries, less once you get the rhythm. This approach works on second-day hair best. I am still not sure this is the best way, but it has worked every time for me.
What You'll Need
Styling Products:
- Texturizing spray (~$8-18)
- Light-hold hairspray (~$6-15)
Tools:
- Tail comb (~$5-12)
- Small clear elastics (~$4-10)
- Sectioning clips (~$6-14)
Treatments & Prep:
- Smoothing serum (~$8-25)
Step 1: Prep for grip and movement

Start with hair about 30 to 60 percent dry. If it is slick from product, the fishtail will slip apart. I spray texturizing mist from mid-lengths to ends, tousle with fingers, and let it sit for a minute. That coarse, slightly tacky feel is what holds the tiny crosses. For fine hair I add one pump of smoothing serum at the ends only to avoid frizz. Across four hair textures I have styled, this combo gives the braid enough bite without looking crunchy.
Mistake to Avoid: Skipping the texturizing step makes the braid slip apart within an hour.
Step 2: Section and anchor the braid
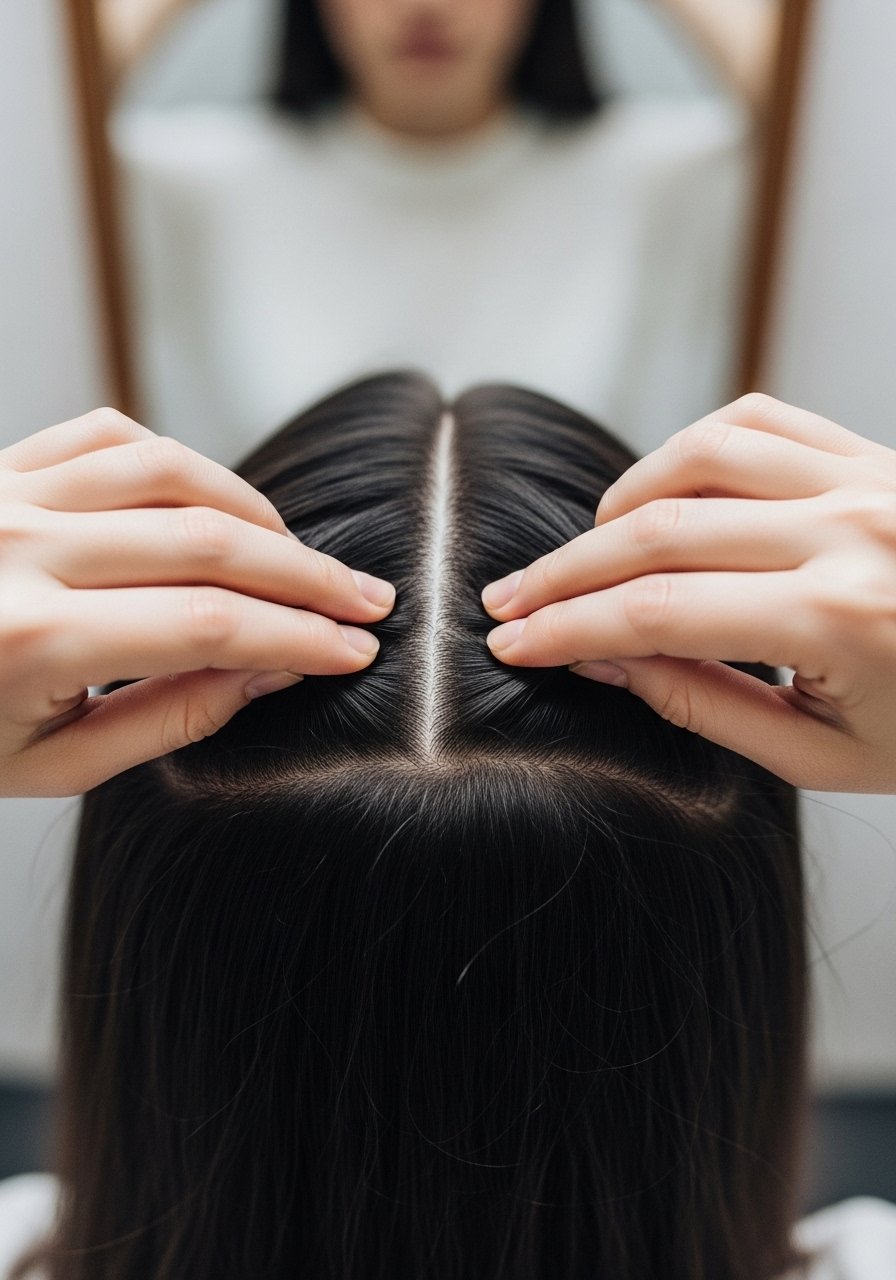
You want two even handfuls, not three. Hold them like book pages. I clip the left section to the opposite shoulder for a second while I tidy flyaways with a tail comb. This is the moment to remove tangles and decide how much hair will be in the braid, because that determines its final weight. If you prefer a looser look, split each main section into slightly smaller pieces. The principle is even tension: keep each cross consistent or the braid will look lopsided.
Mistake to Avoid: Starting with uneven sections produces a lop-sided braid that refuses to sit flat.
Step 3: The basic fishtail pass
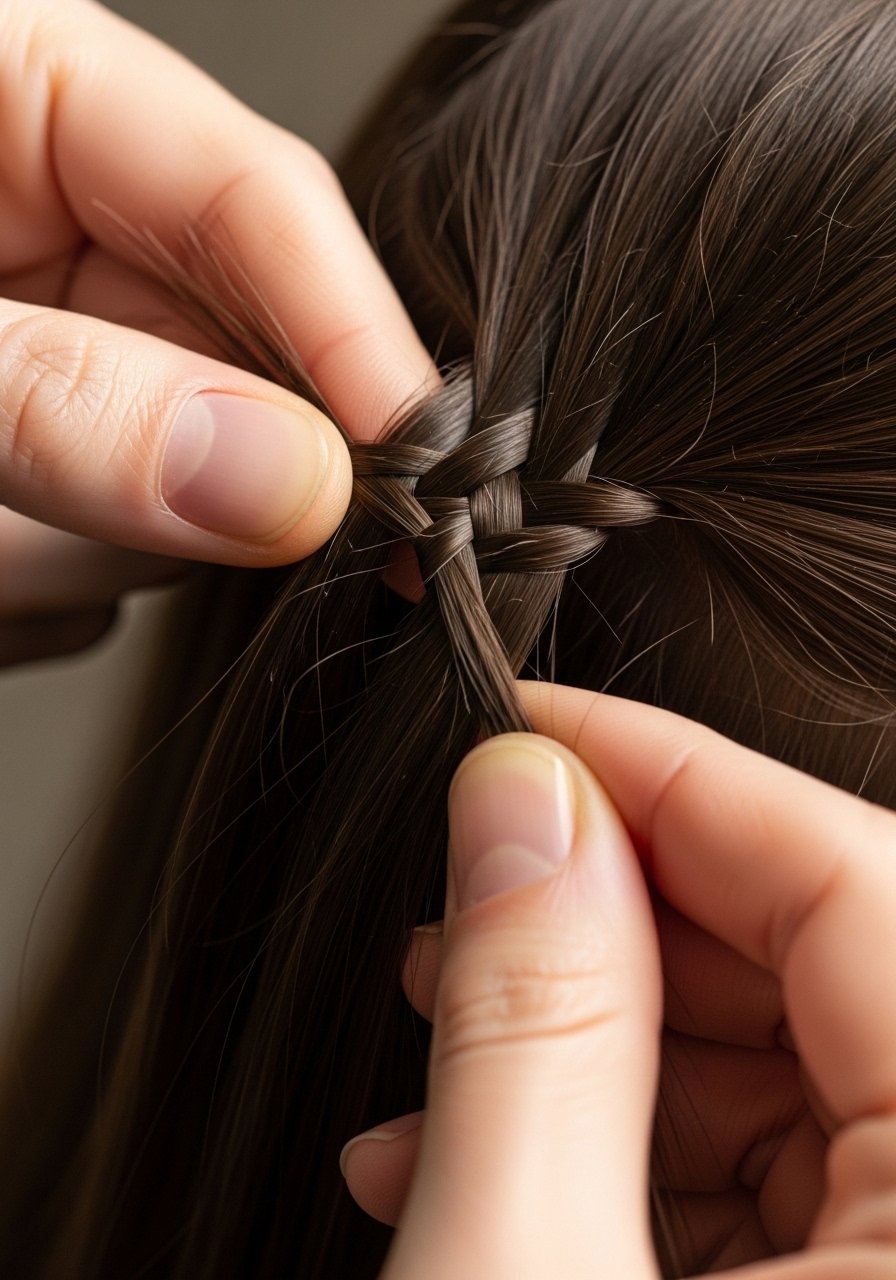
Take a 1/4-inch strand from the outer right of the right section, cross it over to join the left section. Repeat on the opposite side. Small, consistent picks create the signature fishtail texture. I count one, two, breathe. If you take big chunks, you get a chunky look. If you take tiny bits, you get a delicate rope. For practice I do five clean passes, then stop and tug slightly to see how the tension feels. The faint snap of the elastic at the end is oddly satisfying.
Mistake to Avoid: Using large chunks turns the fishtail into a loose rope instead of a defined braid.
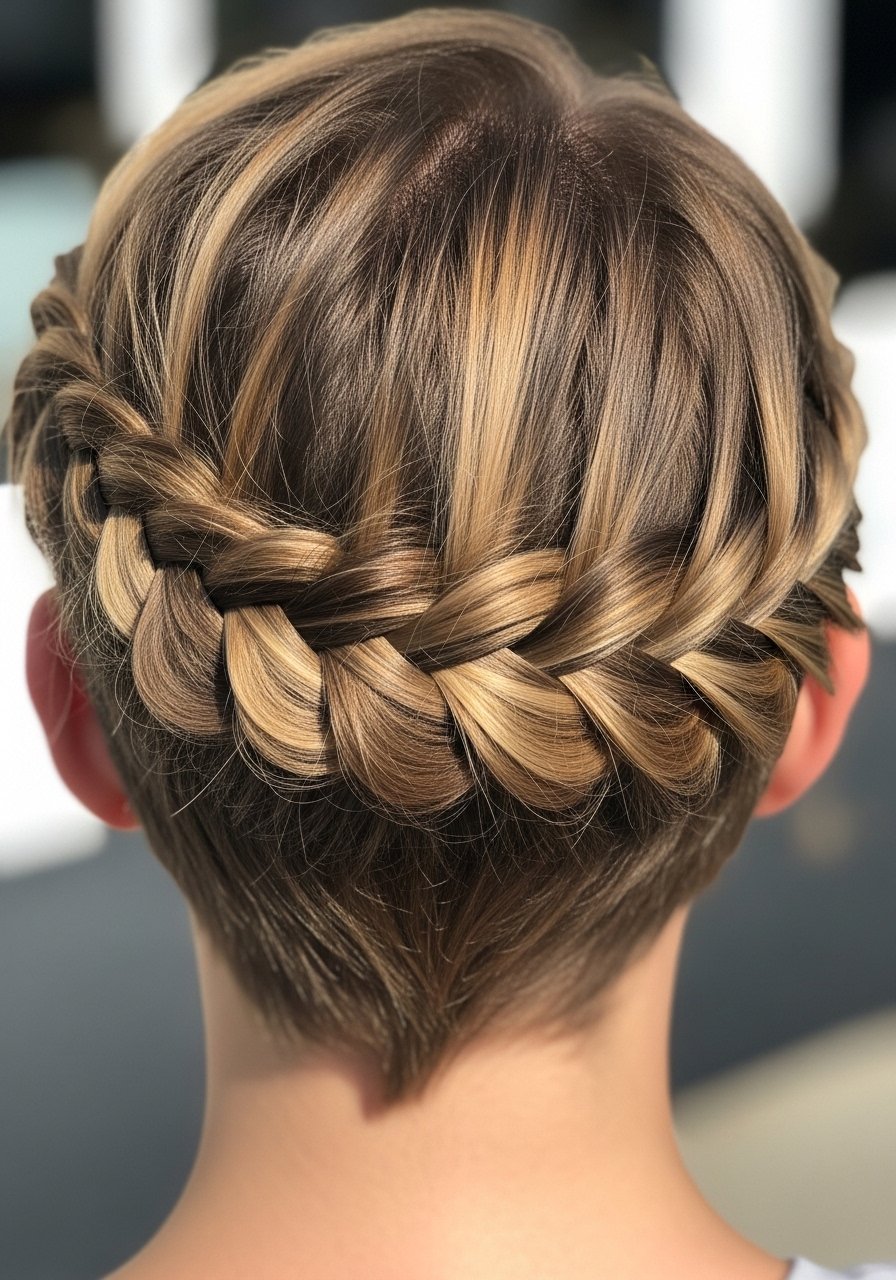
Step 4: Make it look undone and full

Once you reach about three inches from the end, secure it with one small clear elastic. Now the fun part, gently pull the outer edges of each "row" to pancake and widen the braid. Work from top to bottom, pulling light. The trick is to keep even pressure so the top does not balloon while the bottom stays tight. I usually pull each side twice and step back. That openness is what makes photos and real life both look good. For extra hold mist with light-hold hairspray.
Mistake to Avoid: Pancaking only the bottom makes the braid look top-heavy and sloppy.
Step 5: Secure, finish, and hide the elastic

Take a 1-inch piece of hair from under the braid, wrap it around the elastic twice, and pin the tail under the braid with a bobby pin. The wrap disguises the elastic and gives a seamless finish. If you want movement, tug two small face-framing pieces loose. I sometimes mist the ends with serum to tame fuzz, then a light spray to set. The weight of the finished braid should feel balanced. If it feels heavy at the tip, you used too much hair in the base.
Mistake to Avoid: Leaving the elastic exposed makes the braid look unfinished and schoolyard.
Step 6: Adapt for layers and hold
Layers can poke out. Instead of wrestling them, tuck short pieces into the braid as you go or let them frame the face for a lived-in look. For very fine hair, add a single row of small clear elastics every 4 to 5 inches to anchor slips. If heat is part of your routine, use a low setting and roughen the hair slightly with a curling iron before braiding. There is a heat-free option: sleep with three loose braids the night before to add grip without tools.
Mistake to Avoid: Forcing long layers into the braid creates bumps that show in photos and real life.
Hair Styling Tips
Tight versus loose: If you want a polished look, keep picks to 1/4-inch strands and braid tightly. For casual, double the strand size and pancake more.
Two-day hair hack: Spray dry shampoo at the roots and lightly tease the crown before sectioning for instant volume with minimal product. Try dry shampoo.
Fine hair anchor: Use one small clear elastic 4 inches down to prevent the braid from sliding loose mid-day. Find clear elastics.
Texture boost: A light mist of texturizing spray after braiding keeps the shape without stiffness.
Quick undo: If you hate the result, tug the wrap, pull the elastic, and shake it out. Rework on slightly damp hair for better control.
Layer-friendly tweak: For heavy layers, start the braid slightly lower at the nape so short hairs can be tucked in naturally.
Travel version: Braid loosely, roll into a low bun, and sleep. In the morning you get soft waves and a ready-to-wear braid in minutes.
Own That Braid
You will get better with three tries. I know, because my first attempt was rough and the third one finally looked like the photos. The key is even tension and small strand size at first, then pancake for personality. Final tip, practice on second-day hair when it has natural grip. Wear it to a coffee run or a meeting and notice how much easier it feels than you expected. Keep braiding and you will find your version.
