
I almost did not bother planning an outfit at all. Then I wore last year’s thing and felt like my clothes were reading someone else’s mood. I spent an afternoon reworking what I owned and the result surprised me: small changes in shape and scale made the whole look relaxed and intentional. If you are juggling kids, brunch reservations, or a walk in the park, this approach keeps you comfortable and put together.
This guide covers casual-brunch through nicer restaurant looks, with pieces that mix and match across budgets. Think breathable fabrics for spring, a 60:30:10 color ratio to keep things balanced, and one focal accessory that reads in photos. I tweaked these combos after rotating an outfit for a full season and found the small edits that actually matter. Ideal if you want something timeless but not fussy.
What You'll Need
Clothing Basics:
- Linen midi dress (~$40-120)
- High-waist straight jeans (~$30-90)
Layering Pieces:
- Lightweight cardigan (~$25-70)
- Cropped blazer (~$40-150)
Accessories:
- Delicate pendant necklace (~$15-60)
- Waist belt (~$12-45)
- Straw tote bag (~$20-80)
- Block-heel sandals (~$30-110)
Step 1: Start with the silhouette you actually want to wear
Pull the items you feel physically comfortable in, not the ones you think you should wear. I begin by standing in front of the mirror and trying on two base options: a linen midi dress or high-waist straight jeans with a tucked blouse. The skirt hem should hit between mid-knee and mid-calf for most proportions. Use the 60:30:10 color ratio: 60 percent base, 30 percent secondary layer, 10 percent accent. That keeps the outfit readable in photos and in person. After rotating this outfit for a full season I trust the silhouette check first. Pair the linen dress with a lightweight cardigan for cooler mornings.

Mistake to Avoid: Skipping the silhouette check leads to outfits that look forced instead of lived-in.
Step 2: Pick one focal accessory and build around it
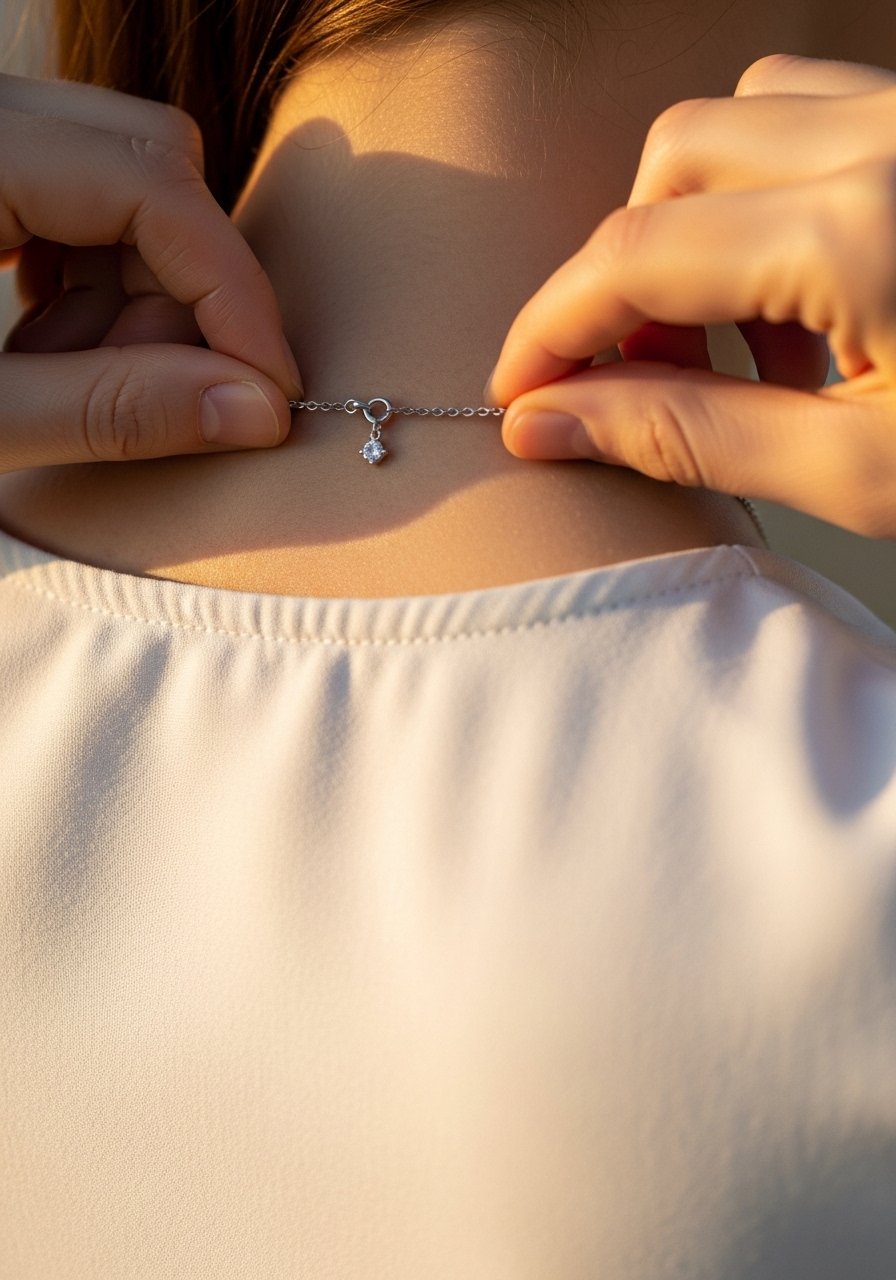
Most people pick everything at once and end up with clutter. I pick one thing that should pop, usually a pendant or belt. If you choose a necklace, aim for a drop that sits about 3 to 4 inches below the collarbone so it reads against most necklines. A waist belt is another focal move: cinch at your natural waist for dresses or at the top of the jeans for structure. This creates a single point the eye rests on, which makes photos look intentional. I use a delicate pendant on days I want soft polish and a braided belt when I want the outfit to read a little more tailored. Try a delicate pendant necklace or a waist belt.
Mistake to Avoid: Choosing two competing focal accessories makes the outfit feel confused and heavy.
Step 3: Layer with purpose, not just for warmth
This is where it starts to actually look styled instead of random. Add one structured layer and one soft layer only. For example, a cropped blazer over a linen dress keeps proportions clean. If the blazer is structured, let the under layer be fluid. Pay attention to fabric weight: linen feels cool and slightly nubby, while a cotton-blend cardigan will drape softer. Use proportion as your principle and avoid adding another long layer that extends the same length as the base. For petites, crop the blazer a touch higher so the hem hits just above the waist. I almost skipped tailoring this bit once and the outfit flattened out.
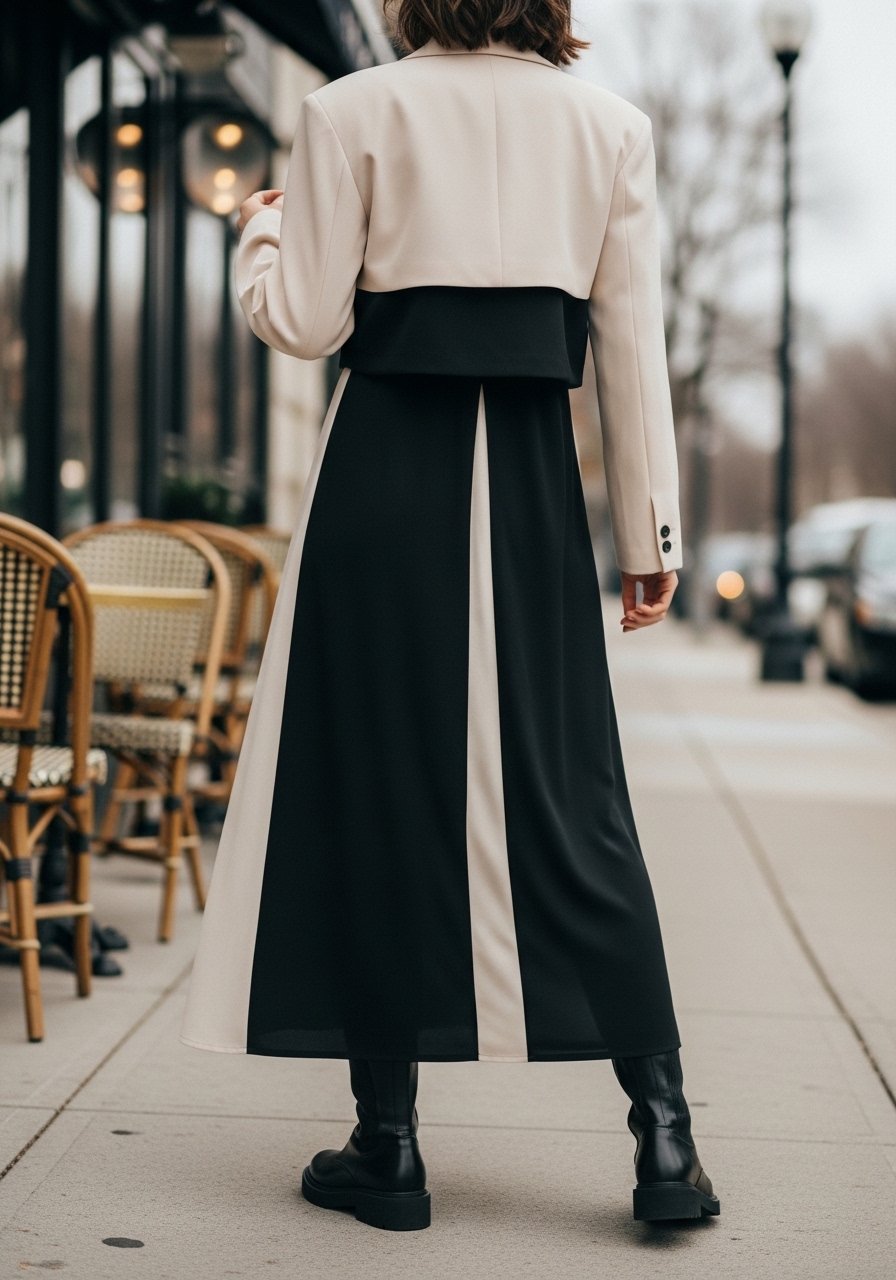
Mistake to Avoid: Layering two long pieces that sit the same length makes you look visually shortened.
Step 4: Choose shoes that match the day and hold up to walking
This part feels wrong while you are doing it, because you want pretty shoes. Pick comfort first then scale. Block heels around 1.5 to 2 inches are often ideal: they give lift without collapsing by the fourth step with kids. For a park walk pick sturdy flats or loafers. The shoe should visually anchor the outfit, so if your top is voluminous pick a sleeker shoe. I broke in a pair by wearing them around the house for 10 to 15 minutes the day before and that made a world of difference. A pair of block-heel sandals is my go-to when I want a bit of polish.
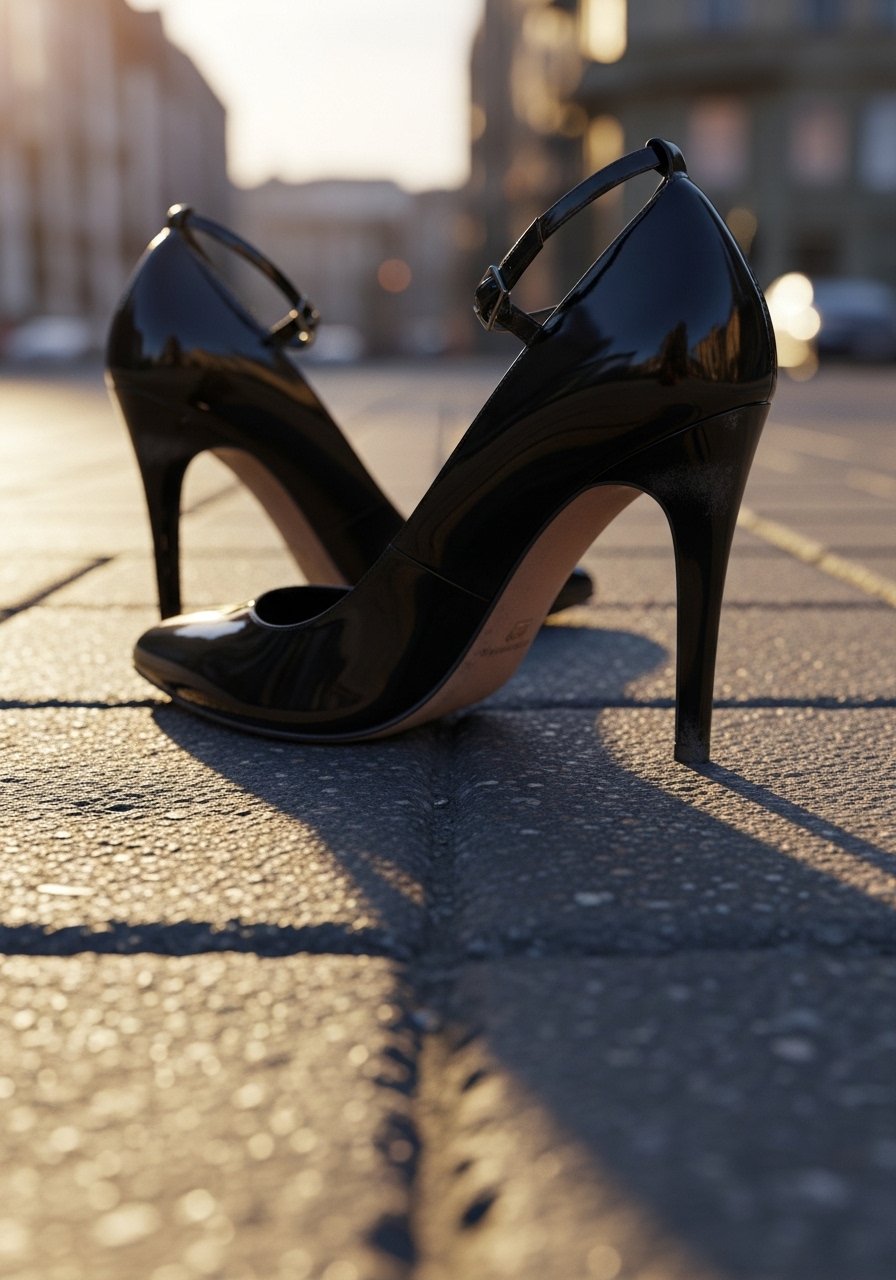
Mistake to Avoid: Picking height over stability leads to sore feet and ruined plans by midday.
Step 5: Add final touches that read well in photos and feel comfortable all day
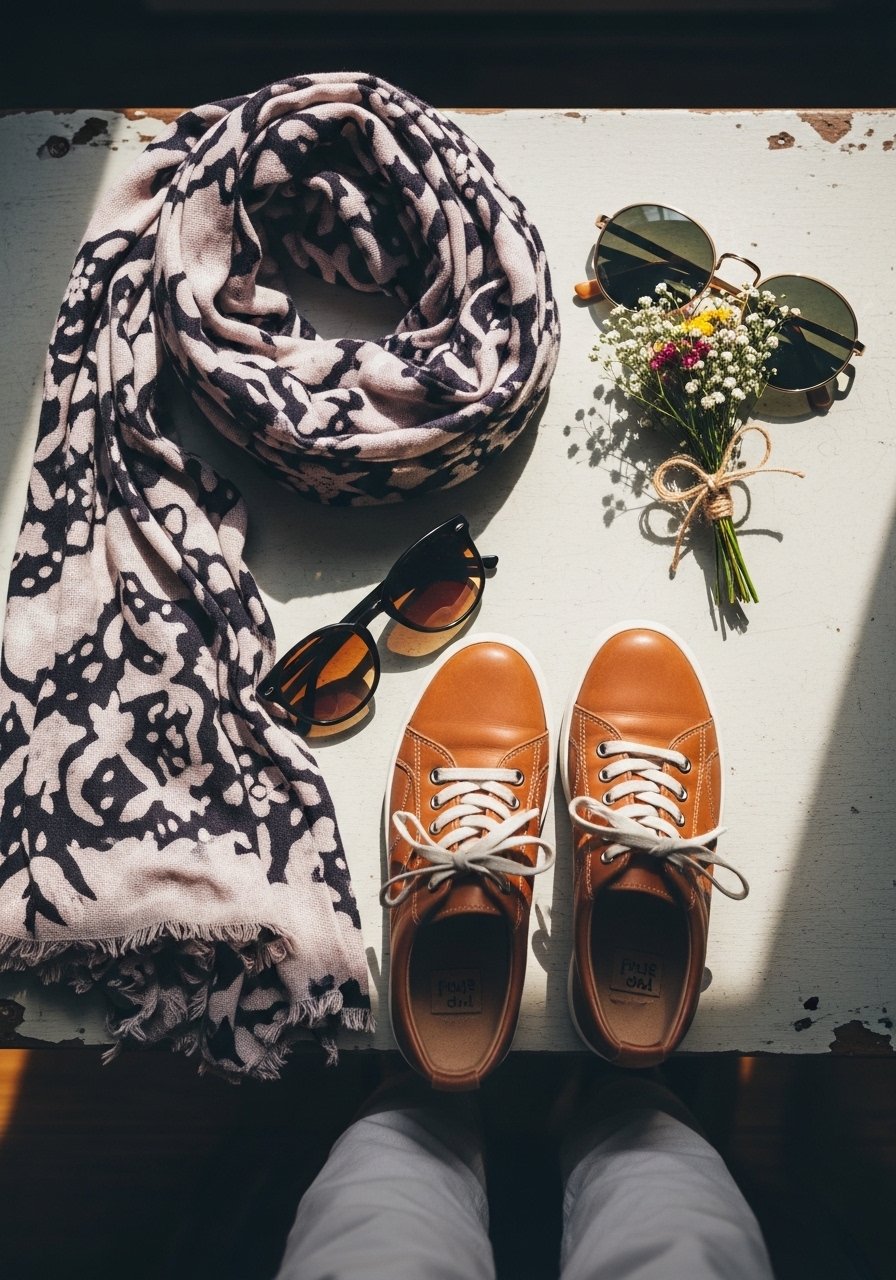
The visual result should be a small set of deliberate choices: one accessory, one layer, one shoe. Add a straw tote or a neat crossbody for size and texture. Texture is sensory: the straw will feel slightly rough and light, leather will feel heavier and sit differently. If you plan to take photos, tuck a soft scarf into the tote for a casual pop. I almost skipped the tote once and missed a convenient place for a water bottle and wipes. For budget swaps, thrift a blazer or look for a dress in fabric rather than brand. Try the straw tote bag for leisurely days.
Mistake to Avoid: Forgetting a functional bag means you will be juggling items and the outfit stops feeling effortless.
Step 6: Do a timed run and tweak things 24 to 48 hours before
Listen for the small cues. Try the full outfit on at least 24 hours before the event. Walk, sit, and lift your arms. If a seam pinches when you sit adjust the layer or swap the belt. I find a quick 10-minute walk tests shoes and layering in realistic movement. For last-minute steaming or spot-checks, hang the outfit in the bathroom with hot water running for five minutes to relax wrinkles. A stylist I follow for petites pointed out that trying everything in natural light makes fit problems obvious. Tight timelines cause panic. Give yourself that 24-hour buffer.
Mistake to Avoid: Leaving the outfit try-on until the morning of the event creates surprises and stress.
Fashion Tips
Color anchor: Use one neutral color for the base and add two accents, sticking to the 60:30:10 rule, to keep things cohesive. Try a linen midi dress as the base.
Tuck trick: A half-tuck in the front creates shape without looking tailored. A thin waist belt helps hold that tuck in place, try a waist belt.
Pattern pairing: If you mix patterns, make one small-scale and one large-scale and limit the palette to three colors. A small floral with a striped scarf reads balanced.
Seasonal fabric swap: Swap linen for a lightweight cotton blend if you need more structure and less wrinkling. Look for breathable fabrics with a slight texture.
Budget alternative: Thrift a blazer or borrow a belt to get the tailored effect without the cost. A neutral blazer from a secondhand shop often looks indistinguishable in photos.
Body-type cue: If you are petite, raise the blazer hem and choose a shorter tote. If you are tall, a longer blazer can look grounding. Fit matters more than label size.
Photo-ready: Pin the focal accessory in place and smooth the area where the camera will focus. A quick smoothing motion with your hands reduces visible lint and makes textures read better on camera. Try a delicate pendant necklace for subtle shine.
Wear Your Day
Do the prep once and you will have a repeatable blueprint: base silhouette, one focal accessory, one structured layer, shoes that work, and a bag that holds what you need. My first attempt at this felt awkward. The third time it clicked and now it takes under ten minutes to pull something that feels intentional. Final tip, try one new small detail each year so the outfit still feels like you while staying familiar.
