
I almost did not make anything handmade for my mom this year. It felt like too small a gesture. Then I tried a tiny linen pouch with her handwriting printed on it and everything changed. The whole thing felt deliberate. If you are short on time or on a budget, this guide breaks the projects into small wins so you end up with gifts that feel honest, not staged.
I write this after trying these ideas in three rentals and learning what survives travel, pets, and dishwasher heat. Budget can be $20 per gift or $60 if you want upgrades. These projects work because they mix a simple handmade base with one personalized detail, which gives the result weight without needing pro tools. Expect to spend 30 to 90 minutes per project once you get the hang of it.
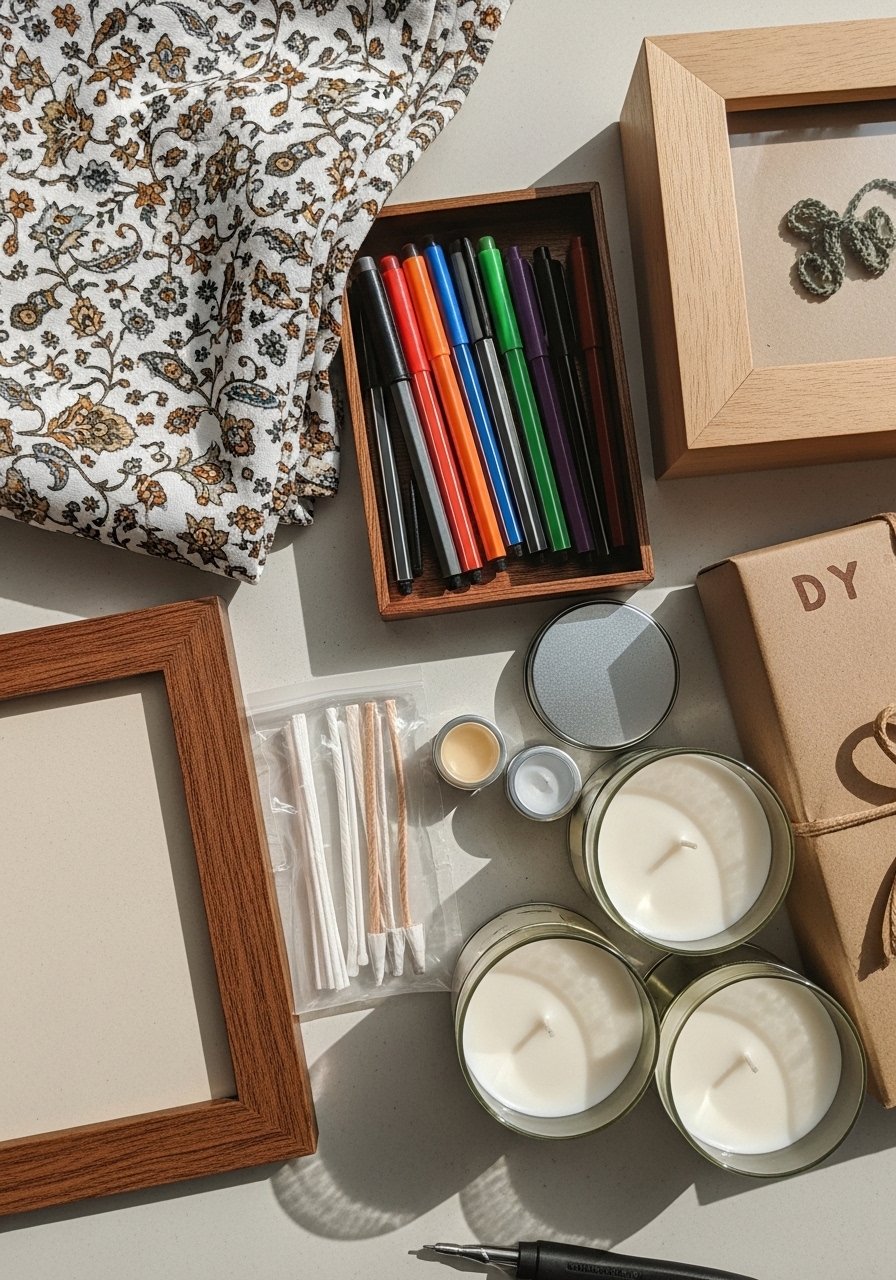
What You'll Need
Textiles & Soft Goods:
- Cotton embroidery kit (~$15-30)
- Prewashed linen pouches (~$8-18)
Wall Decor & Art:
- Picture frame with mat (~$12-25)
- Archival pen set (~$8-15)
Lighting & Accents:
- Soy candle-making kit (~$20-40)
- Glass keepsake jars (~$10-20)
Step 1: Pick one simple idea and commit
Pull out everything you can think of. Then close your eyes and pick one. I used to try to make three gifts at once and none of them landed. Narrowing to a single concept, like "handwritten keepsakes" or "cozy desk set," gives you a clear direction. Decide the delivery moment too, because presentation changes the build. Use the rule of three when grouping items in the box, three small things feel intentional. I found that one 6-inch embroidery hoop works better visually than a bigger one if you plan to photograph the gift.
Mistake to Avoid: Skipping the selection step turns everything into random clutter instead of a cohesive gift.
Step 2: Make handwriting the star
Scan or photograph a short note in your mom's or your handwriting. Print it to scale for a 5×7 frame or for transfer onto fabric. I messed this up the first two times by using tiny script that disappeared once printed. The fix was to increase size by 150 percent and use a thick archival pen when tracing. For fabric transfers, use two passes of the heat application for 12 seconds each so the ink sets without ghosting. The result is tactile and personal, the paper has a slight tooth, and the pen sounds like a crisp click as it writes.
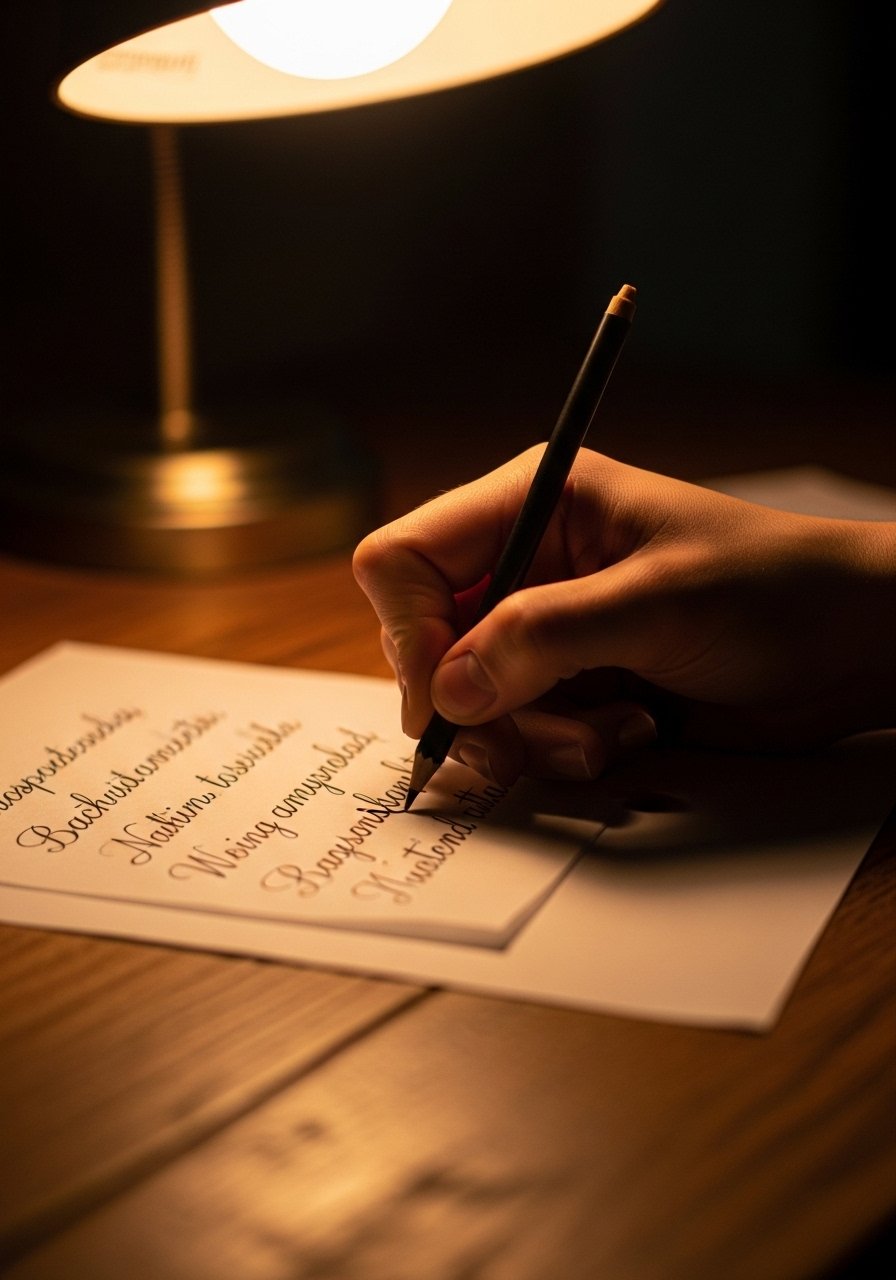
Mistake to Avoid: Using tiny handwriting makes the personalization unreadable when reproduced.
Step 3: Pour a small candle that smells like a memory
Measure wax and fragrance using a 10 percent fragrance-to-wax ratio by weight for a balanced scent that is not overpowering. Melt soy wax until it reaches 175 degrees Fahrenheit and cool to 140 degrees before adding fragrance, then pour slowly into jars. I almost quit candle-making after my first jar popped and left air pockets. The trick is a steady pour and a gentle tap on the counter to release bubbles. Let candles cure for at least 24 hours before wrapping. The wax looks smooth and slightly satiny when it is ready.
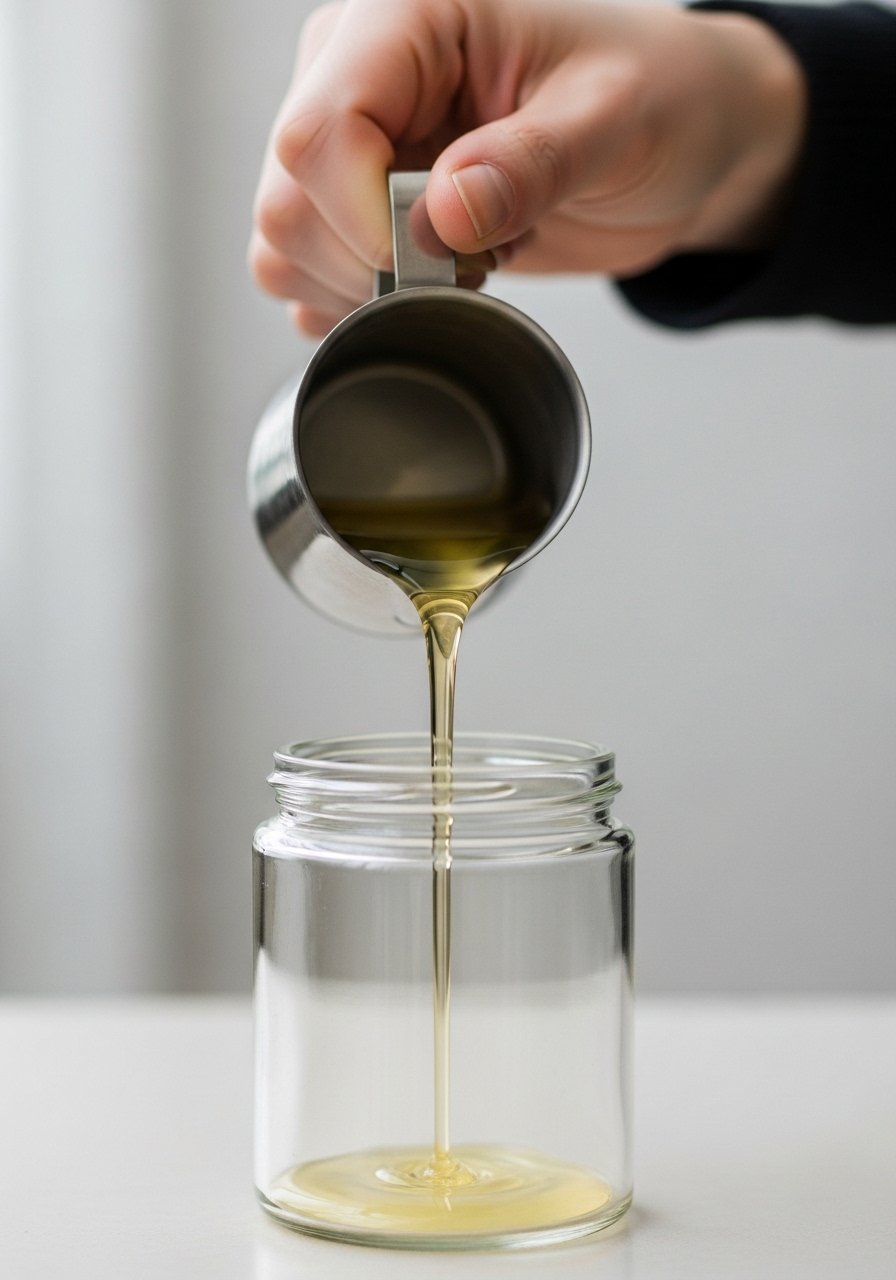
Mistake to Avoid: Pouring at the wrong temperature creates sinkholes and uneven tops in the candle.
Step 4: Stitch or glue a functional linen pouch
If you can sew a straight line, choose the simple stitch route. If not, fabric glue works fine for a clean pouch. Cut fabric 1 inch larger on all sides than the final size so you have a 1/2-inch seam allowance. I honestly fought the perfect seam for a long time. Now I fold 1/4 inch twice and press, then do two passes: one quick basting stitch and one neat edge stitch. For no-sew, apply glue in a 2:1 glue-to-water mixture and clamp with binder clips for 30 minutes. The linen has a weight that feels reassuring in the hand, unlike a thin cotton.
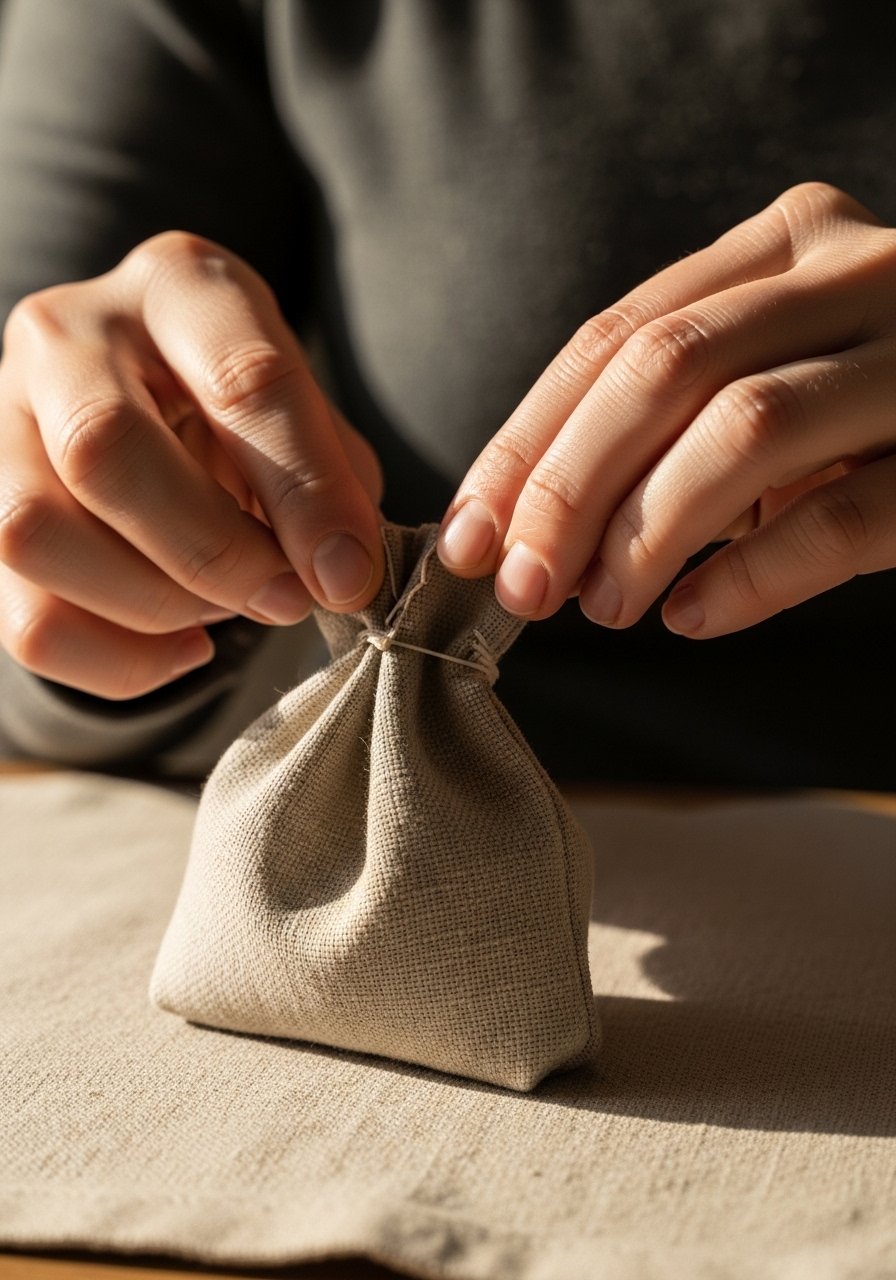
Mistake to Avoid: Skipping the seam allowance makes the pouch too small once finished.
Step 5: Assemble the box using texture and scale
Start with a base, like crumpled tissue or a folded linen napkin. Place the largest item at the back, then offset two smaller items in front using the rule of three. I almost always overfill the box at first. Then I remove one item and the whole box breathes. Use one neutral base and one accent color in a 3:1 ratio to keep things balanced. Add a handwritten tag and seal with a small wax dot or ribbon. The weight of the finished box should feel neither flimsy nor heavy when you lift it.
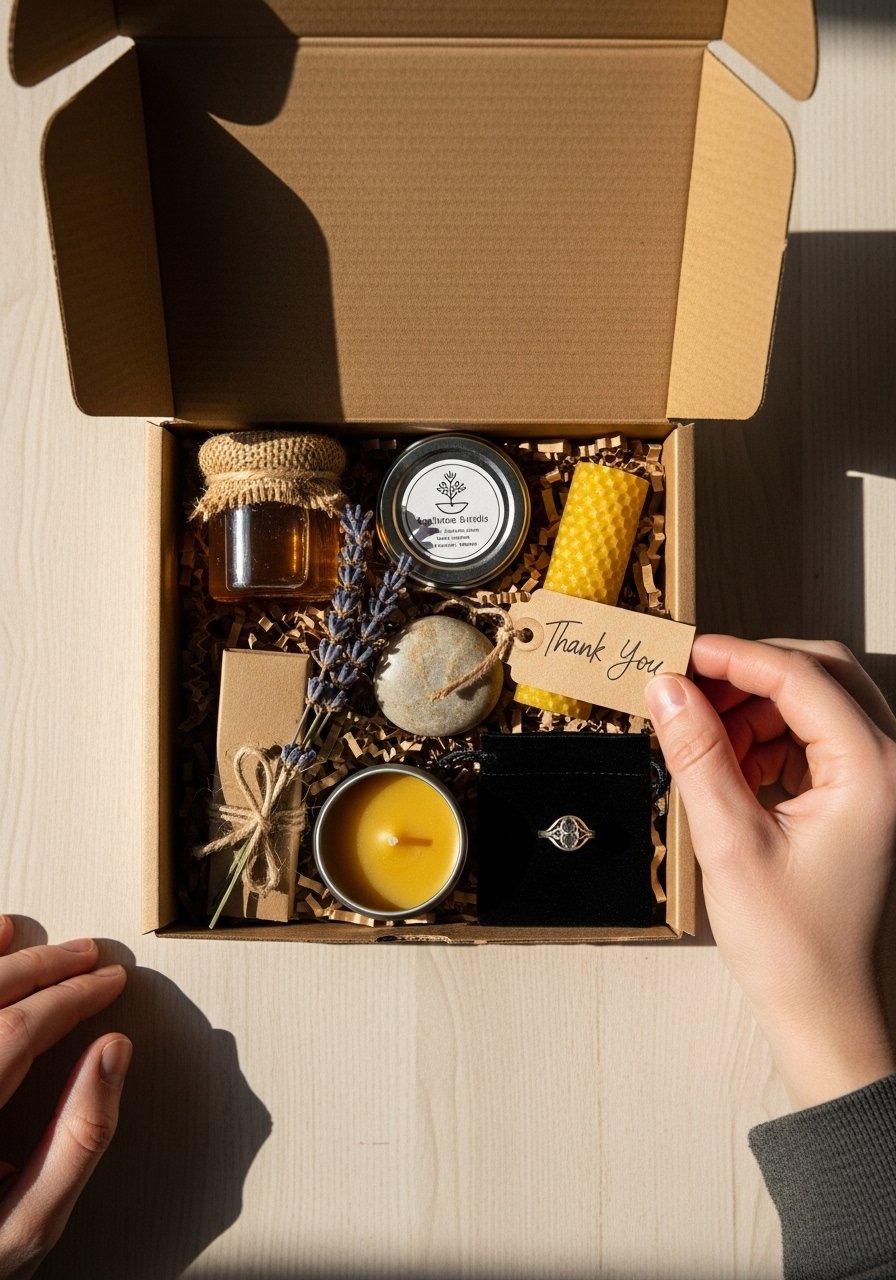
Mistake to Avoid: Overstuffing the box makes the arrangement look casual instead of intentional.
Step 6: Create a small story card to explain the gift
Write one paragraph about why you made the item, the memory it connects to, or a single instruction for use. I almost skipped this step. Glad I did not. The card turns a craft into a keepsake. Use one sentence of context, one sentence of memory, and one sentence of care instructions. Use an archival pen so the ink does not bleed on damp or textured paper. Fold the card into the package where it will be the first thing she opens. The paper should make a soft creak when turned.
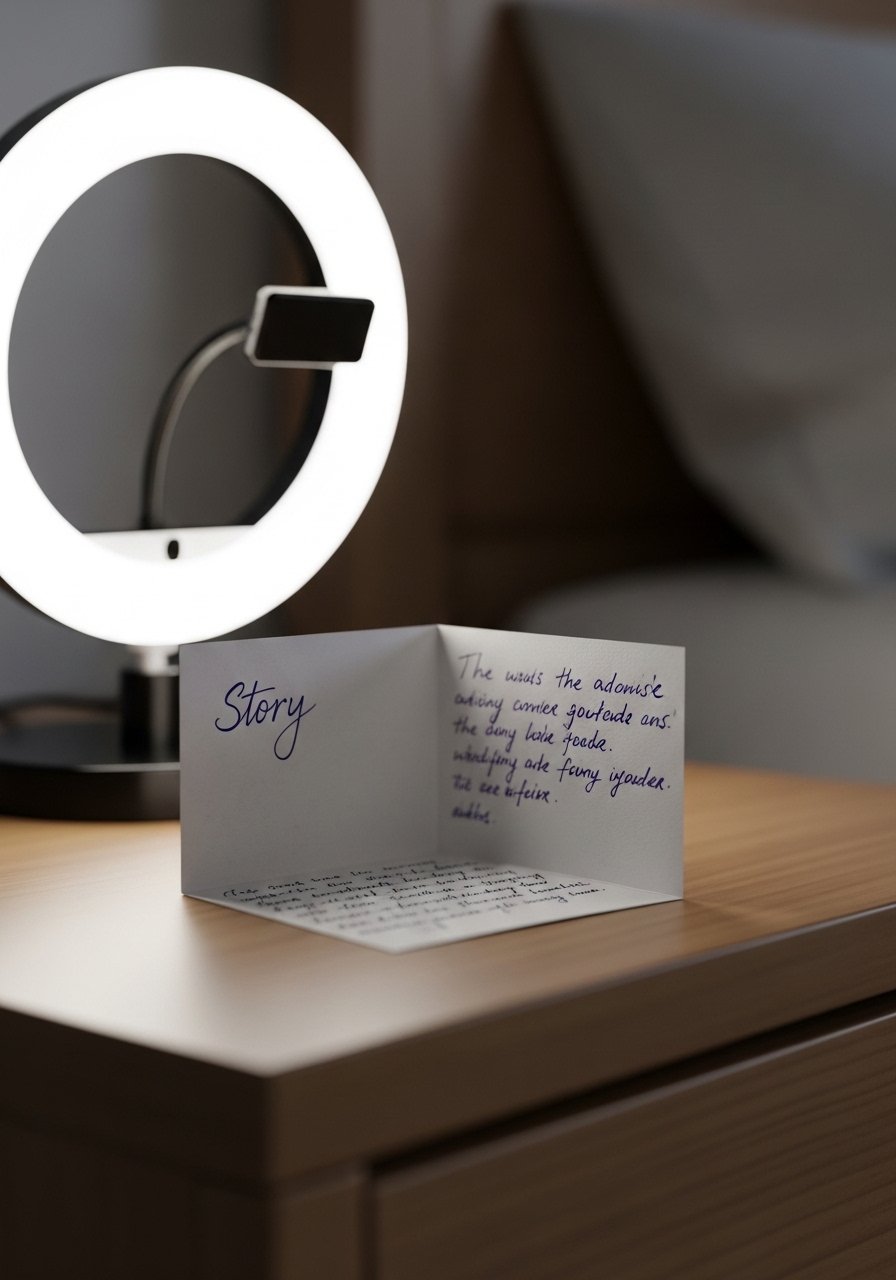
Mistake to Avoid: Leaving out the story card makes the gift feel like an object instead of a memory.
Decorating Tips
Use everyday boxes creatively: Wrap a simple cardboard box with brown kraft paper and line it with a washed linen napkin for an elevated look using linen-pouches.
Add a scent thread: Place a small scented sachet in the box that echoes the candle scent, like vanilla or lavender from a soy-candle-making-kit.
Include a practical upgrade: If you give a framed note, add a small easel back so it can stand on a desk, use a picture-frame-with-mat.
Photograph the process: Take a quick photo of you making the gift and tuck it into the box. A phone snapshot feels raw and real.
One-minute polishing: Run a lint roller over fabrics just before boxing. It removes small fibers and makes linen feel smoother to the touch.
Swap materials for allergies: If soy is a problem, try a beeswax candle kit or use a tea light in a keepsake jar like the glass-keepsake-jar.
Add a lasting detail: Seal the story card in a small clear sleeve so it survives being handled, and write the date in the corner for future nostalgia.
Most people end up spending between $500 and $800 when they finally commit to refreshing a room. I am still not sure this is the best way, but it has worked every time for turning small, affordable materials into something that feels like a gift you would keep.
Make It Personal
If you try one thing, make it the handwriting transfer or the story card. Those two details anchor the whole package. Pack slowly, let glue and wax cure the full recommended time, and step back after you place items in the box. You will notice what needs removing. After making these gifts across four different kitchens and three rentals, I can say the small rituals matter more than the tools. Give it a try, and treat the first attempt as practice instead of final.
