
I stared at my mirror with three half-done braids and no idea why they fell apart by lunch. I had watched ten videos, tried too much product, and still ended up with a loose, messy braid that looked fine only from one angle. It took me a few weeks of practicing after work to figure out the simple little moves that make a braid hold and look tidy without fuss.
A quick note on what this guide covers: these instructions work across straight, wavy, and loose-curly textures and take 10 to 20 minutes once you get the rhythm. I tested these moves after washing and restyling about fifteen times. Expect inexpensive tools and one reliable styling product to make the difference. You will learn sectioning, tension control, and two quick fixes for layers and short ends.
What You'll Need
Styling Products:
- light-hold-hair-cream (~$8-18)
- texturizing-spray (~$10-20)
Tools:
- wide-tooth-comb (~$6-12)
- rat-tail-comb (~$7-15)
- small-elastics-pack (~$5-10)
- bobby-pins (~$4-8)
Treatments & Prep:
- leave-in-conditioning-spray (~$9-18)
Step 1: Prep the canvas with the right moisture
Start with slightly damp hair or dry hair spritzed with a leave-in. I learned the hard way that bone-dry hair slides and drenched hair balloons. Aim for about 10 to 20 percent dampness or mist for 2 to 3 spritzes along the mid-lengths. Apply a pea-sized amount of light-hold cream for short hair, a nickel-sized amount for medium lengths, and a quarter-sized hit if your hair is long. Comb through with a wide-tooth comb so the product spreads evenly and the hair feels slightly tacky, not greasy. This tackiness gives grip and helps braids last longer.

Mistake to Avoid: Skipping this moisture step makes the braid slip and puff up within an hour.
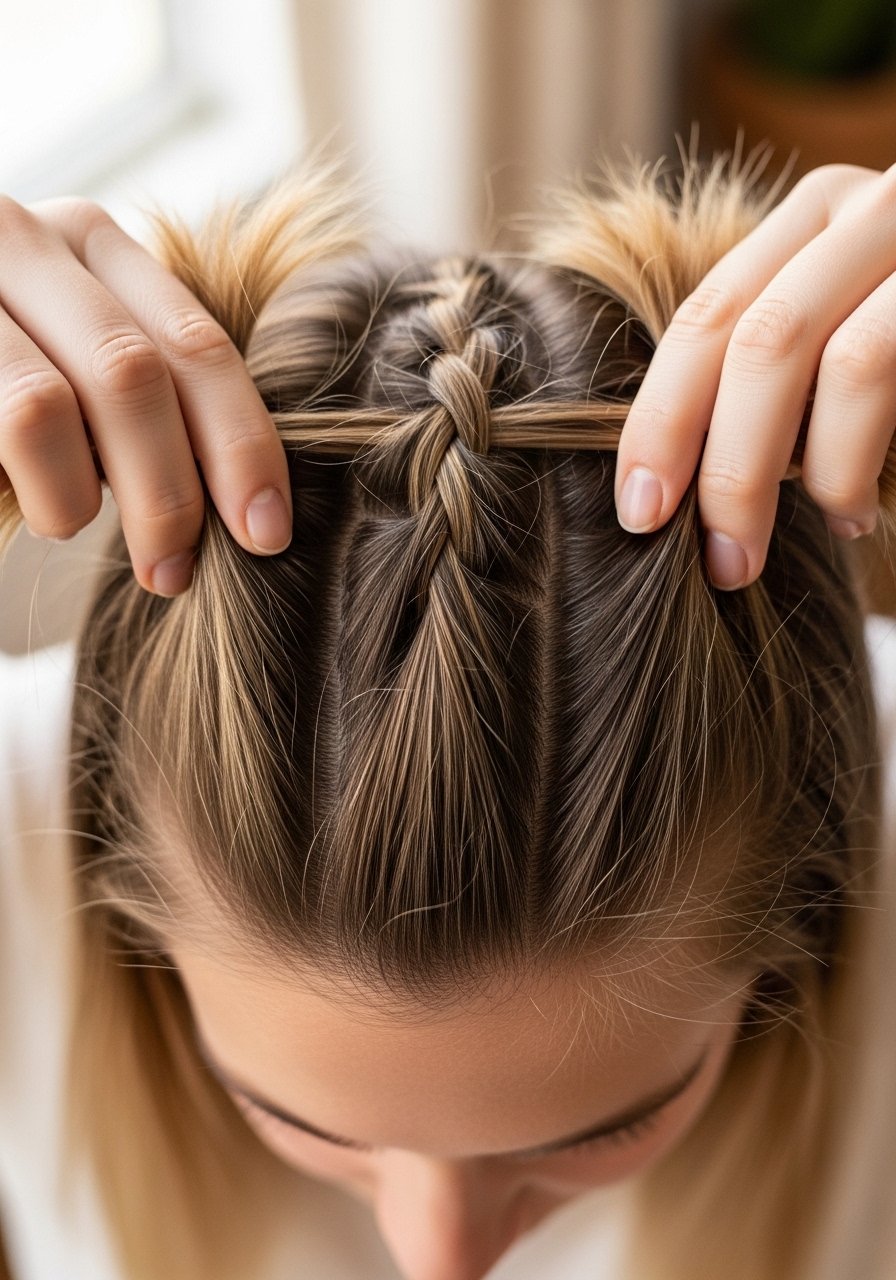
Step 2: Section like a pro, not like a tutorial
Most people start with messy sections. Instead, use the tail of a rat-tail comb to create one clean center part or three equal parts for a single braid. For a basic three-strand braid, split hair into three even sections about 1 inch wide at the crown so the braid sits proportionally to your head. If you have layers, add a fourth small front section to tuck later. Hold each section between your fingers like you mean it. The rule I swear by is even tension equals longevity. Keep tension constant as you cross strands. You will feel the braid tighten slightly under your fingers as it sets.
Mistake to Avoid: Rushing the sectioning step makes uneven, lopsided braids that unravel fast.
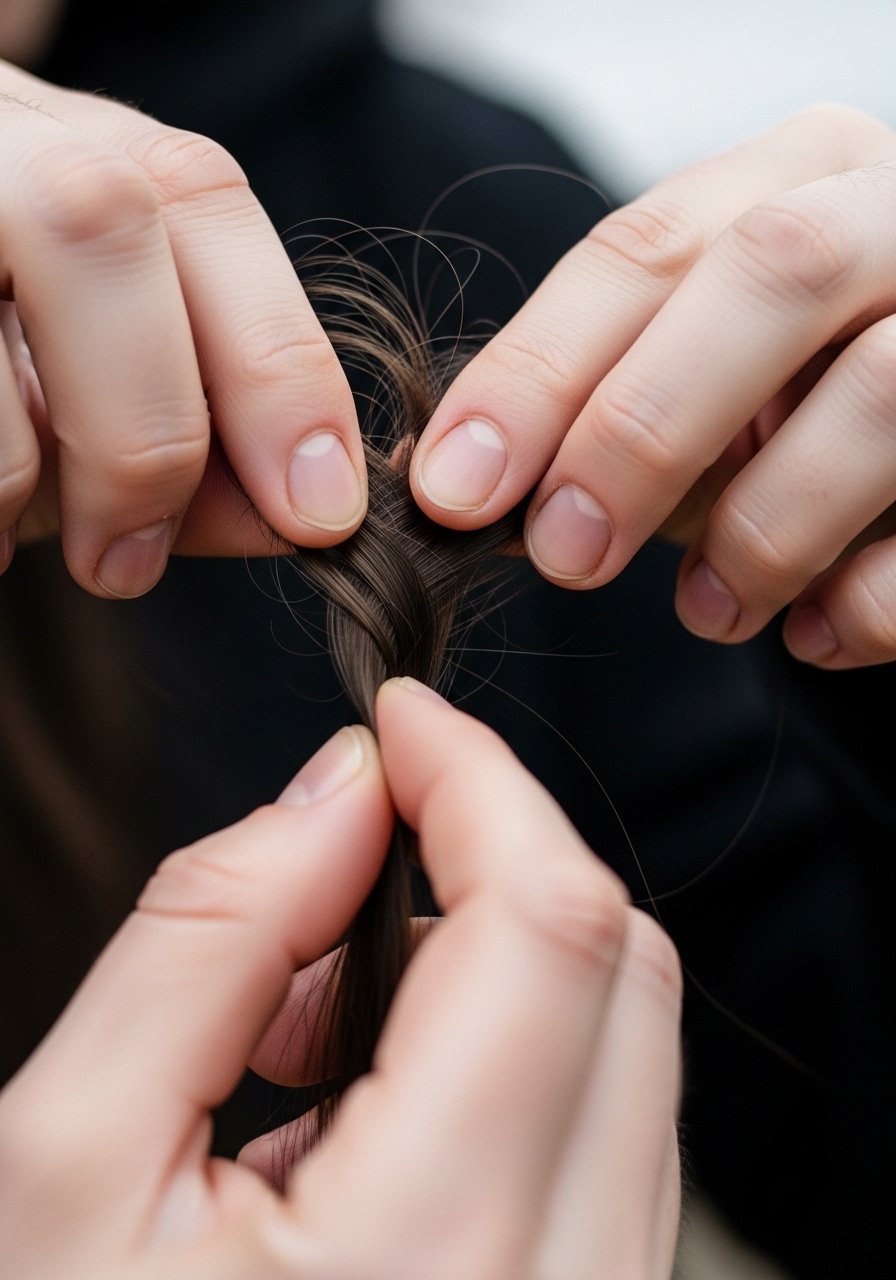
Step 3: The crossing rhythm that makes it neat
This is where it starts to actually look styled instead of sloppy. Cross the outside section over the middle, tighten, then repeat with the other outside section. Keep each cross snug but not painful. Think of a small, steady pulse: cross, slide two fingers down 1 inch, cross again. That 1-inch repeat keeps the spacing even and the braid tidy. If you want a softer look, pull gently at the braid sides after you finish to pancake it, but only after securing the end. I used this method across four hair textures I have styled and it made the final braid more uniform every time.
Mistake to Avoid: Pulling hard while crossing creates a tight braid that twists and looks brittle.
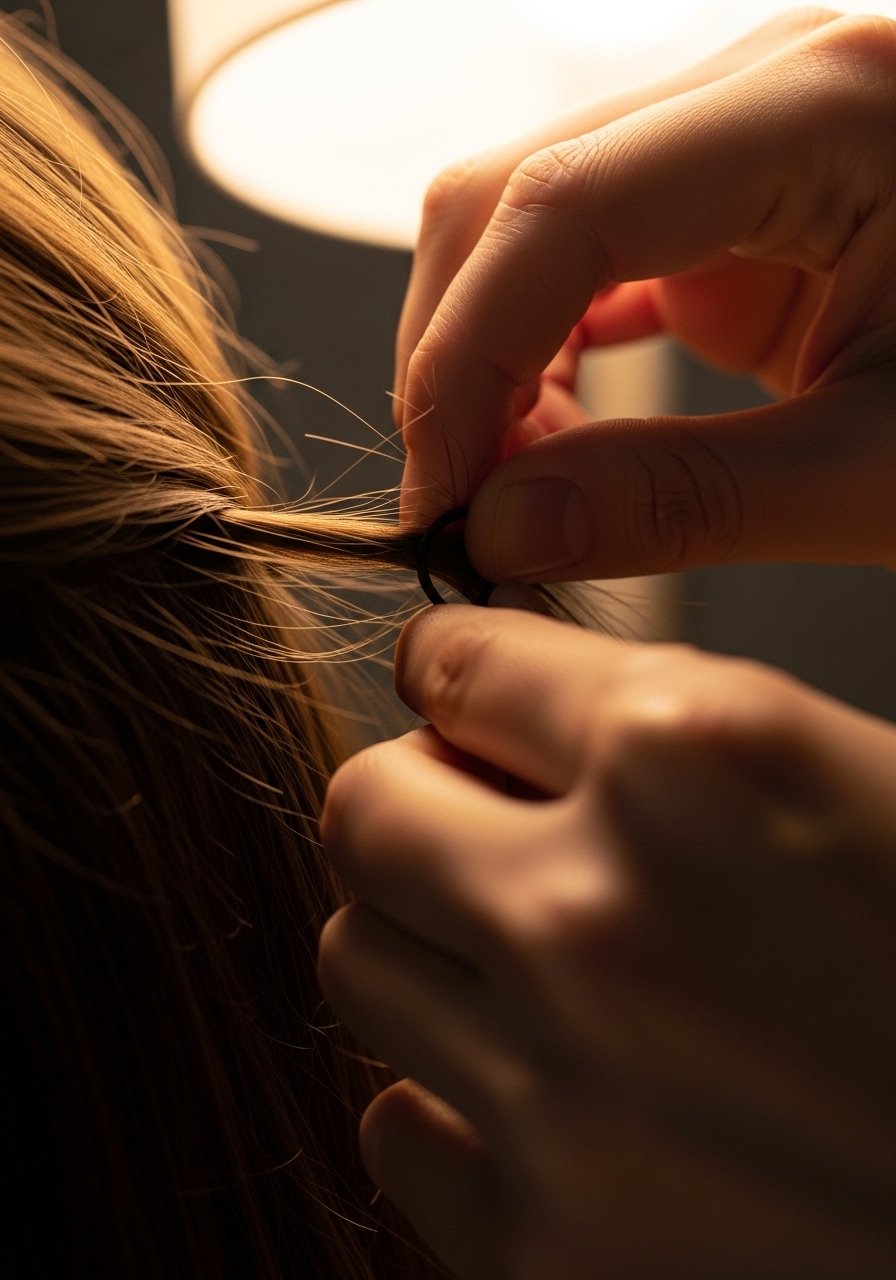
Step 4: Secure and hide the elastic
The elastic snags the eye if left exposed. Use a small elastic to secure the end, then thread a small piece of hair over the elastic and pin it with a bobby pin tucked flat. For shoulder-length hair, use two elastics spaced about 1 inch apart if you want a longer tail feel. Listen for a soft click when the bobby pin sits right and feels flush. This little step turns a finish that looks homemade into one that reads intentional. I almost skipped this. Glad I did not.
Mistake to Avoid: Leaving the elastic visible makes even a tidy braid look unfinished.
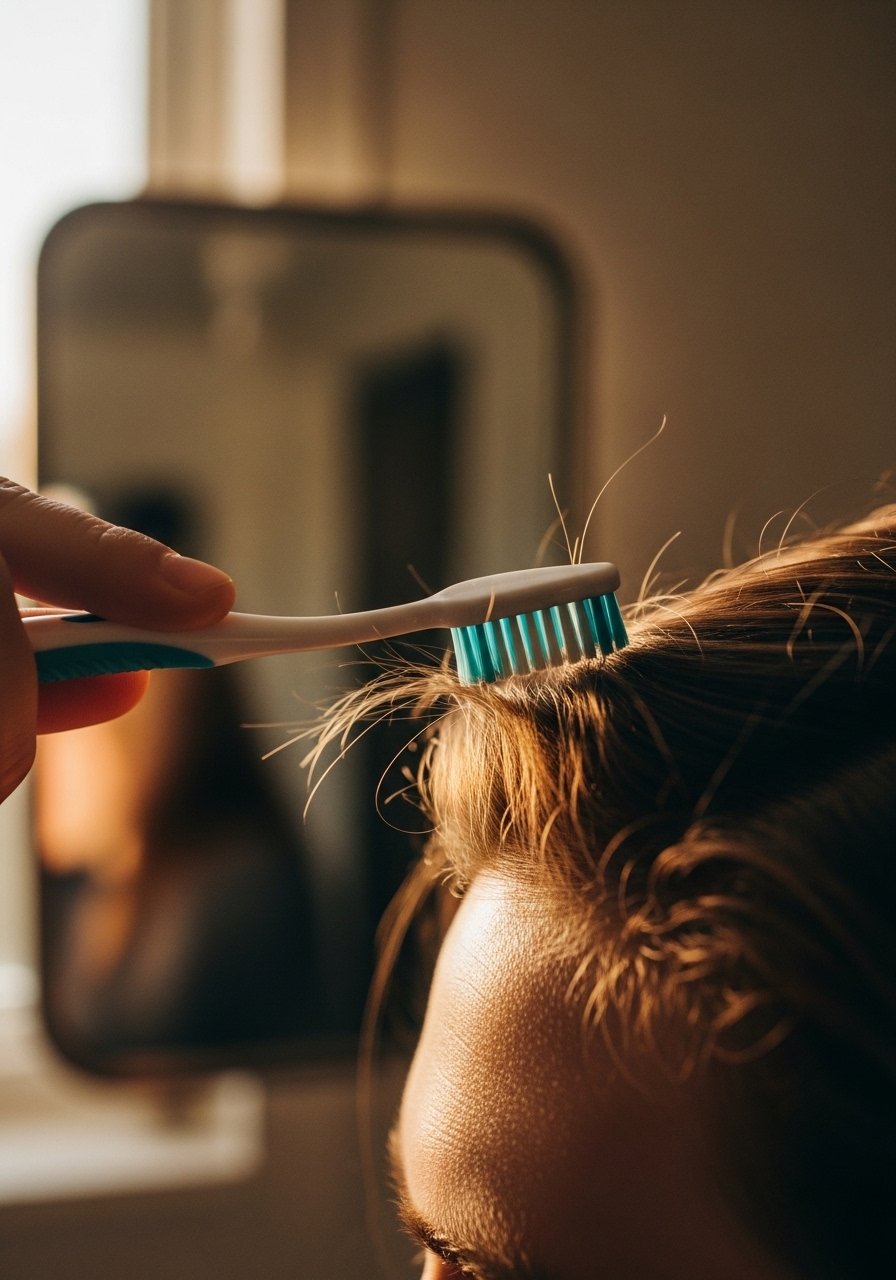
Step 5: Fix layers and flyaways without starting over
I used to shave off ten minutes and then regret it. For short layers that stick out, pin face-framing pieces into the braid with single bobby pins placed under the strand. For stubborn flyaways, mist a toothbrush with a bit of hairspray and sweep gently along the hair surface for a soft hold. For extra long days, a light coat of texturizing spray at the roots gives grip and keeps the braid from loosening. These small fixes are the gap most tutorials miss. They let you wear a braid all day without redoing it.
Mistake to Avoid: Grabbing a heavy hairspray blast makes the braid feel crunchy and look stiff.
Step 6: Overnight care and quick refresh
The feeling of waking to a squashed braid used to ruin mornings. Plait loosely before bed and sleep on a silk pillowcase or wrap your braid in a silk scarf. In the morning, undo the braid and finger-comb; if it needs shaping, re-braid the bottom third only, using the same 1-inch rhythm. If you need a quick refresh during the day, dampen just the roots with two spritzes of leave-in, then tighten the top three crosses and re-secure. This saves time and avoids a full re-do.

Mistake to Avoid: Sleeping on a cotton pillowcase without protecting the braid creates frizz and shortens wear time.
Hair Styling Tips
Quick three-strand refresher: If your braid looks uneven, undo the bottom 2 to 3 crosses and redo them rather than starting over. Use a small-elastics-pack to secure as you work.
Make it look fuller: Gently pancake the braid by pulling at the sides after finishing. Finish with a spritz of texturizing-spray to hold the shape.
Short-hair trick: For bob or lob lengths, create micro-braids at the temples and pin them back with bobby-pins to fake the look of a full side braid.
Heat-free curl boost: If you want waves before braiding, twist damp hair into two buns for 20 to 30 minutes, then braid. No heat needed and the texture grips better.
Product ratios: Use a pea-sized amount of cream for every 6 inches of hair length. More product does not equal more hold and often weighs hair down.
Porosity note: If your hair soaks up product quickly, try a leave-in conditioner with lighter ingredients. I switched after one morning and it made my braids less brittle.
Travel version: Pack a travel-size texturizing-spray and two elastics for touch-ups on the go. It saved me at airports more than once.
Make It Yours
You will not nail this perfectly on day one. My first attempt was bad. The second was barely better. The third one clicked because I focused on tension and small sections rather than perfection. Pick one principle to practice for a week, either consistent 1-inch crossings or the elastic-hiding trick, and repeat it on a Tuesday night when you do not want to think. Tiny, repeated wins are what turn a messy braid into a reliable style you can do in ten minutes.
