
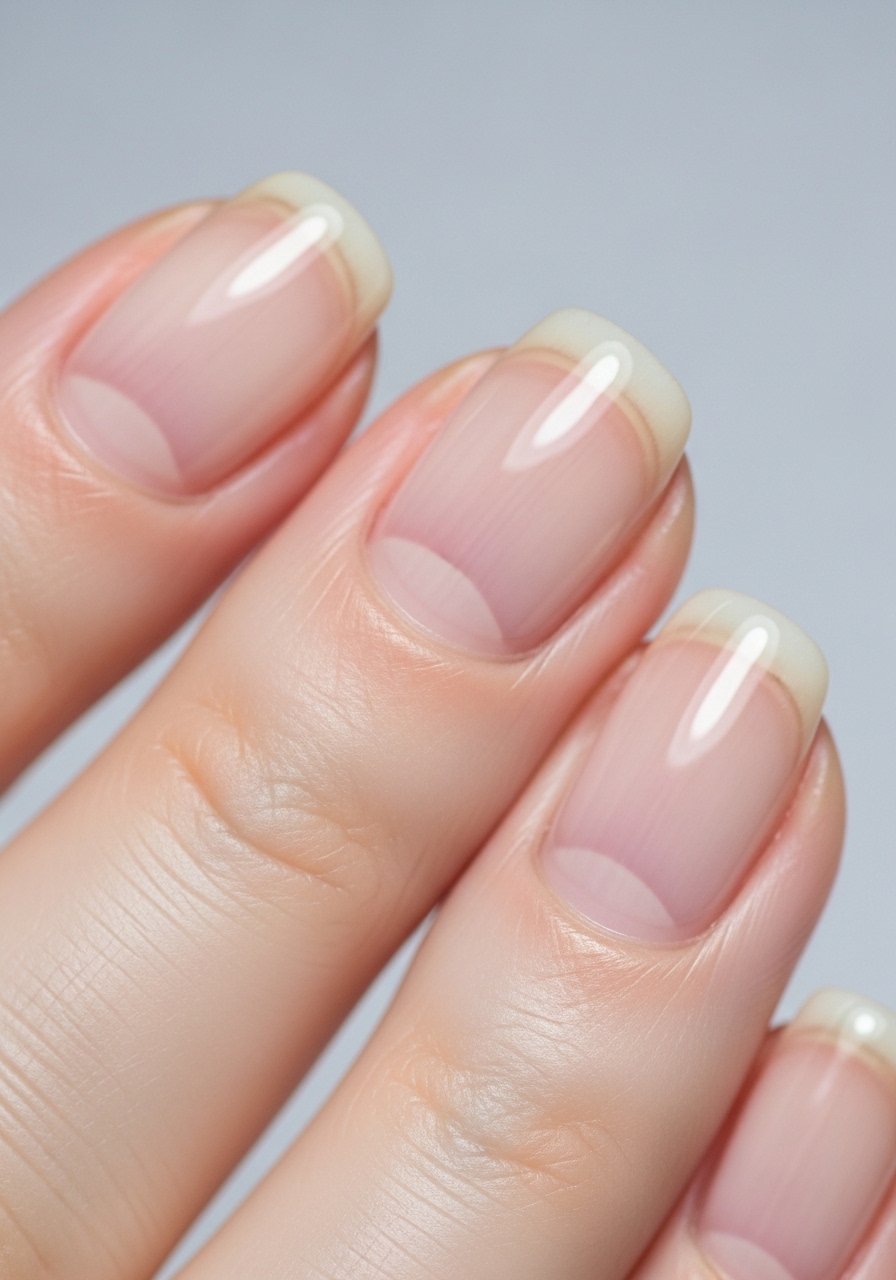
I kept thinking base coat was just a boring first step. My nails lifted by midday until one morning I filed inward toward the cuticle, wiped the free edge, and watched polish stick for eight days. That tiny, specific move changed how my whole routine looked and felt. After a few more tweaks I stopped staring at chipped edges and started getting compliments instead of sighs.
These tips are salon-practical and weekend-doable, aimed at short to medium natural nails with a few options for gel-lovers. Most items are under $20 with a couple of splurges around $25 to $35. If you want a mani that lasts through workouts and typing, these are the steps a tech who works at a salon downtown showed me and a routine I refined after six weeks of testing this routine. Most people spend somewhere between $500 and $800 when they finally commit to refreshing a room.
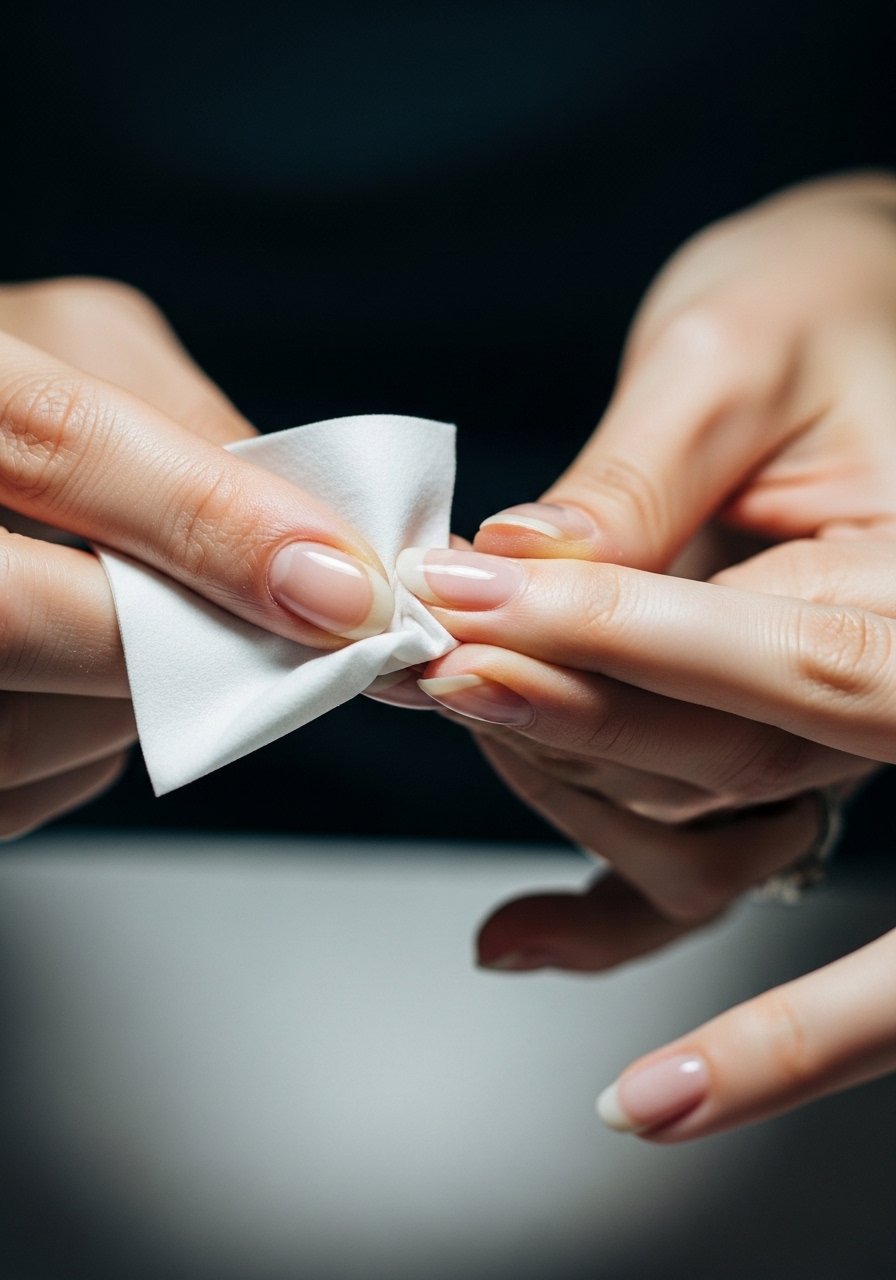
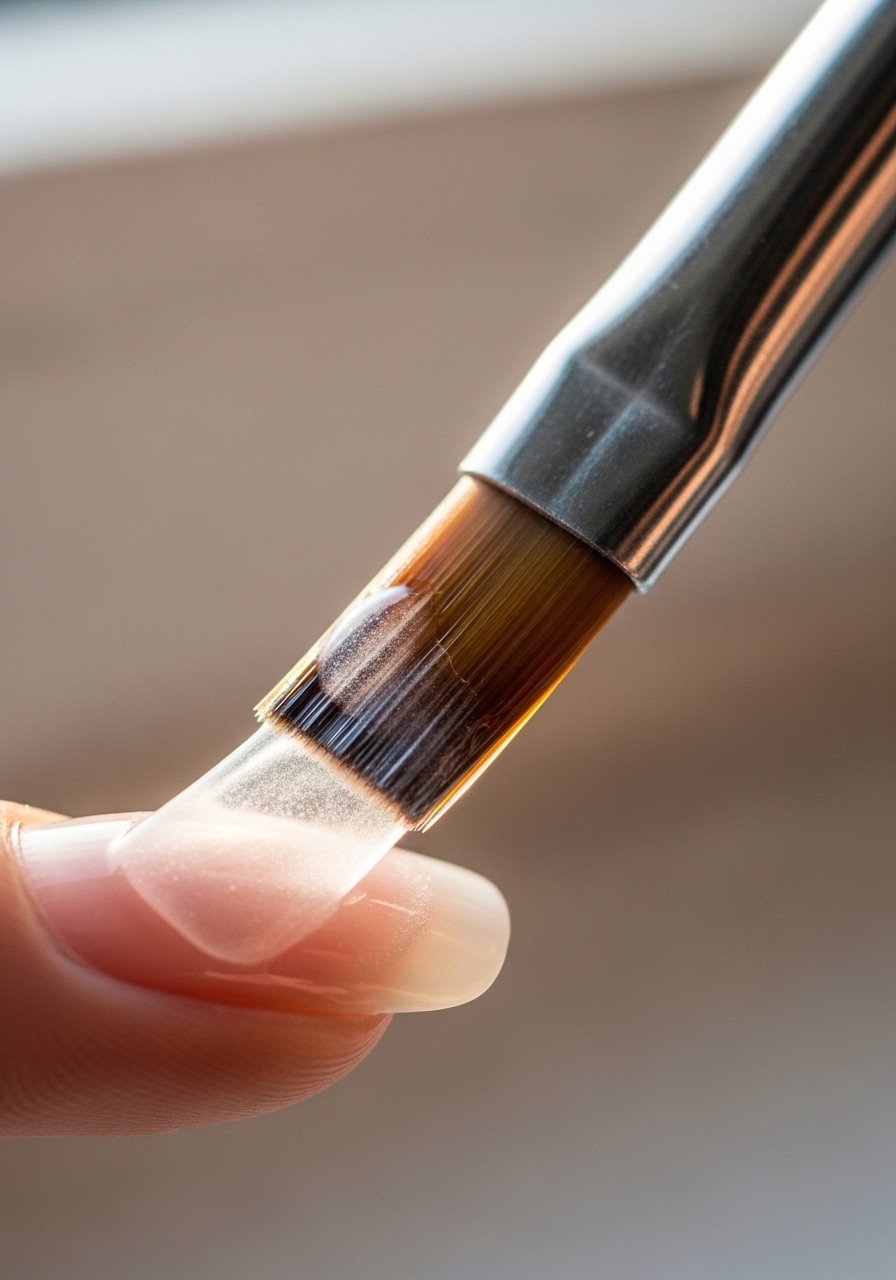
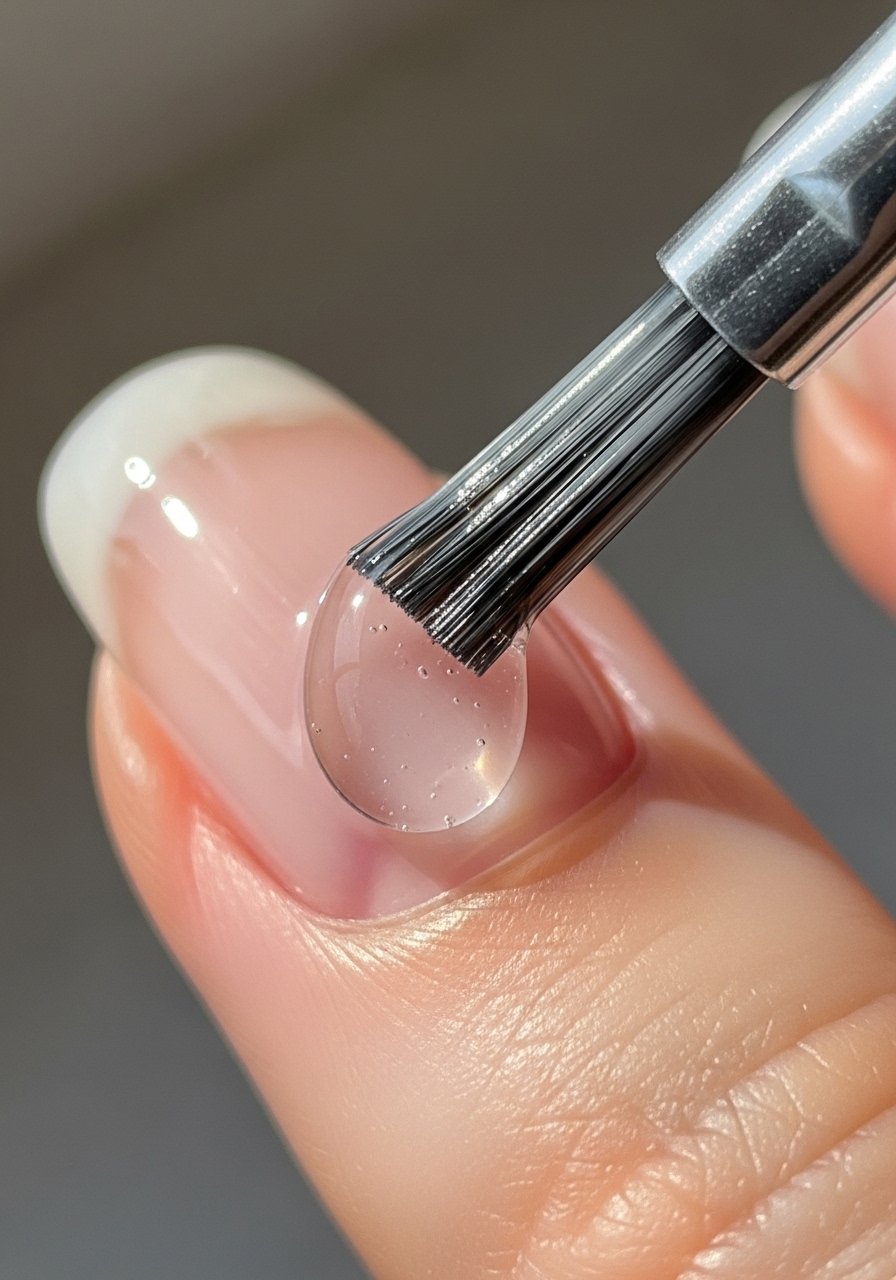
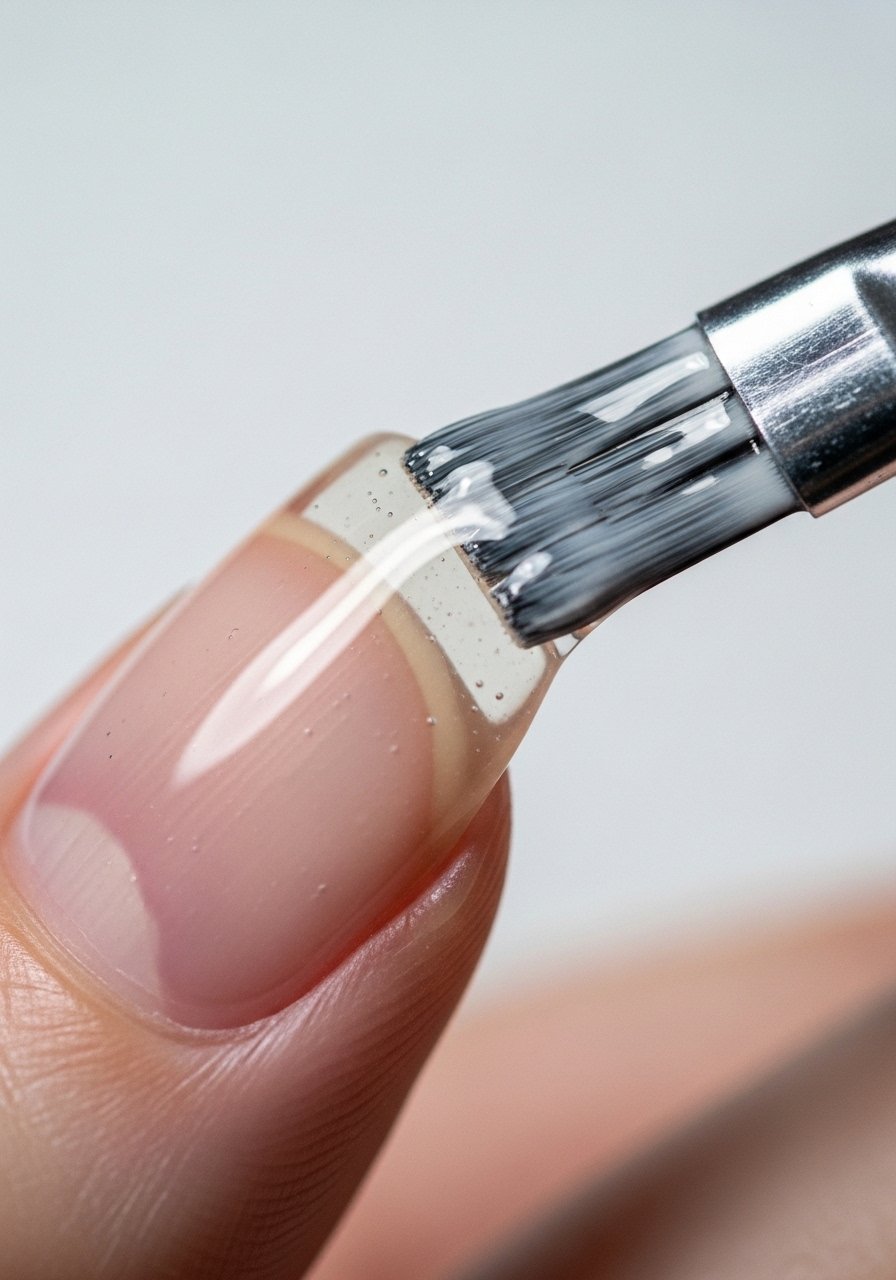
1. Wipe the Free Edge First
Style/Vibe: Clean, long-wear
Best For: Short to medium nails / everyday wear
Skill: Beginner
Start by dragging the brush along the free edge of each nail after filing. That tiny seal reduces lift where chips begin. I use a lint-free wipe with a bit of acetone to remove residual dust and oils, about one swipe per nail. The visual result is smoother tips and fewer peeled edges. This works for natural and thin-overlay nails, and takes thirty to sixty seconds for a full set. Pair this with the base coat from idea 4 for best adhesion.
Mistake to Avoid: Skipping the free edge wipe lets oils and filing dust lift polish from the tip within days.
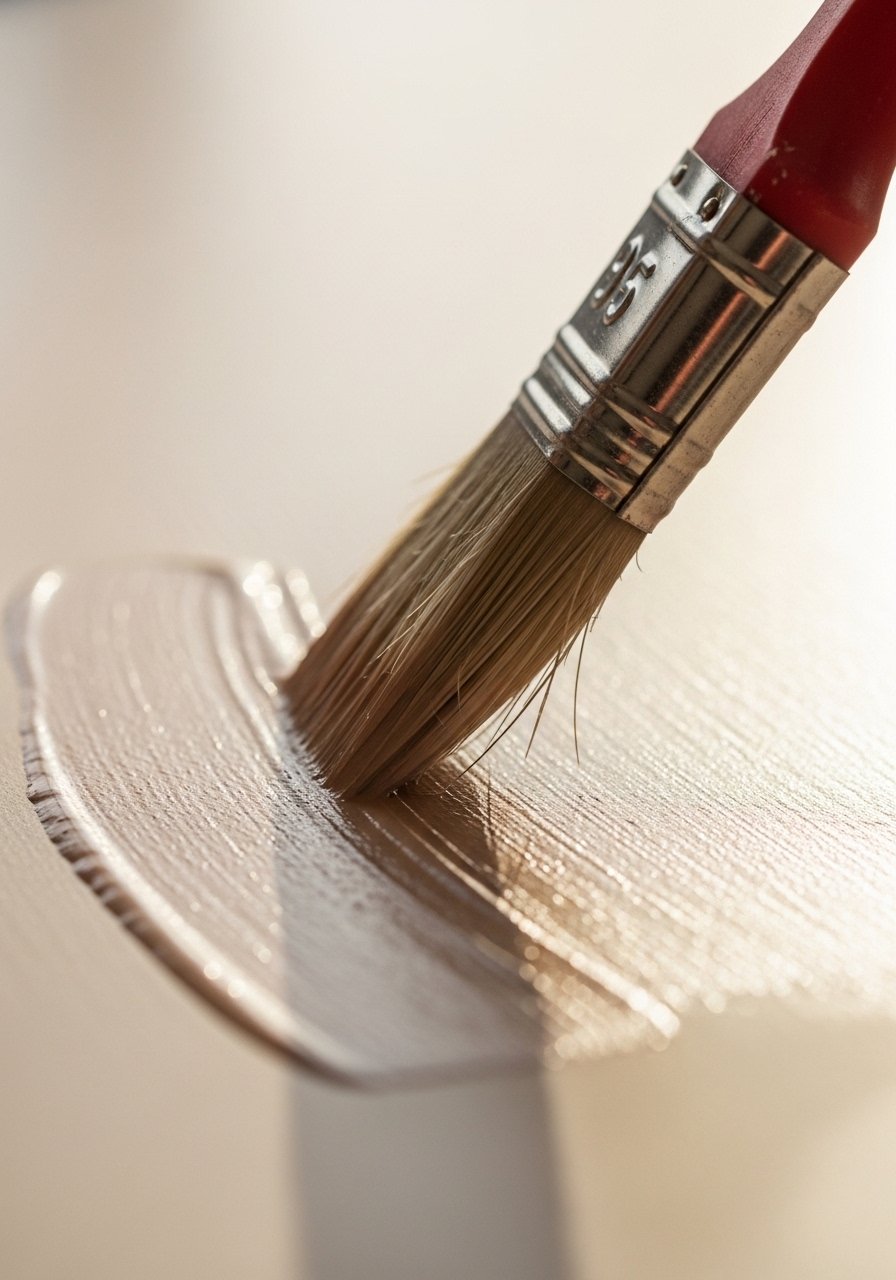
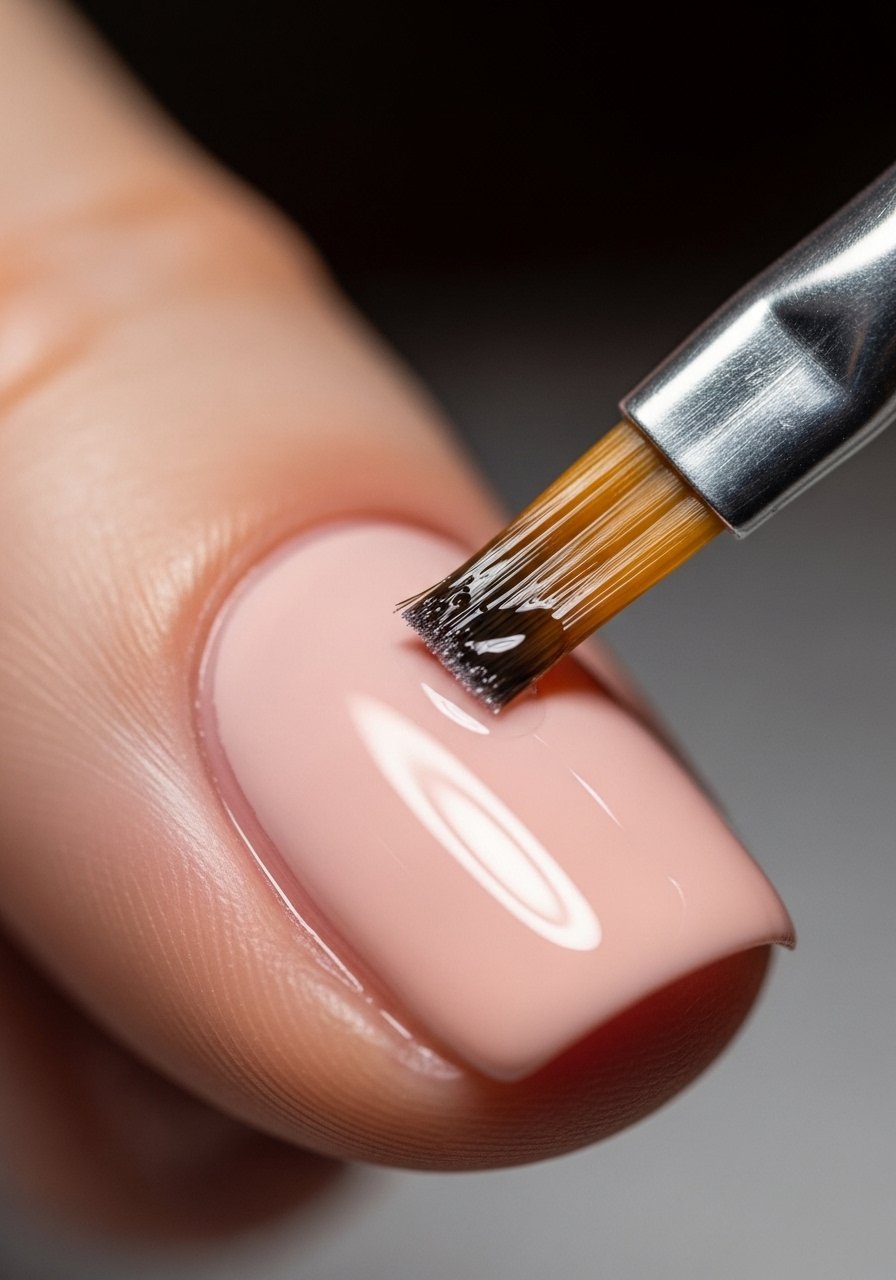
2. Thin Coats, Two Passes
Style/Vibe: Subtle, professional
Best For: Anyone who hates thick brush marks
Skill: Beginner
Apply one thin coat, let it level for 10 seconds, then a second ultra-thin coat. Two thin layers create a microscopic grip without pooling at the cuticle. I spread product from the center to the left, then center to the right in two soft strokes, each stroke taking about two seconds. For thick natural nails reduce to one thin coat. A thin-application approach cuts dry time and prevents the domed gummy look that drags and chips.
Mistake to Avoid: Slathering one thick coat thinking it is faster, which traps solvent and shrinks later.
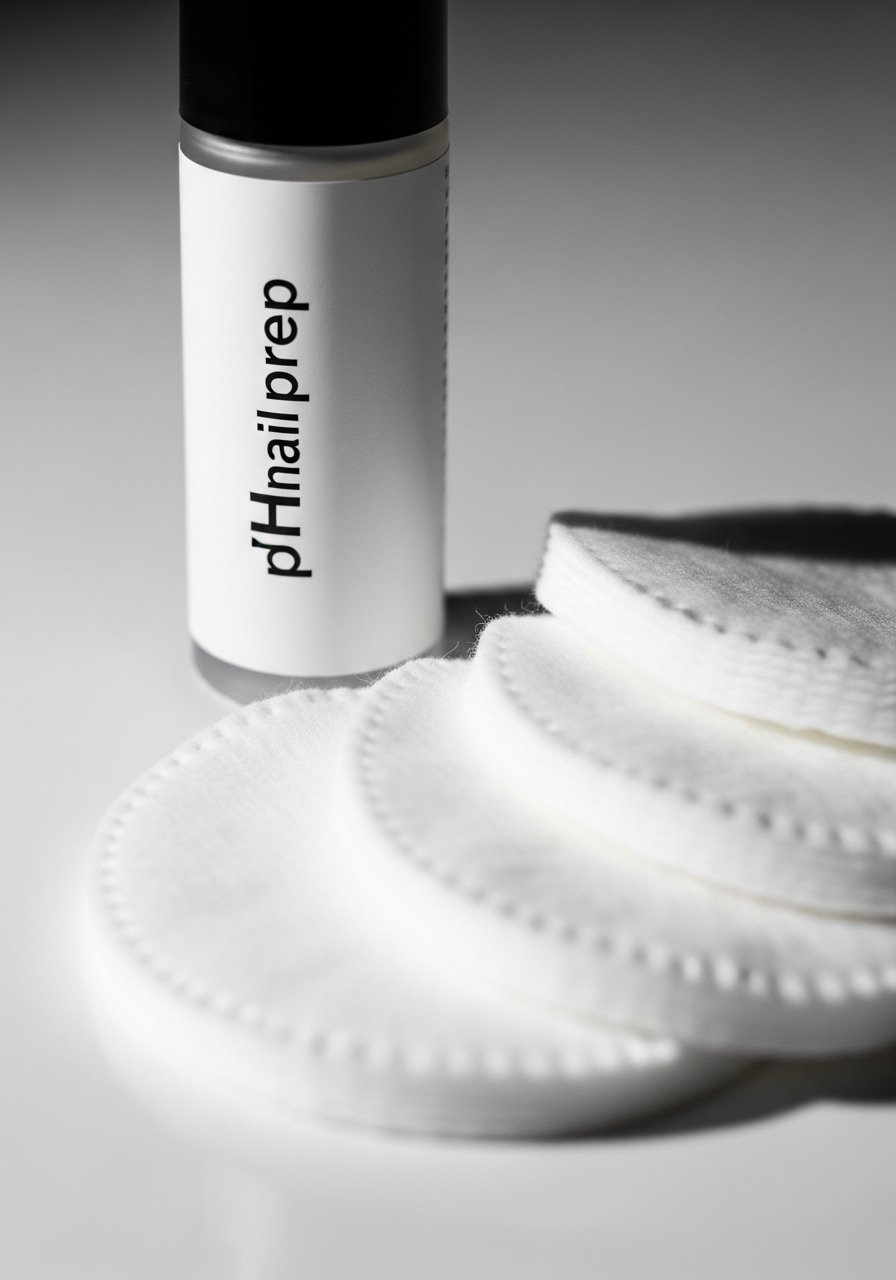
3. Dehydrate, Then Balance pH
Style/Vibe: Clinical but simple
Best For: Oily or high-sweat nails
Skill: Intermediate
After removing dust, use a dehydrator wipe, then a pH-balancing prep. The dehydrator removes surface oil in about five seconds per nail. The pH step neutralizes residues that can prevent adhesion. Use one cotton pad dampened with product per hand. This is the move many at-home mani guides skip, and it matters if your polish lifts at the cuticle by day two. It adds under a minute and makes base coats stick like glue.
Mistake to Avoid: Assuming acetone alone is enough and skipping the pH balance, which causes early lifting.
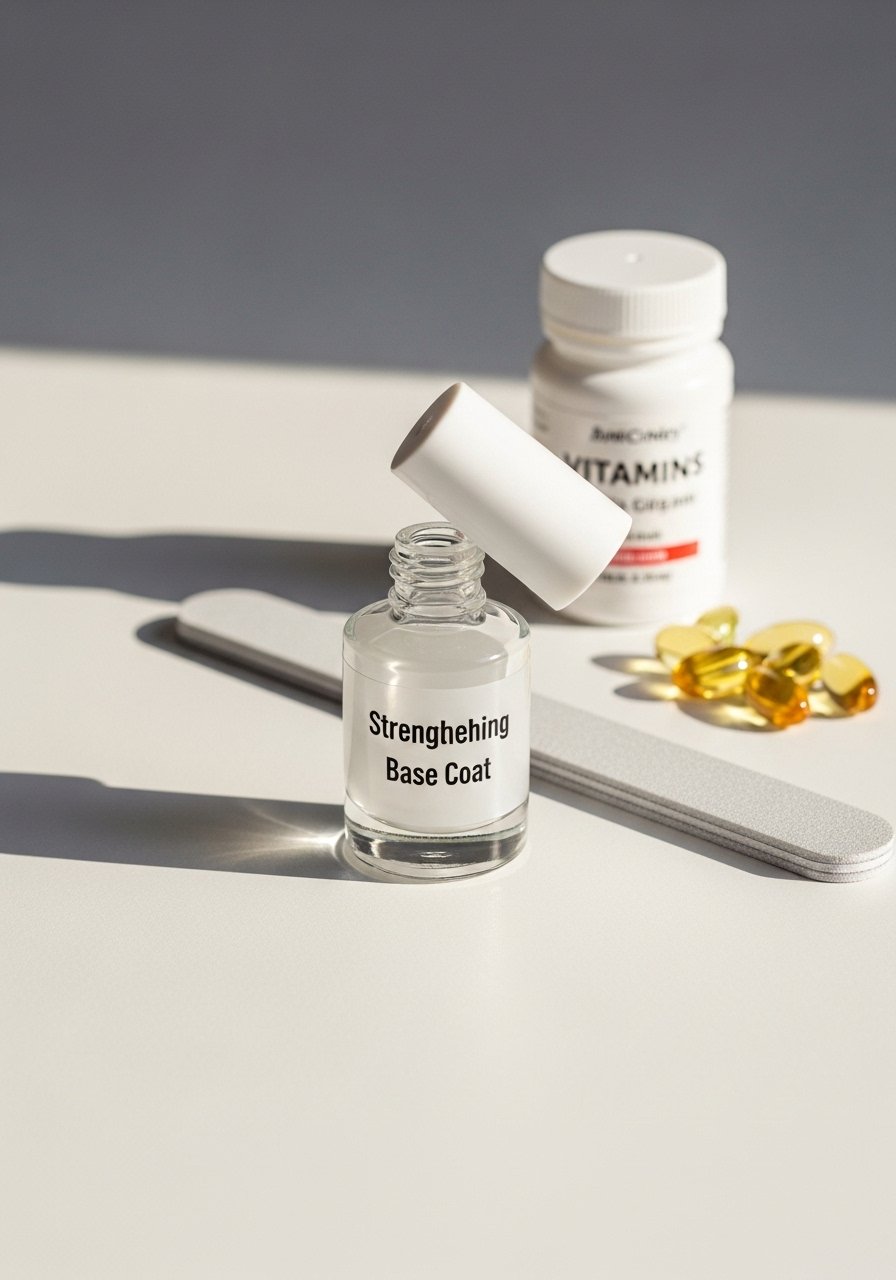
4. Match Base to Polish System

Style/Vibe: Functional, system-focused
Best For: Mixed polish users who switch between lacquer and gel
Skill: Beginner
Not every base coat is interchangeable. Use a gel-friendly base if you plan to cure with an LED lamp. For thin lacquers pick a flexible base that bends with the nail. I rotate between a strengthening base and a flexible resin depending on whether I am using opaque polish or a sheer tint. Read the bottle and test one nail first if unsure. Picking the wrong base is the reason some gels peel right off for beginners.
Mistake to Avoid: Using a gel base under regular lacquer, which can lead to poor adhesion and peeling.
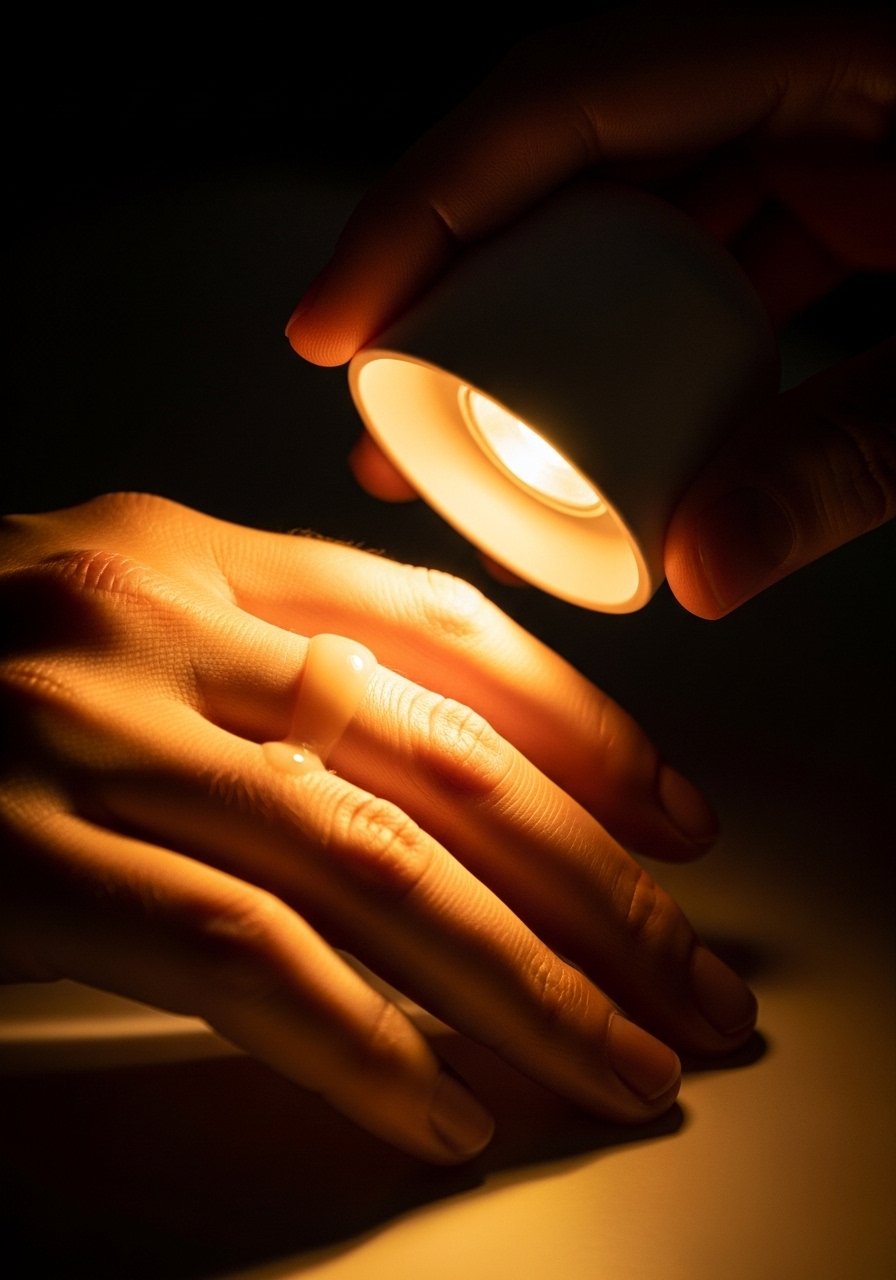
5. Heat Before Cure
Style/Vibe: Salon small hack
Best For: Gel users who notice fish-eye or pooling
Skill: Intermediate
Warm the base coat for five to eight seconds with your hands or a low-wattage lamp before popping it under the LED. Slight warmth reduces surface tension, helping self-leveling bases smooth into a flawless film. A tech told me this after I kept getting tiny bubbles, and it fixed the issue in one session. Use this if your base beads up or shows fish-eye marks. It adds a minor step but saves a redo.
Mistake to Avoid: Curing cold product straight away, which traps surface tension and causes texture flaws.
6. Brush Angle Matters
Style/Vibe: Precise, minimal
Best For: People who want smooth cuticle lines
Skill: Beginner
Hold the brush flat and drag from the cuticle to the tip in one fluid stroke, then cap the free edge. A 45-degree tilt gives you control around the cuticle without flooding. The look is cleaner and closer to salon standards. Practice takes five minutes to feel natural and it prevents a common stress point where polish pools and lifts. File the nail shape first so the stroke follows the apex.
Mistake to Avoid: Stabbing at the cuticle with the brush, which pushes product under the skin and creates lifting.
7. Use a Peelable Base for Staining
Style/Vibe: Practical, color-friendly
Best For: Red and dark polish lovers with pale nails
Skill: Beginner
If you rotate saturated hues often, try a peelable base coat on two fingers as a test. It prevents staining without heavy buffing. Apply the peelable product thinly and let it flash-dry for 20 to 30 seconds before color. The result is less surface staining and cleaner removals. Swap to a standard base if you need durability for a long trip. This is a budget-friendly trick for people who hate yellowed nail beds.
Mistake to Avoid: Using peelable base for every set, which shortens wear time dramatically.
8. Slightly Roughen Thick Natural Nails
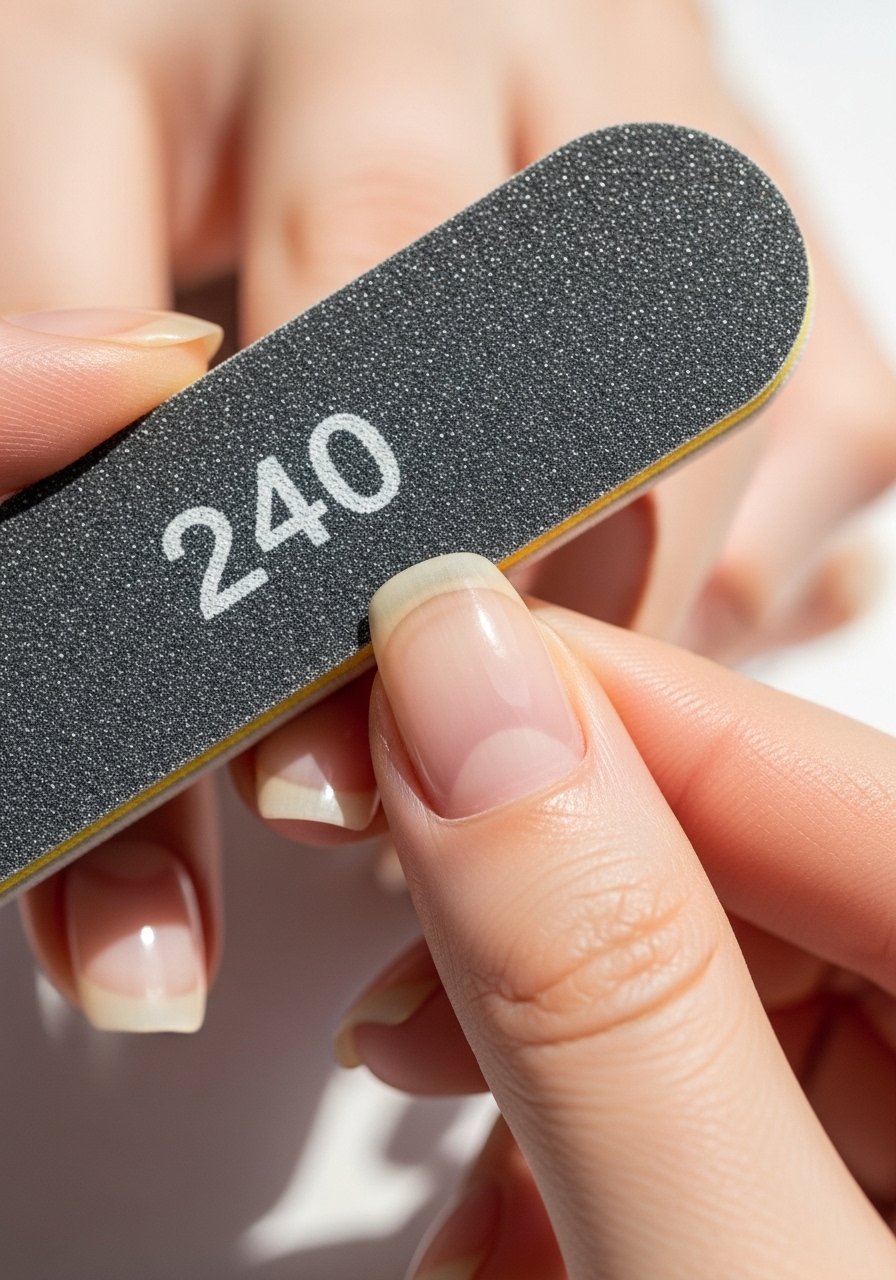
Style/Vibe: Textured, practical
Best For: Thick, slick nails that shed polish quickly
Skill: Intermediate
If your surface is glassy, do one swipe with a 240-grit buffer in the center only. The micro-etch helps base coats bite. Do not over-buff, two to three light passes is enough. Finish with a dust-off and a wipe. The outcome is a longer-lasting bond for people whose polish slides off by day three. This is the step most quick tutorials skip, but it makes big differences on slick nails.
Mistake to Avoid: Aggressive buffing across the whole nail, which thins the plate and weakens nails.
9. Thin-Wipe Technique for Cuticle Cleanup
Style/Vibe: Neat, editorial
Best For: Anyone wanting salon-finished edges
Skill: Intermediate
If polish pools near the cuticle, dip a small angled brush in acetone and thin-wipe once toward the free edge. This refines the cuticle line without damaging surrounding skin. It takes about three seconds per nail and instantly looks polished. Use caution on sensitive skin. This trick is what separates rushed at-home manis from the ones that look like they were done professionally.
Mistake to Avoid: Over-cleaning the cuticle area, which removes too much product and causes premature chipping.
10. Cap the Free Edge Every Layer
Style/Vibe: Protective, long-wear
Best For: Typists, swimmers, gardeners
Skill: Beginner
Run the brush along the free edge to seal each application. Cap base, color, and top coat. That tiny line prevents water and oils from creeping under the polish. It adds five to ten seconds per nail but can double wear time. If your polish flakes from the tip first, you are probably not capping. It is the easiest fix for weekend warriors who want their mani to survive chores.
Mistake to Avoid: Leaving the free edge unsealed, which exposes a weak point for lifting and chipping.
11. Allow a Flash-Dry Before Second Coat
Style/Vibe: Slow-bake patience
Best For: People using quick-dry top coats later
Skill: Beginner
Give the first base coat about 10 to 15 seconds to flash-dry before applying another thin layer. This prevents solvents from pooling and forming a weak middle layer. The visual is smoother, and you avoid the wrinkled look when the next layer reacts. If you are in a rush, fan your nails for 15 seconds between coats. It is a tiny time investment for much better adhesion.
Mistake to Avoid: Immediately layering more product and trapping solvent, which causes surface defects.
12. Choose Base with Flex for Natural Nail Bends
Style/Vibe: Functional, injury-averse
Best For: Flexible, long natural nails
Skill: Beginner
Nails flex during typing and chores. Pick a base that states flexibility or elastic resin. It prevents cracking where the nail bends. The result is a more forgiving mani that lasts through daily movement. Test one nail first if you have brittle tips. For people with rigid nails a strengthening base might be better. The key is matching the product to nail behavior.
Mistake to Avoid: Using a rigid base on flexible nails, which causes breakage at the bend.
13. Thin Film for Thicker Polishes

Style/Vibe: Balanced, professional finish
Best For: Opaque, high-pigment polishes
Skill: Intermediate
When using very pigmented polishes, keep the base film extra thin. Thick bases plus thick color cause shrinkage and end-of-day chips. I wipe the brush once on the rim and apply a near-invisible film as the base. That small detail reduces pooling at the cuticle and keeps edges crisp. Works well under two-coat opaque systems.
Mistake to Avoid: Layering thick base with thick color, leading to early lifting and edge cracking.
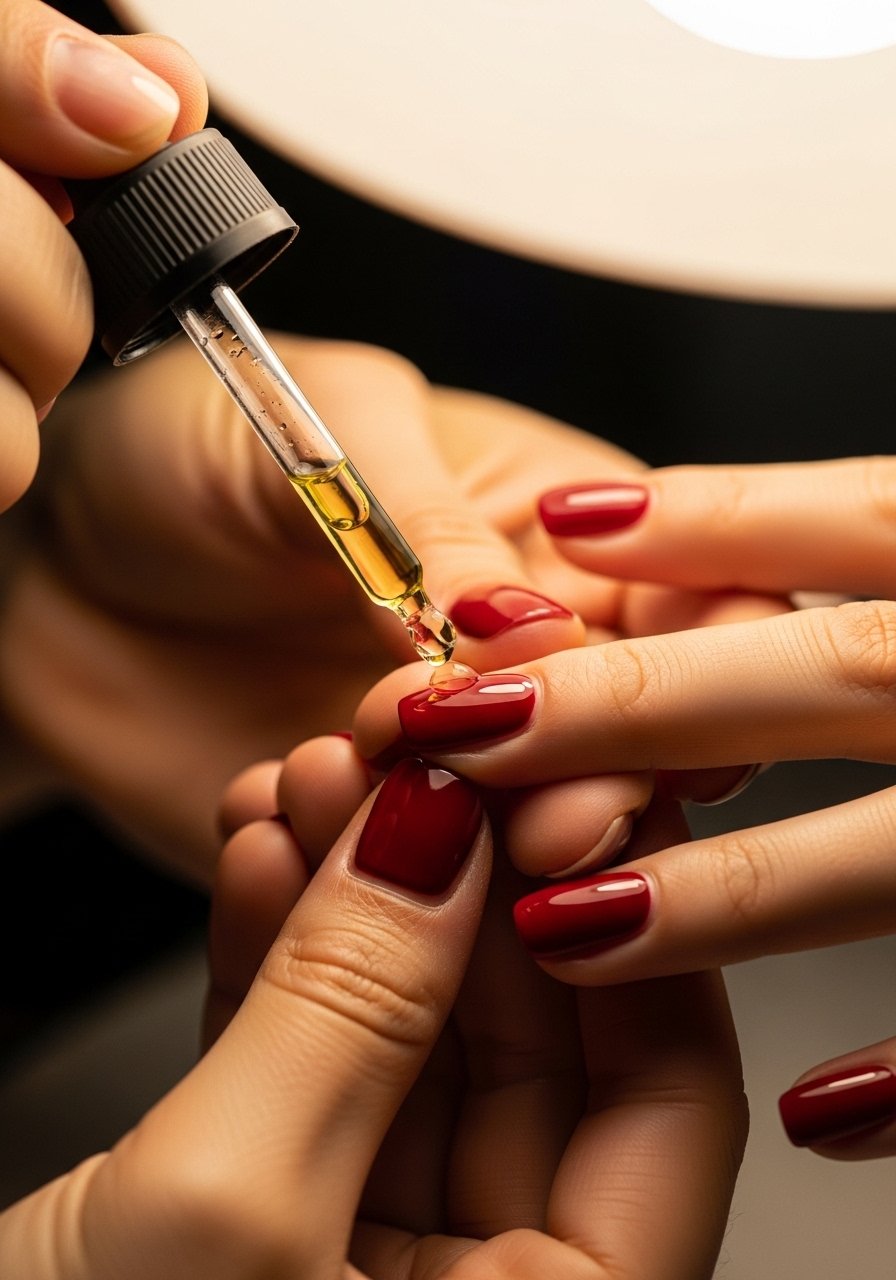
14. Cuticle Oil After Cure, Not Before
Style/Vibe: Nourishing, finishing touch
Best For: Dry cuticles and long-term nail health
Skill: Beginner
Apply cuticle oil after the top coat is fully cured or dry. Oil before can interfere with adhesion and shorten wear. Use two drops per nail and massage for five seconds. The oil soaks in and makes the nails and surrounding skin look finished. I keep a small pen in my bag for midday refreshes, but never before the base step. This keeps the mani lasting and the skin happy.
Mistake to Avoid: Oiling cuticles before applying base, which prevents proper adhesion.
15. Use a Strengthening Base Sparingly
Style/Vibe: Health-forward, subtle
Best For: Brittle nails needing reinforcement
Skill: Beginner
Strengthening bases can be mildly drying. Use them in cycles, two to three weeks on, then a week off with a flexible base. The result is stronger plates without long-term brittleness. Apply one thin layer only. Pair with cuticle oil nightly to counteract dryness. This is a competitor gap I noticed, many guides never suggest cycling bases for health.
Mistake to Avoid: Using strengthening base every week without breaks, which can make nails rigid and prone to splitting.
16. Test the Brush Flow on Paper
Style/Vibe: Calm, methodical
Best For: People who get globby brush starts
Skill: Beginner
Before the first nail, press one stroke on scrap paper to check flow. If it puddles, wipe the brush and apply thinner layers. This saves you from flooding the cuticle and having to clean up. It is a tiny habit but prevents a whole set being ruined by one heavy brush load. Pair this with the brush-angle trick from idea 6 for clean lines.
Mistake to Avoid: Dipping and going without testing, which causes cuticle flooding and cleanup.
17. Use Peel-Off Tape for Clean Cuticles
Style/Vibe: Precise, protected
Best For: Beginners and those doing bright colors at home
Skill: Beginner
Apply a thin strip of peel-off liquid or tape around the skin before painting. Remove after the top coat cures for perfect skin. It saves editing time and keeps the base coat from contaminating the skin. This is a good trick for people who prefer bold shades without a salon cleanup. Use sparingly on delicate skin. It bumps your finish from messy to neat.
Mistake to Avoid: Skipping protection and relying on acetone cleanup, which can thin the top and cause lifting.
18. Use a Bonding Base for Acrylic and Tips

Style/Vibe: Builder-friendly, reinforced
Best For: Acrylics and press-ons
Skill: Intermediate
When using tips or acrylics, use a bonding base designed to adhere to both natural nail and overlay. It creates a bridge so tips do not pop at the sidewalls. Apply thinly and cap the free edge. The result is fewer popped tips after the first week. If you wear press-ons, a bonding base reduces edge separation significantly.
Mistake to Avoid: Using a standard base under acrylic, which leads to early lifting and separation.
19. Flash Cure Between Steps for Gel Polish
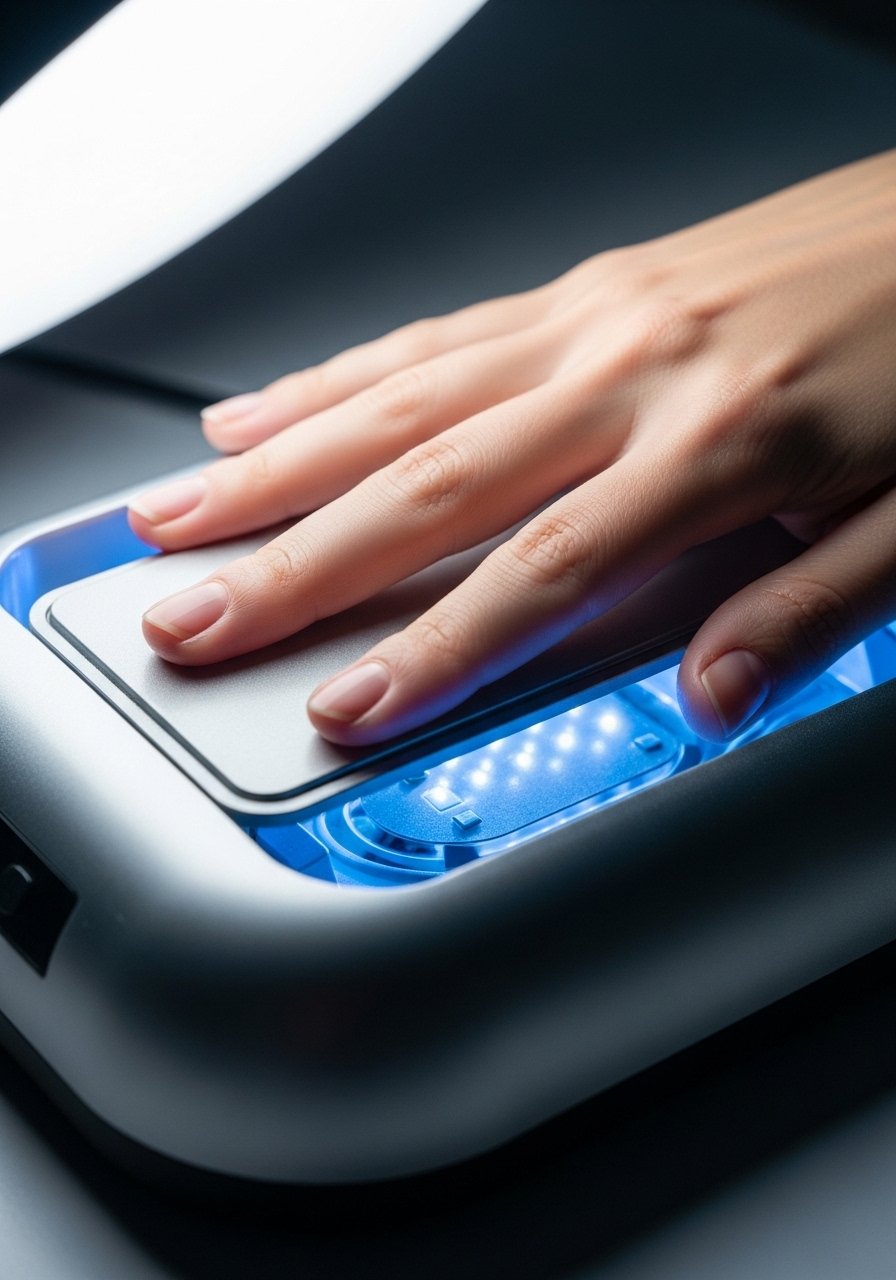
Style/Vibe: Efficient, salon-true
Best For: Gel polish users who get smudges
Skill: Intermediate
Do a 5 to 10-second flash cure after the base coat if your lamp allows it. This firms the layer slightly so your first gel color application does not drag. The visual payoff is cleaner lines and fewer smudges. Use manufacturer-recommended times for full cure. It adds a couple of extra lamp cycles but saves redoes.
Mistake to Avoid: Leaving the base uncured and applying wet color, which causes streaks and pooling.
20. Thin the Base When It Thickens with Age
Style/Vibe: Economical, resourceful
Best For: People who keep polish for months
Skill: Beginner
If a base coat thickens, add a couple of drops of dedicated nail thinner, not acetone. Stir gently and test on a scrap nail. This restores flow and avoids buying a new bottle every time. The right thinner preserves resin properties. Many people toss expensive bottles unnecessarily when a few drops bring them back.
Mistake to Avoid: Adding acetone to thin the base, which breaks the formula and shortens wear.
21. Store Bottles Upright and Cool
Style/Vibe: Organized, practical
Best For: Anyone with a small collection
Skill: Beginner
Keep base coats upright and out of direct sunlight, ideally under 70 degrees. Heat and frequent opening accelerate thickening. The small habit keeps formulas stable for months. If you travel, lay them flat in a padded pouch. This reduces the number of bottles you discard and keeps your base behaving predictably.
Mistake to Avoid: Storing bottles on their side or in hot cars, which thickens and destabilizes the polish.
22. Edge-Seal with a Flexible Top Coat
Style/Vibe: Final-polish, lasting finish
Best For: Anyone wanting maximum wear
Skill: Beginner
After curing or drying, seal the free edge with a flexible top coat. The flexible formula moves with the nail and prevents chips where polish usually fails. For gel systems use a non-wipe top coat to avoid fogging. This step is the finishing guard that made my sets last from three days to eight days consistently. Pair with daily cuticle oil for best results.
Mistake to Avoid: Skipping edge sealing and assuming the top coat alone will stop tip wear.
Your Nail Kit
Honestly the tools you actually use matter more than having a dozen bottles. Lint-free wipes, pack of 100 ($8). For night-time repair, cuticle oil pen, 3-pack ($12). A compact file set is essential, try 100/180 grit glass file set ($10). For prep, nail dehydrator ($7). Keep a pH-balancing nail prep ($9). For gel users, standard 36W LED lamp ($25-$40). A thin-bristled angled brush helps clean cuticles, angled cleanup brush ($6). For peelable removals, peel-off base solution ($9). Keep a nail thinner bottle ($7). A flexible base coat option, flex base coat ($12). For strengthening cycles, protein-strength base coat ($14). And a quick-dry non-gel top coat, fast dry top coat (~$8).
Nail Tips That Save a Mani
Thin coats beat one thick coat every time. Three thin layers of a fast-dry top coat look smoother and last longer than one gloopy layer. Let each layer flash for 10 seconds.
Grab a small angled cleanup brush for $6. Use it with a drop of acetone to refine cuticle lines immediately after painting, not later.
If your nails feel slick, one light pass with a 240-grit buffer centers the plate without over-thinning. 240-grit buffer block prevents polish from sliding off glossy nails and saves redoes.
A tiny observation: heating the base for a few seconds before cure melts surface tension and helps self-levelers. Keep a small warming lamp nearby for quick sessions.
Most people skip test-strokes. Try a single test stroke on scrap paper with the base bottle you plan to use to check flow and avoid cuticle floods.
