
I kept choosing designs because they looked cool on Instagram, then waking up a week later wishing the placement was different. The moment it clicked was watching my sleeve bunch oddly when I reached for a jar, and realizing the story I wanted had to sit with my daily life, not against it. That change in thinking is the difference between a photograph and something I still like in the mirror.
If you want tattoos that read like sentences, these ideas lean modest in scale and honest in detail. Most are doable in a single session, many sit in the $100 to $350 range depending on line work and shadow, and they fit people who want visible pieces or coverable options. I pulled these from sketches and conversations across five shops I have visited, so there are realistic timing and healing notes in each entry.
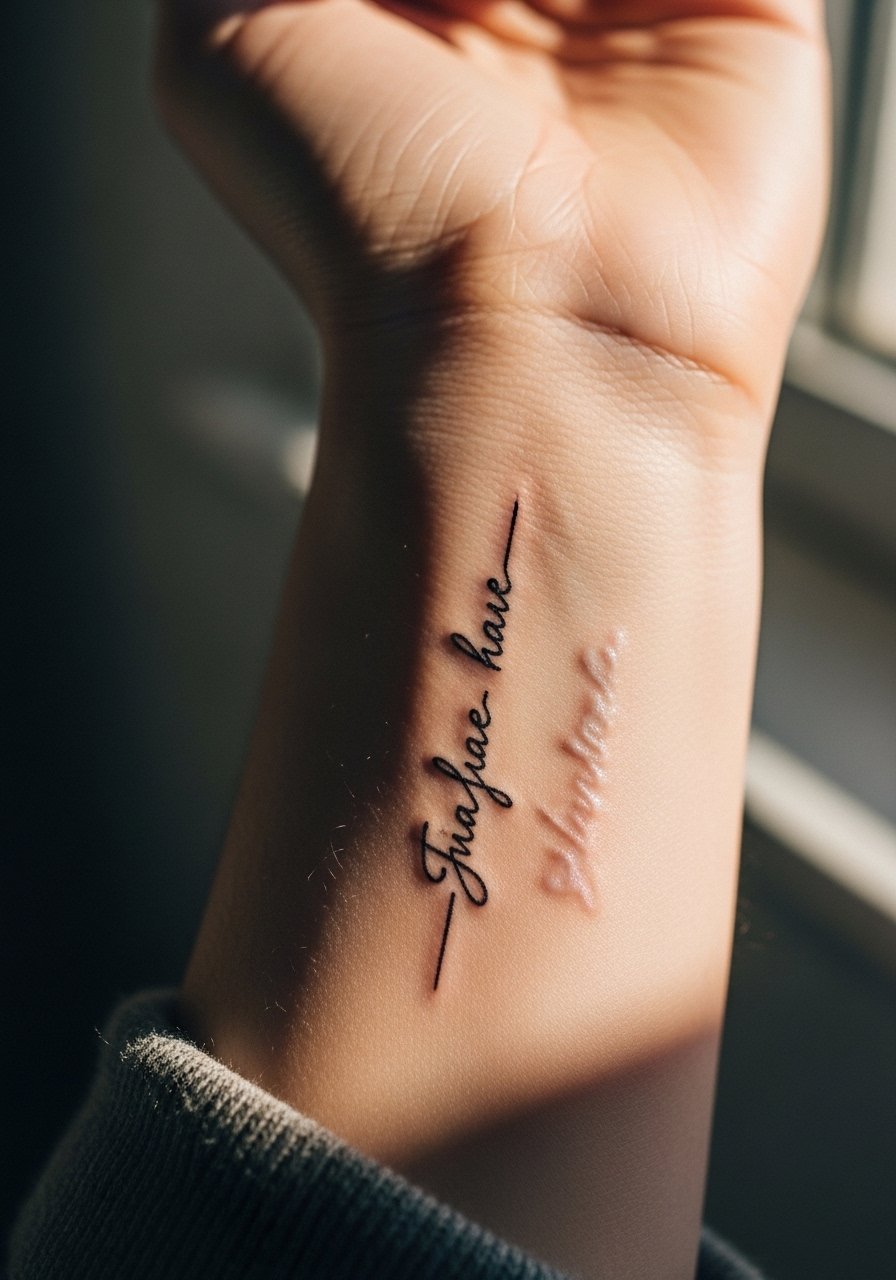
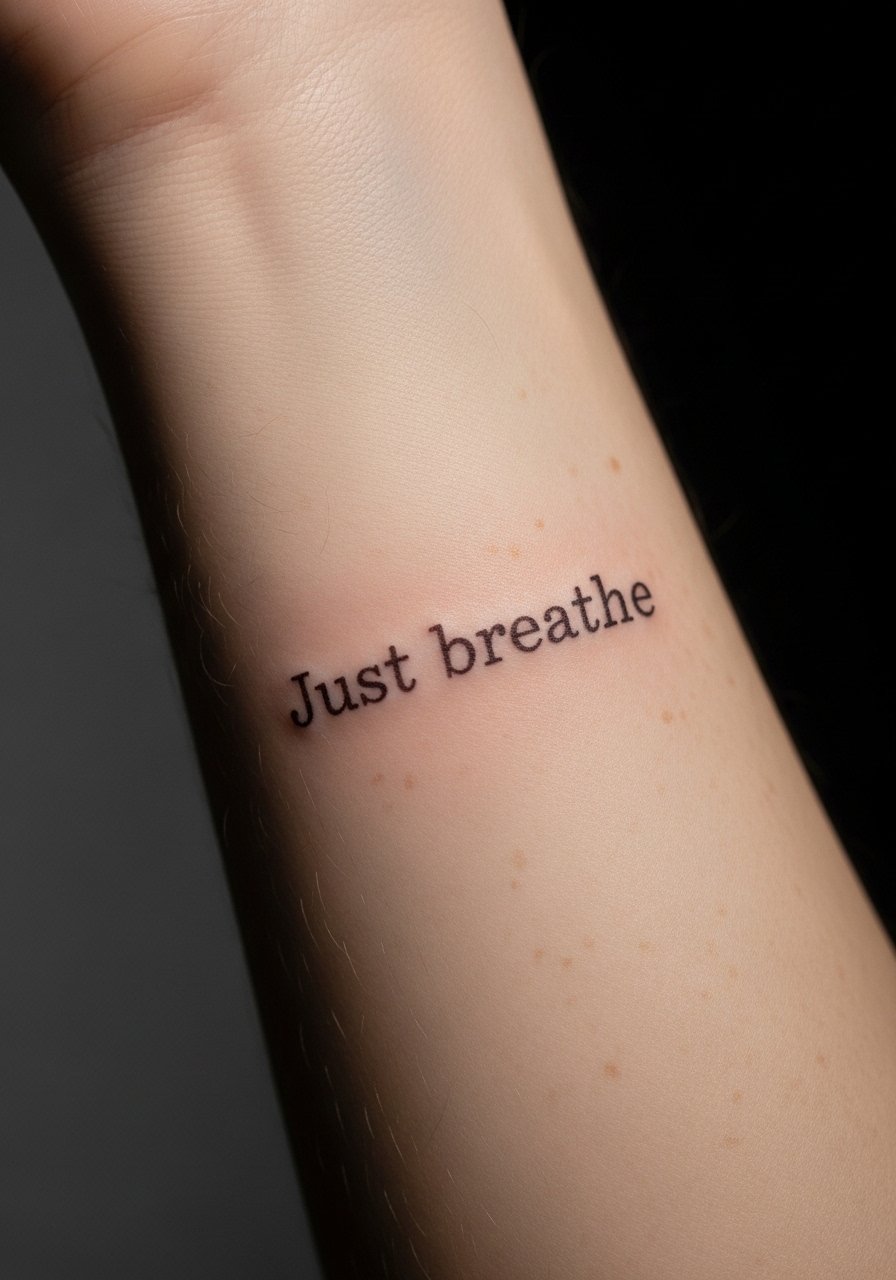
1. Tiny Script That Wraps a Memory
Style/Technique: Fine-line script
Pain Level: 3/10
Session Time: 30 minutes to 1 hour
Best For: Inner wrist, forearm, people who want discreet text
A delicate cursive phrase, a single word, or a date can read like a private journal entry. Keep the scale to 1.5 to 2.5 inches so letters stay legible after settling. It works for anyone who wears watches or bracelets, but avoid placing the baseline where a strap lands. For sustainable ink, ask for a single pass with extra-straight needles and a follow-up touch-up after 6 to 8 weeks. Consider a fine-line needle pack for reference when discussing technique.
Mistake to Avoid: Placing script too small, which makes letters blur together as the ink spreads.
2. Single-Stem Floral With Hidden Meaning

Style/Technique: Botanical linework
Pain Level: 4/10
Session Time: 45 minutes to 2 hours
Best For: Ankle, ribs, behind the ear
A one-stem flower holds a lot of narrative without shouting. Pick a bloom with personal meaning, scale it to 2 to 3 inches, and keep the lines varied: one slightly heavier outline and hair-fine interior veins. This gives texture that ages well and avoids the washed-out look of single-weight lines. For aftercare, use a fragrance-free healing ointment for the first three days. Bring an image on your phone and a clean cotton sock if the ankle placement needs padding during healing. See fragrance-free tattoo ointment for options.
Mistake to Avoid: Choosing overly dense shading, which can look muddy on small, mobile areas.
3. Tiny Portrait Line With One Accent
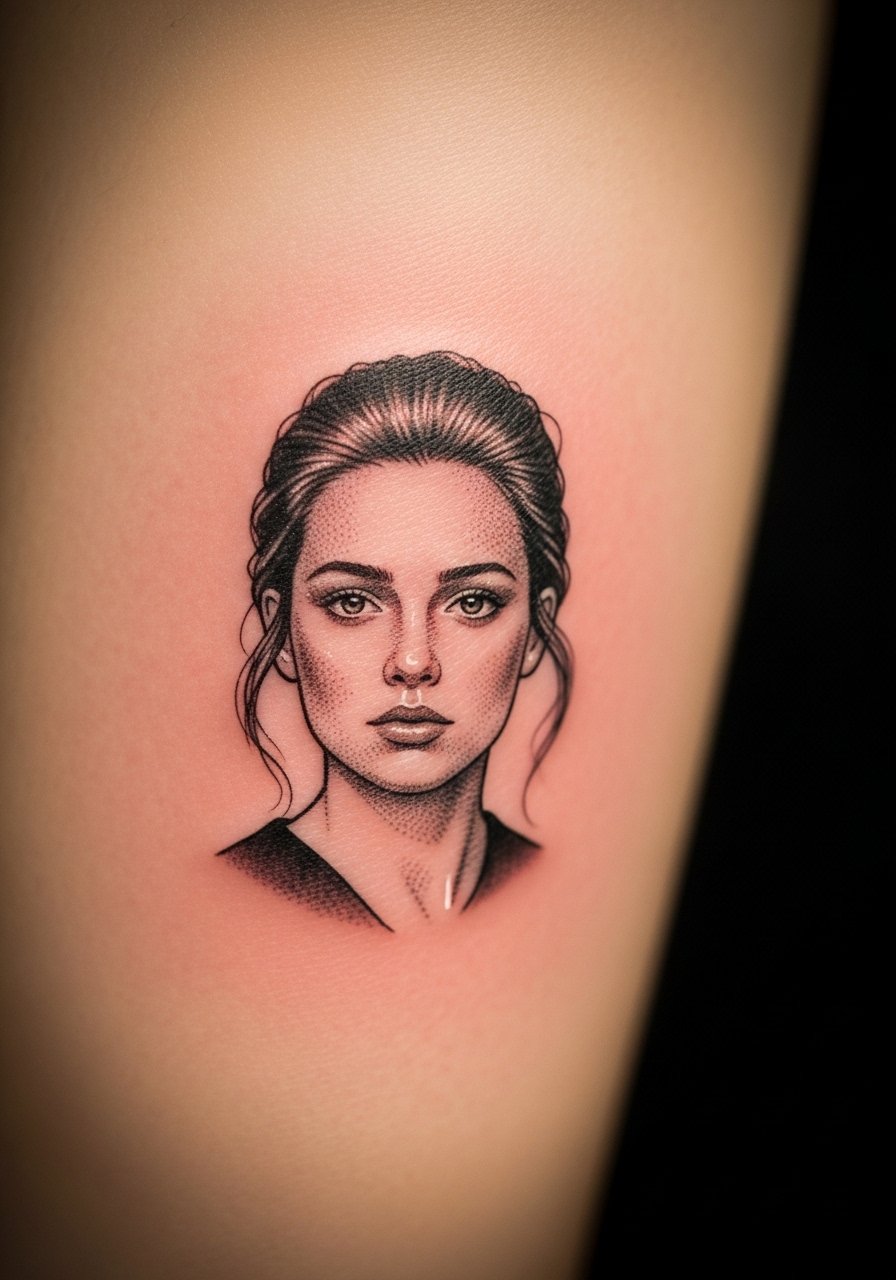
Style/Technique: Micro-portrait linework
Pain Level: 5/10
Session Time: 1 to 2 hours
Best For: Inner arm, chest, coverable placements
A small linear portrait captures someone you love without turning into a full realism piece. Keep the face simplified to 20 to 30 key strokes and add one colored accent, like a single red heart or a blue collar. This keeps costs down and makes touch-ups predictable. Bring a high-contrast photo for the artist. Expect a light touch-up at 3 months if you choose delicate gray washes. Ask your artist about needle grouping so the hairlines read for years.
Mistake to Avoid: Bringing a low-resolution photo, which forces the artist to guess details.
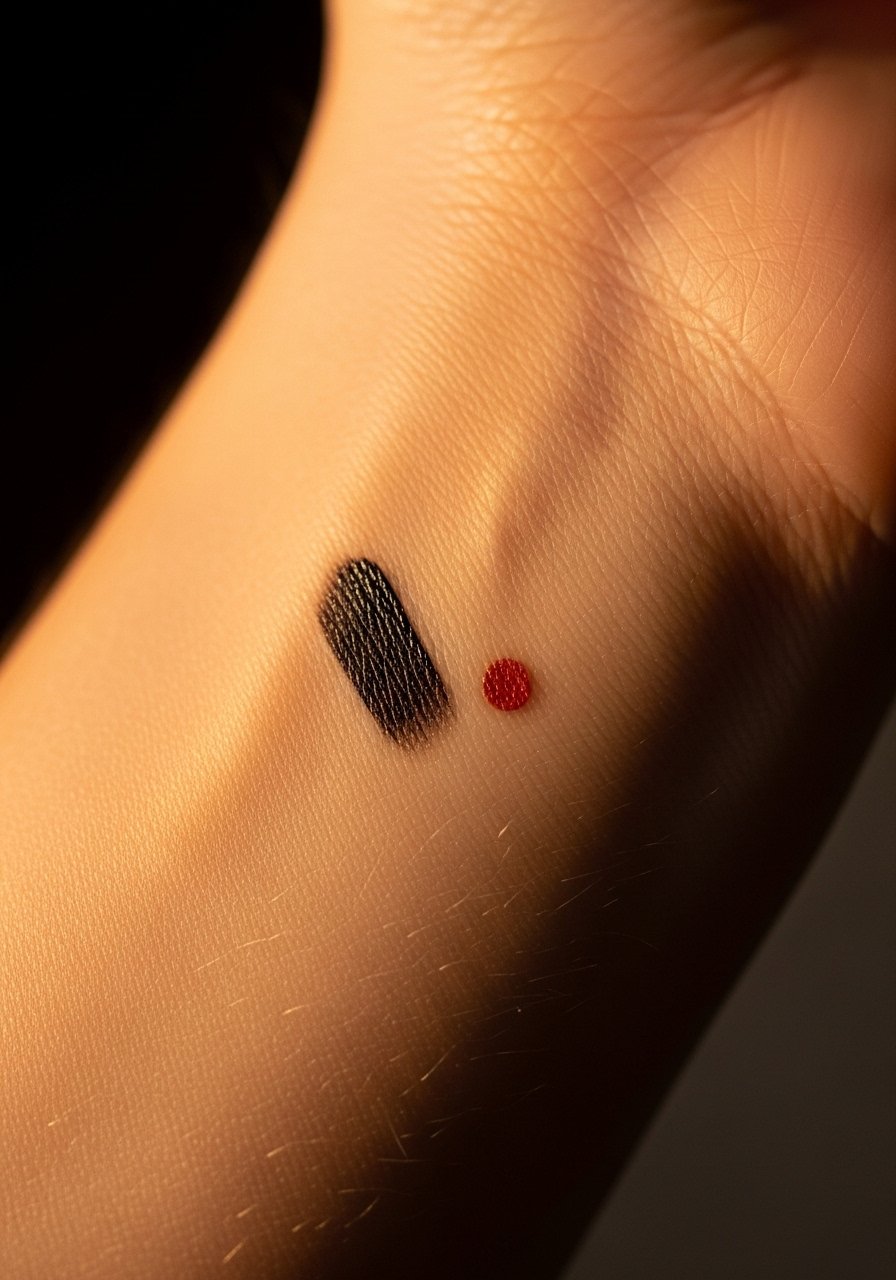
4. Coordinates With a Tiny Map Mark

Style/Technique: Numeric with tiny emblem
Pain Level: 2/10
Session Time: 20 to 45 minutes
Best For: Forearm, collarbone, people who travel
Numbers are clean but sterile. Add a 0.25- to 0.5-inch dot, a tiny compass rose, or a micro-map sketch to anchor the coordinates to a place. Keep spacing between numerals at least 4 mm so lines do not blur together. This is a good work-visible option because it looks like a minimalist bracelet from a distance. Bring your own font idea or choose a classic typeface with your artist to avoid odd kerning.
Mistake to Avoid: Cramming too many numbers close together, which blurs as it heals.
5. Tiny Animal Silhouette With One Detail
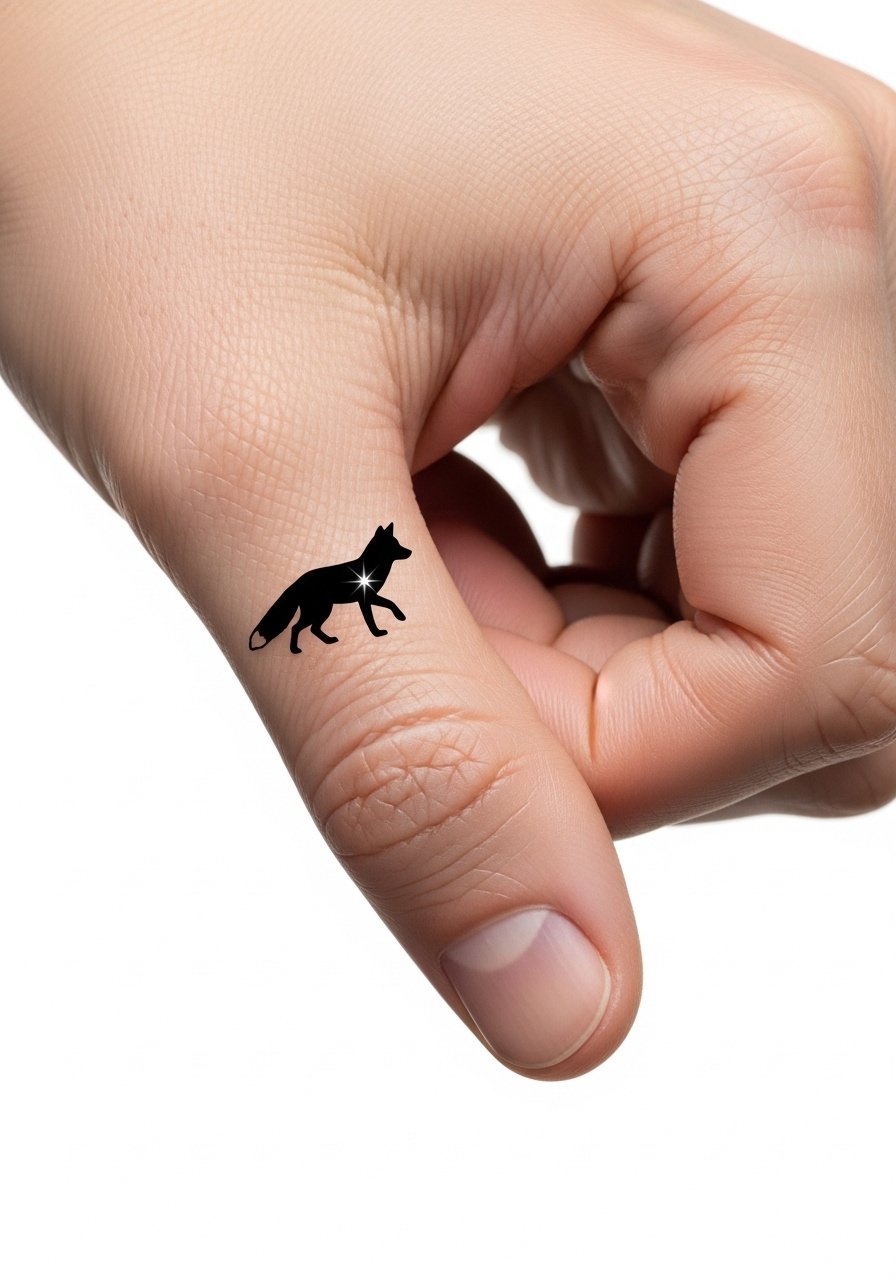
Style/Technique: Solid silhouette with micro-detail
Pain Level: 4/10
Session Time: 30 to 60 minutes
Best For: Hand, wrist, ankle
A silhouette of a pet or spirit animal reads easily from a distance and still tells the story up close when there is a single white ink dot or thin line for the eye. Size matters here; aim for 1 to 2 inches so fills pack evenly. White highlights can fade faster, so budget for a refresh at 9 to 12 months if you want them to stay crisp. Ask your artist about using slightly thicker outlines around the shape to protect internal fill.
Mistake to Avoid: Using white ink as the sole defining element, which disappears quickly.
6. Constellation With Personal Star

Style/Technique: Dotwork and single-line connector
Pain Level: 3/10
Session Time: 30 minutes to 1 hour
Best For: Inner bicep, ribcage, behind the collar
A thin-dot constellation feels like a private map of a night. Keep the main lines at least 1.5 mm apart and make one star slightly larger to mark the person or moment. This works across skin tones when dots are spaced to avoid merging during the healing process. Dotwork takes longer than it looks, so expect longer needle time for crisp separation. Pack a moisturizing lotion for the second week to keep the dots from scabbing too thickly.
Mistake to Avoid: Placing the design over a scar or stretch area, which can distort the pattern.
7. Miniature Landscape Strip
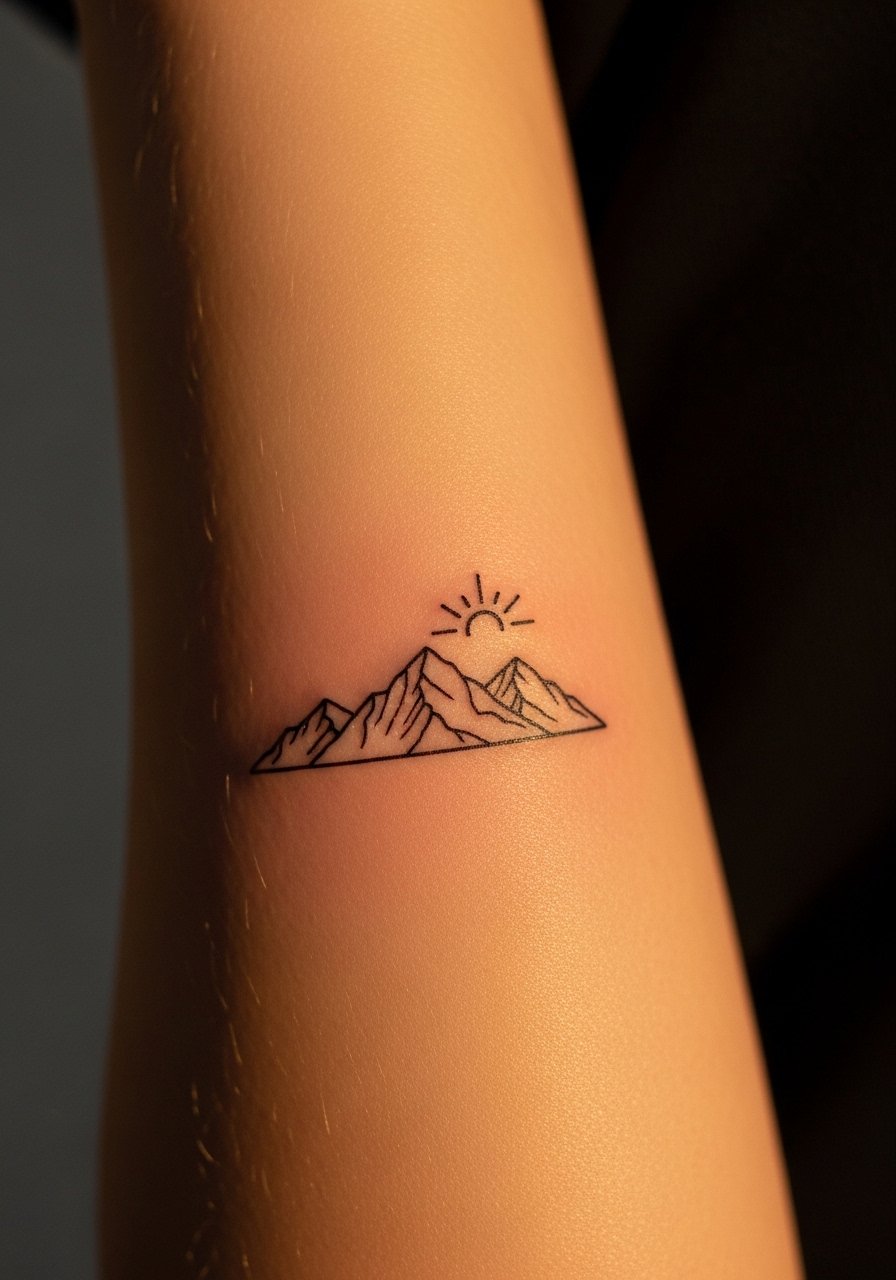
Style/Technique: Mini landscape linework
Pain Level: 4/10
Session Time: 45 minutes to 1.5 hours
Best For: Forearm band, upper arm, calf
A 3- to 4-inch strip of horizon can compress a scene into a wearable storyboard. Use varying line weight for distance, a thin foreground line, and a slightly thicker ridge line for mountains. This prevents the background from dissolving as it heals. It reads well on most body types and is a good choice if you want a visible piece that tucks under sleeves. Bring a reference photo and mark a 3-inch stencil area in the shop to check placement.
Mistake to Avoid: Requesting too much tiny detail in a very narrow band, which will blur.
8. Single-Needle Geometric Symbol

Style/Technique: Single-needle geometry
Pain Level: 3/10
Session Time: 30 minutes to 1 hour
Best For: Wrist, behind ear, finger
Geometric tattoos with consistent angles read as icons rather than art projects. Keep angles true and the largest measure about 2 inches across. Single-needle work needs a steady hand and costs more than it looks because every dot is deliberate. Ask for a digital stencil mock-up so you can see alignment with wrist bones or finger joints. This style pairs well with script from idea 1.
Mistake to Avoid: Asking for perfect symmetry without considering the natural asymmetry of your wrist.
9. Minimalist Line Portrait With Negative Space
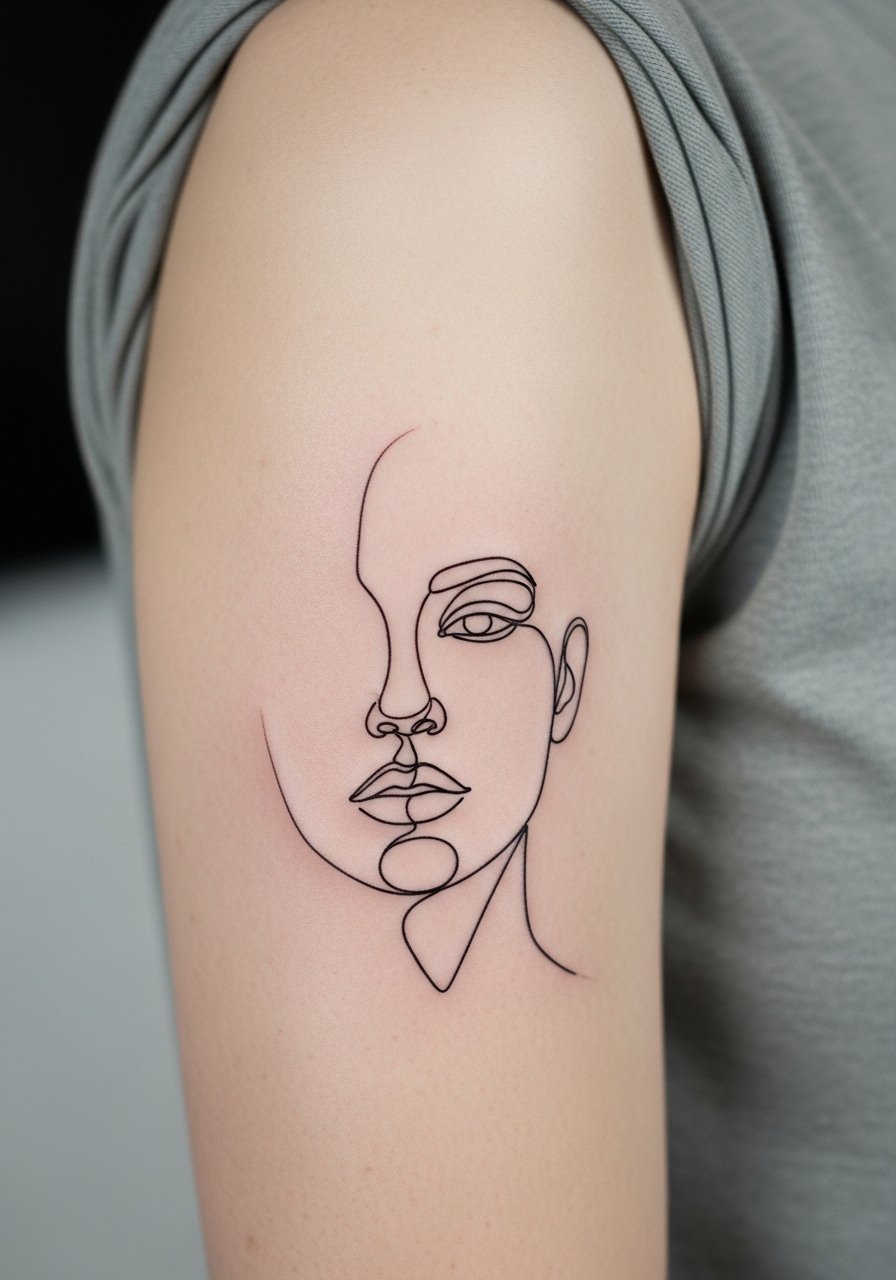
Style/Technique: Continuous line with negative space
Pain Level: 5/10
Session Time: 1 to 2 hours
Best For: Upper arm, thigh, torso
The single continuous line portrait uses empty areas to suggest features. Keep the overall size to 3 to 4 inches, and let the negative spaces breathe by not crowding them with shading. This approach suits people who want an artistic, modern feel and works on most skin tones because contrast comes from line density. Request a mock-up that shows how the piece sits when your arm is at rest.
Mistake to Avoid: Compressing the line portrait into a tiny 1-inch area that loses definition.
10. Small Botanical Band That Wraps

Style/Technique: Repeating botanical motif
Pain Level: 4/10
Session Time: 45 minutes to 1.5 hours
Best For: Wrist, ankle, upper arm
A thin botanical band is a wearable piece that hides movement well. Keep repeat motifs at least 3 mm apart so the pattern does not merge. Bands are great for people who want jewelry-like tattoos and who frequently wear bracelets. If you plan to wear watches, place the band just above or below the strap area to avoid friction. Use a light wash for depth rather than heavy fill so it ages with less patchiness.
Mistake to Avoid: Placing the band where daily straps or clothing will rub continuously.
11. Micro-Scene Inside a Circle

Style/Technique: Circular micro-scene
Pain Level: 4/10
Session Time: 1 to 2 hours
Best For: Chest, shoulder, upper back
Framing a scene inside a small circle makes it feel like a keepsake. Keep the circle 2 to 3 inches so interior details read after healing. Use a slightly thicker border ring to prevent internal lines from bleeding into edges. This design works well on chest areas because movement is moderate and the skin is relatively flat. Plan for a touch-up at 6 to 12 months if you include fine dotwork inside.
Mistake to Avoid: Making the circle too small, which collapses interior detail into a blob.
12. Tiny Script in a Loved One’s Handwriting
Style/Technique: Handwriting reproduction
Pain Level: 3/10
Session Time: 30 minutes to 1 hour
Best For: Inner forearm, ribs, shoulder blade
Translating actual handwriting into ink is intimate and personal. Scan at high resolution, scale to 1.5 to 2.5 inches, and ask your artist to adjust spacing to accommodate skin movement. Handwriting with tall ascenders or deep descenders needs extra vertical space so letters do not touch when swelling occurs. Keep the ink slightly darker on the first pass to compensate for the softening that happens in the settled stage.
Mistake to Avoid: Choosing a scribbly sample that lacks clarity when scaled down.
13. Small Memorial Symbol With Hidden Date

Style/Technique: Symbol plus micro-numerals
Pain Level: 4/10
Session Time: 30 minutes to 1 hour
Best For: Collarbone, inner wrist, behind ear
A miniature emblem, like a small anchor or candle, anchored with a tiny tucked date, reads private and intentional. Keep the date in 1 mm numerals and hide it under an arm fold or hairline for privacy. This makes it coverable in professional settings. Use slightly heavier linework on the symbol and hair-fine numerals for the date so the symbol stays bold while the date stays subtle.
Mistake to Avoid: Putting the date in the same weight as the symbol, which draws too much attention.
14. Single-Needle Constellation Ring
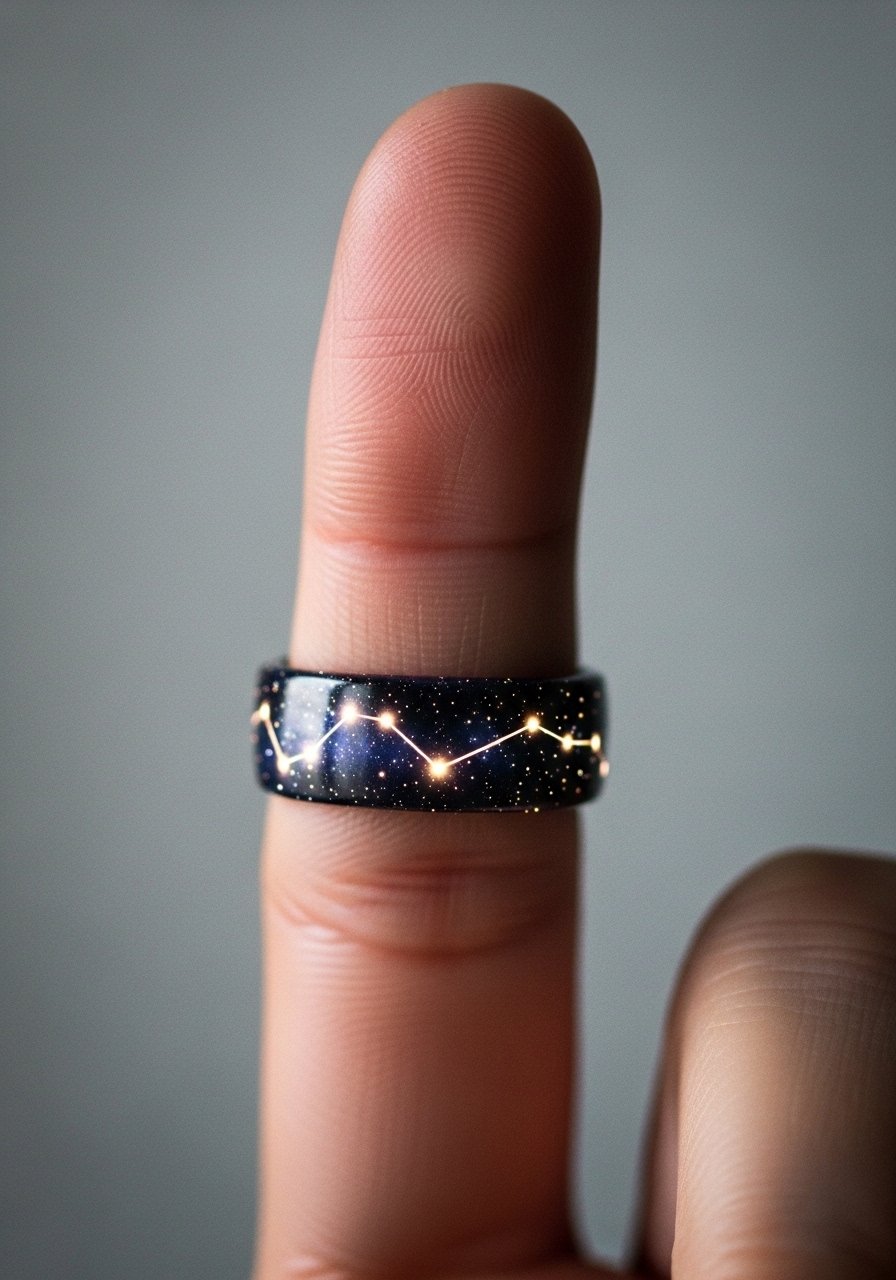
Style/Technique: Single-needle wrap ring
Pain Level: 6/10
Session Time: 30 minutes to 1 hour
Best For: Finger, very small ring placements
Finger tattoos fade faster but can be meaningful. Keep the design slim, and expect touch-ups every 6 to 12 months. Use single-needle dots spaced 2 to 3 mm apart and avoid heavy fills. If you work with your hands, place the ring slightly higher on the finger where abrasion is lower. Ask the artist about sealing techniques during healing to reduce early fading.
Mistake to Avoid: Choosing dense fills on fingers, which blur quickly.
15. Tiny Nautical Icon With Wave Line
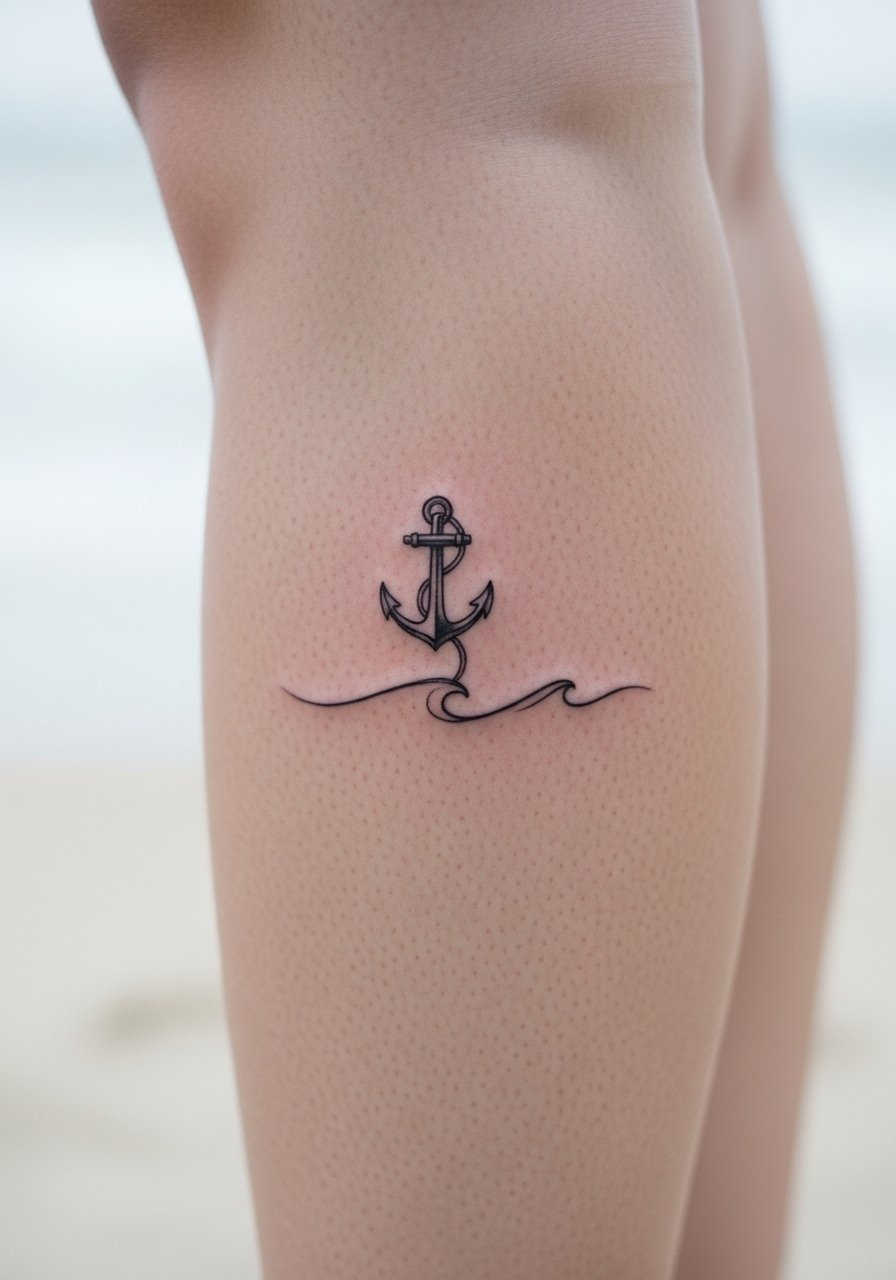
Style/Technique: Icon with fluid line
Pain Level: 4/10
Session Time: 30 minutes to 1 hour
Best For: Calf, ankle, forearm
A nautical icon paired with one flowing line creates movement without busy composition. Keep the wave line light and at least 1.5 mm from the icon edge. This pairing works well for people who want a travel-memory nod without a large piece. Consider a slightly darker outline on the icon so it still reads after a summer of sun. Bring a reference photo of the wave motion you like.
Mistake to Avoid: Using a thick wave line that competes with the icon for attention.
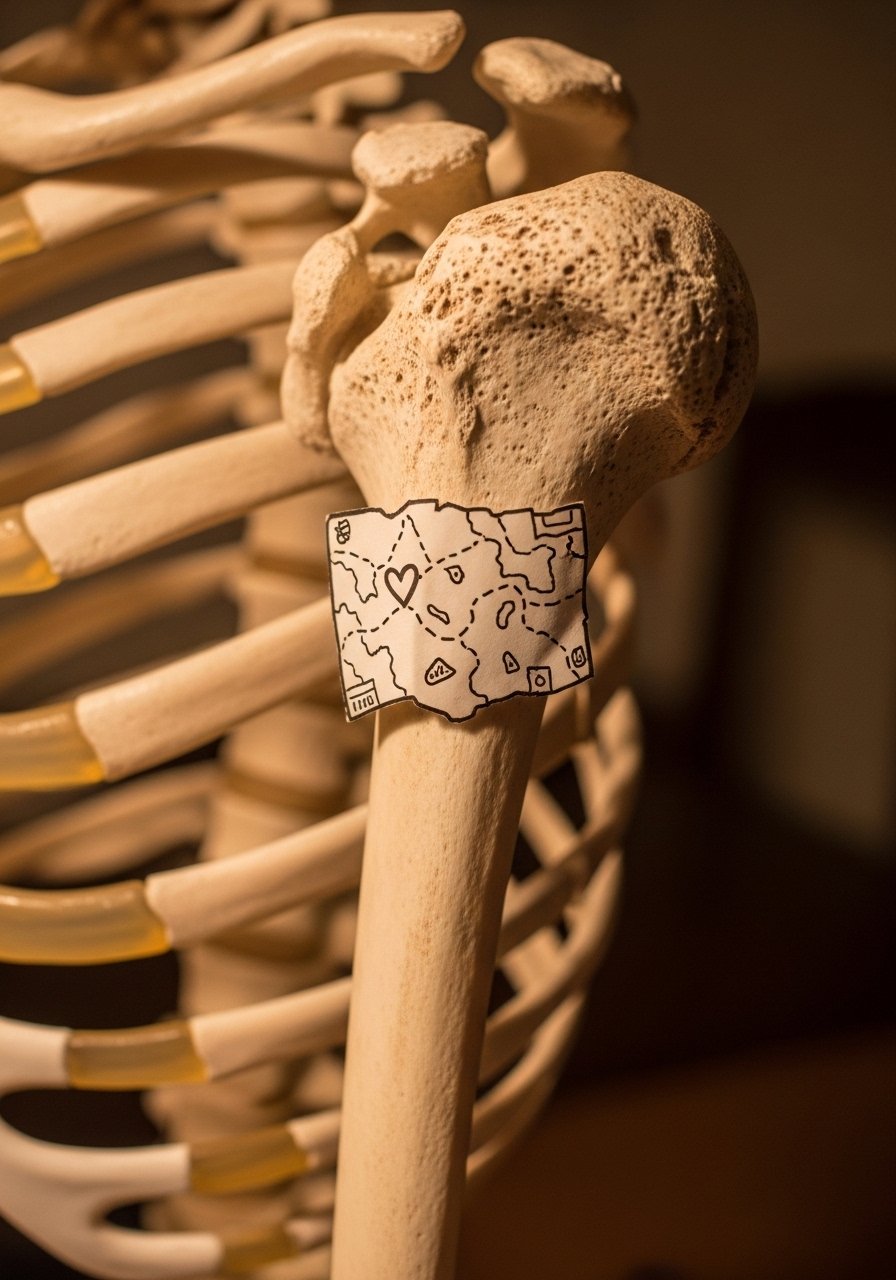
16. Micro-Map With a Tiny Heart
Style/Technique: Sketch-map and emblem
Pain Level: 5/10
Session Time: 1 to 2 hours
Best For: Ribs, side torso, hip
A hand-drawn mini map with a heart or dot marking a place looks like a secret code. Keep the map around 3 inches wide so coastlines are recognizable. Rib placements need longer recovery time, so plan a relaxed schedule. The artist can use lighter shading to suggest water without heavy fills. This idea pairs well with the script in idea 1 for an added phrase.
Mistake to Avoid: Compressing a whole map into a very small area that loses orientation.
17. Tiny Sound Wave of a Voice Clip
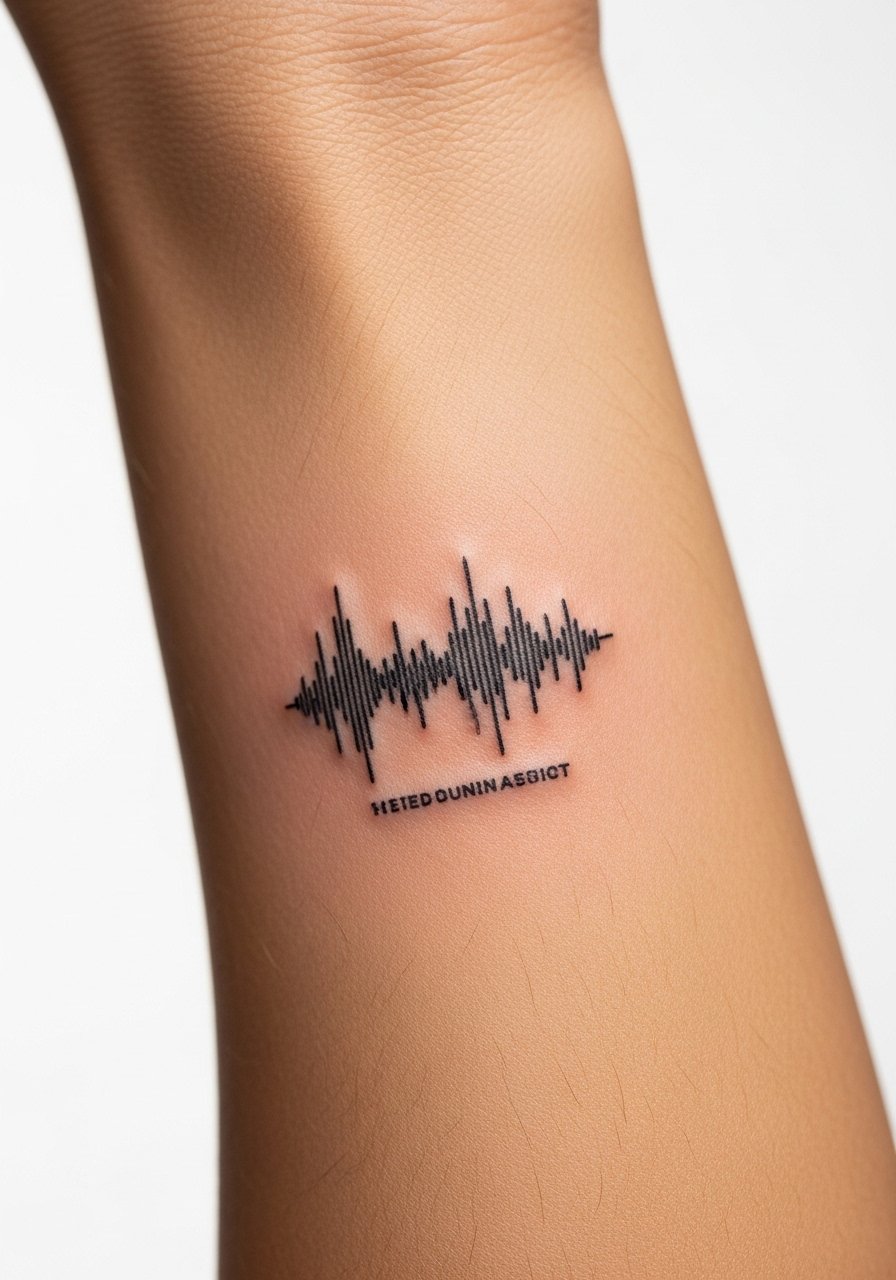
Style/Technique: Soundwave graphic reproduction
Pain Level: 3/10
Session Time: 30 minutes to 1 hour
Best For: Forearm, ribcage, chest
A snippet of a loved one speaking turned into a waveform is modern and private. Clip length should be under three seconds to keep the graphic clean, and scale the waveform to at least 2.5 inches for readability. Bring the actual audio so the artist can render a clean vector. Test the printout on skin to check how it reads at a glance.
Mistake to Avoid: Choosing a very long clip, which compresses the waveform into an unreadable line.
18. Mini Script Wrapped Around a Ring Finger
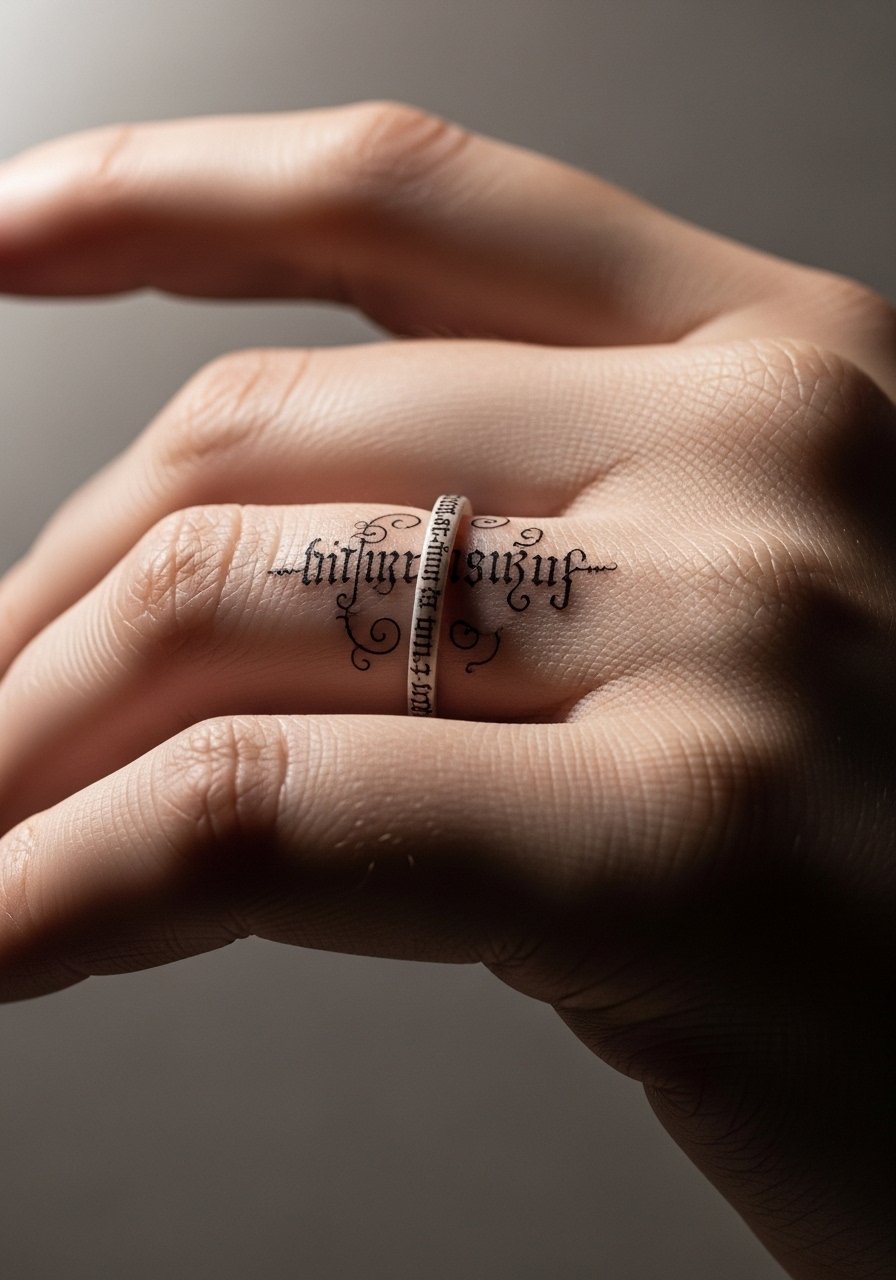
Style/Technique: Continuous micro-script ring
Pain Level: 6/10
Session Time: 30 minutes to 1 hour
Best For: Ring finger, people who want a permanent band
A ring of script reads like a band when spaced evenly. Keep characters at least 1.5 mm tall and avoid dense looping letters that snag on each other. Fingers are high-maintenance, so budget for annual touch-ups. If you wear a wedding band, place the tattoo either above or below it to prevent rubbing. A clear aftercare balm helps during the first two weeks.
Mistake to Avoid: Using thick lettering that fills the finger and fades into a dark band.
19. Tiny Travel Stamp With Date and Place
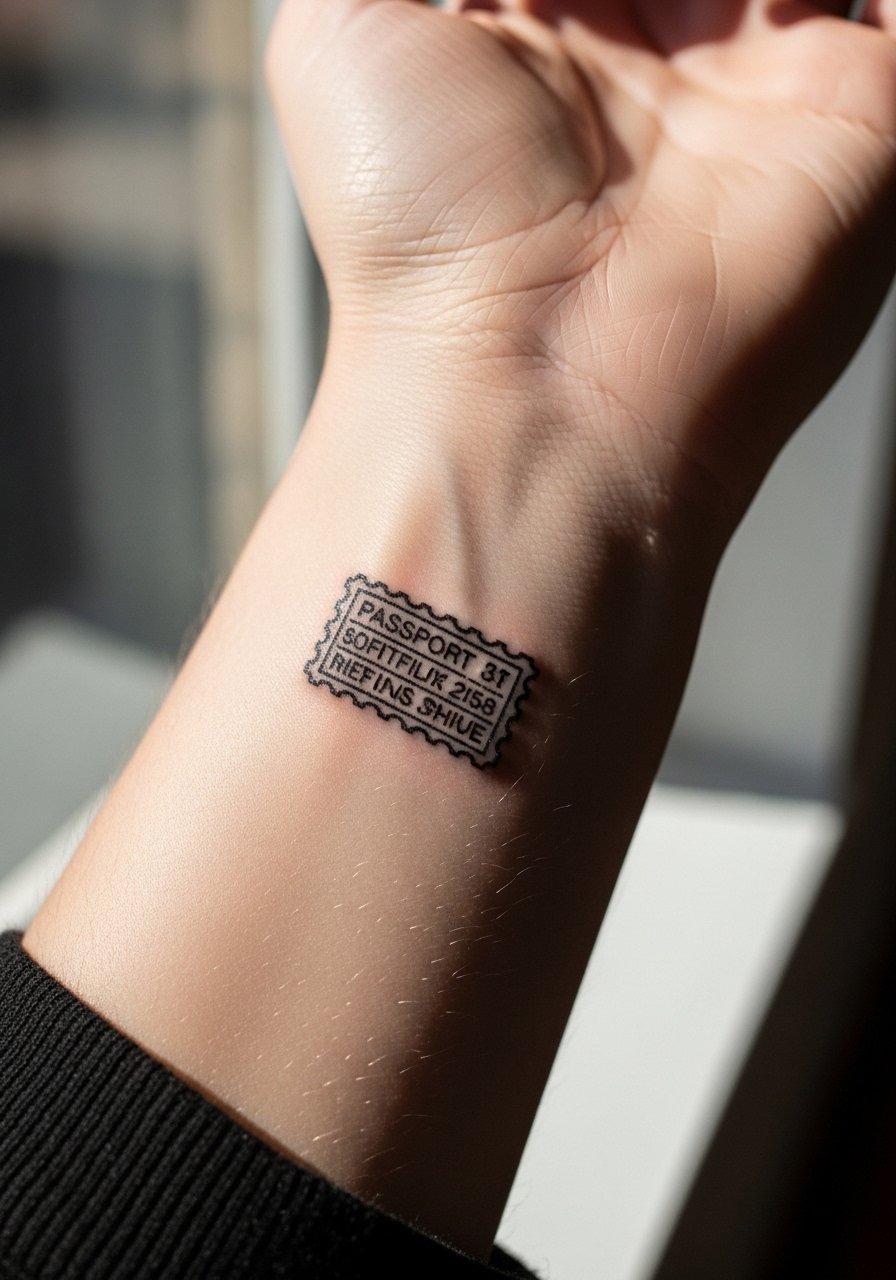
Style/Technique: Stamp-style emblem with microtext
Pain Level: 3/10
Session Time: 30 to 60 minutes
Best For: Wrist, ankle, behind ear
Stamps read like souvenirs. Use a circular stamp around 1.5 to 2 inches and pair it with a 1 mm date below. Keep inner text simple so it stays legible after settling. This approach is low-fuss and easy to cover with sleeves if needed. Ask the artist about line thickness for the outer ring so internal text does not fade into a dark disc.
Mistake to Avoid: Packing too much text into the interior of the stamp.
20. Tiny Botanical Seed With Growth Line
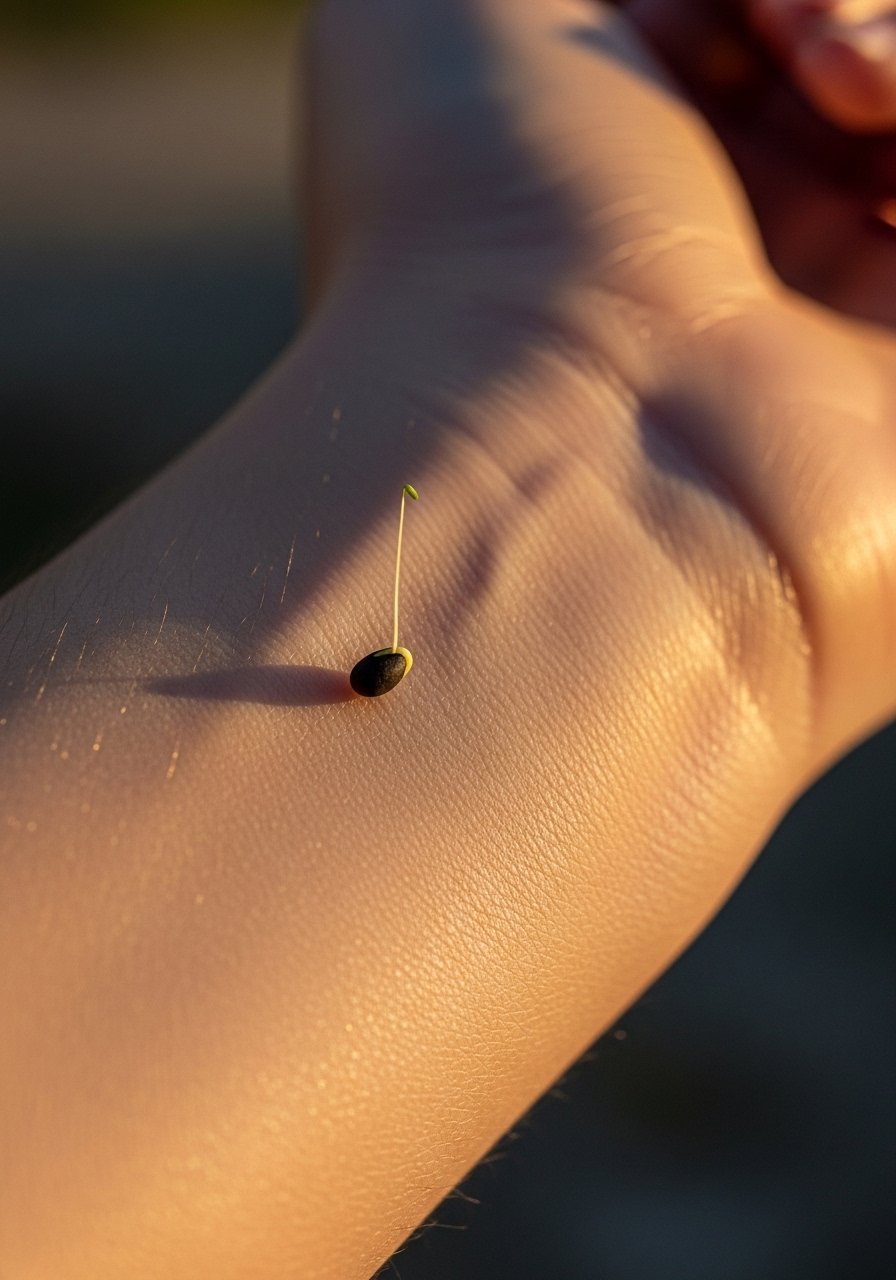
Style/Technique: Seed icon with vertical line
Pain Level: 2/10
Session Time: 20 to 45 minutes
Best For: Wrist, side finger, behind ear
A seed and single sprout line is a small narrative of growth. Keep the seed at 0.5 to 1 inch and the sprout line long enough to suggest upward motion, about 1.5 to 2 inches. This design is forgiving across skin types and works for people who want subtle symbolism. Use a slightly darker seed fill and a hair-fine sprout to maintain contrast through the early heal.
Mistake to Avoid: Making the sprout too short so the symbolism feels cramped.
21. Tiny Compass With Initials
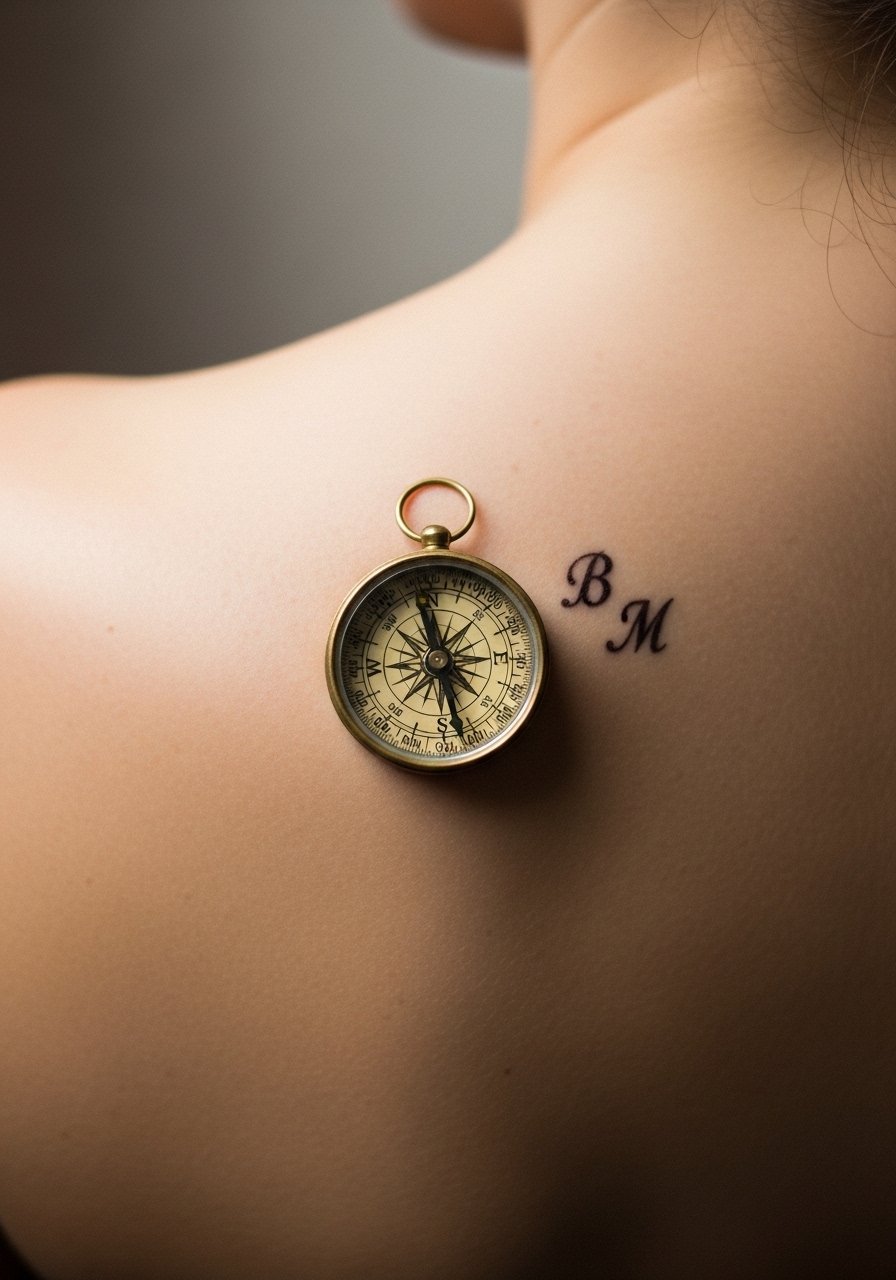
Style/Technique: Compass emblem with micro-letters
Pain Level: 4/10
Session Time: 45 minutes to 1.5 hours
Best For: Shoulder blade, upper back, chest
A compass with tiny initials is both direction and dedication. Keep the compass at 1.5 to 2.5 inches and place initials in a corner or inside the north point. This looks balanced on shoulders and covers easily if needed. Compasses age well when the outer points use slightly heavier lines to protect inner detail. Ask about spacing so letters remain distinct as the ink softens.
Mistake to Avoid: Putting initials too close to the compass center where they will blur.
22. Small Line-Only Animal Paw
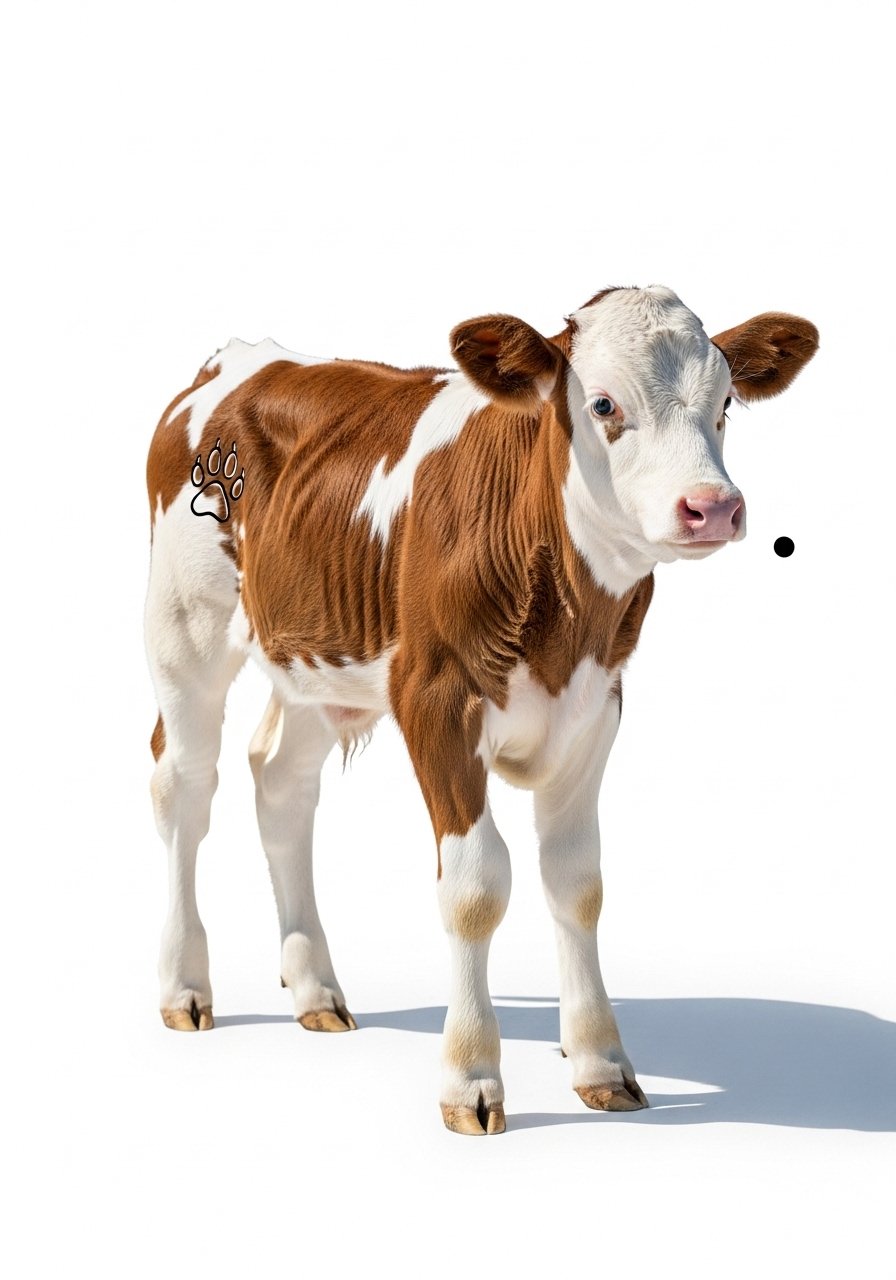
Style/Technique: Outline paw with micro-emblem
Pain Level: 3/10
Session Time: 30 minutes to 1 hour
Best For: Calf, forearm, ankle
A paw outline honors a pet in a graphic way. Keep the paw 1 to 2 inches, and consider adding a tiny dot or heart offset to personalize it. Outlines handle movement better than filled shapes in areas that bend. If you want color, add one small accent instead of full fill to keep maintenance low. This pairs well with idea 5 silhouette work.
Mistake to Avoid: Filling the paw solid on a small scale, which tends to patch unevenly.
23. Mini Literary Quote With Line Breaks
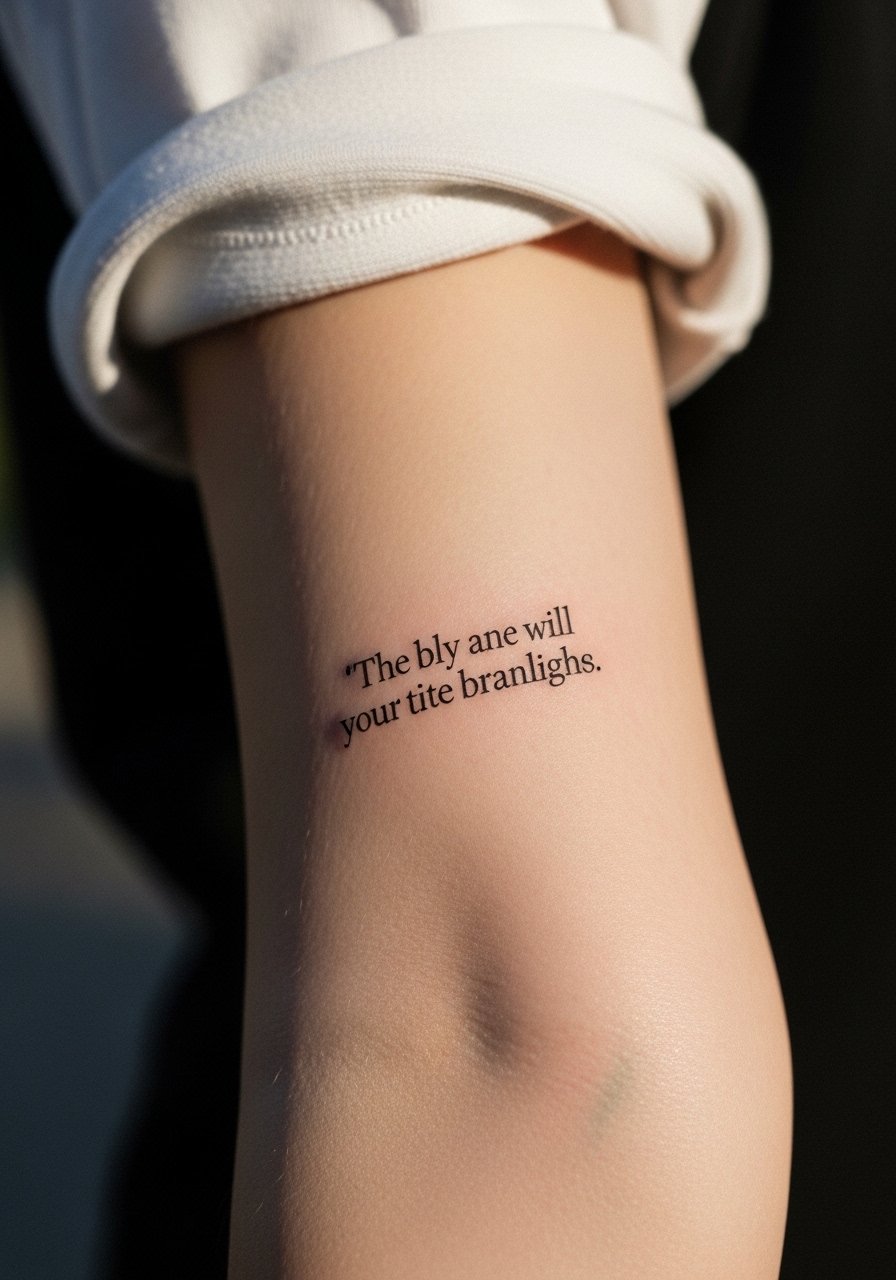
Style/Technique: Micro-quote with tidy line breaks
Pain Level: 3/10
Session Time: 30 minutes to 1 hour
Best For: Forearm, ribs, collarbone
Short quotes need deliberate line breaks. Keep each line under three words when scaled to 1.5 inches so the rhythm reads clearly. Use a serif or clean sans that your artist can reproduce at micro size. Test a printed mock-up against your skin to confirm spacing. Quotes age differently depending on ink depth, so plan for a 6-month check if you want crisp edges.
Mistake to Avoid: Asking for long sentences without reformatting, which compresses text and loses flow.
24. Tiny Abstract Mark With Personal Color Accent
Style/Technique: Abstract stroke with color pop
Pain Level: 2/10
Session Time: 20 to 45 minutes
Best For: Wrist, behind ear, ankle
An abstract mark and one small color accent reads like private punctuation. Keep the stroke 2 to 3 inches if it curves, or 1.5 inches if linear. Colored accents, especially red or blue, fade differently depending on skin tone and sun exposure, so factor in yearly touch-ups. This is a great option for people who want meaningful form without literal imagery.
Mistake to Avoid: Picking a neon or pastel color that loses vibrancy quickly.
25. Tiny Cultural Motif Done Respectfully
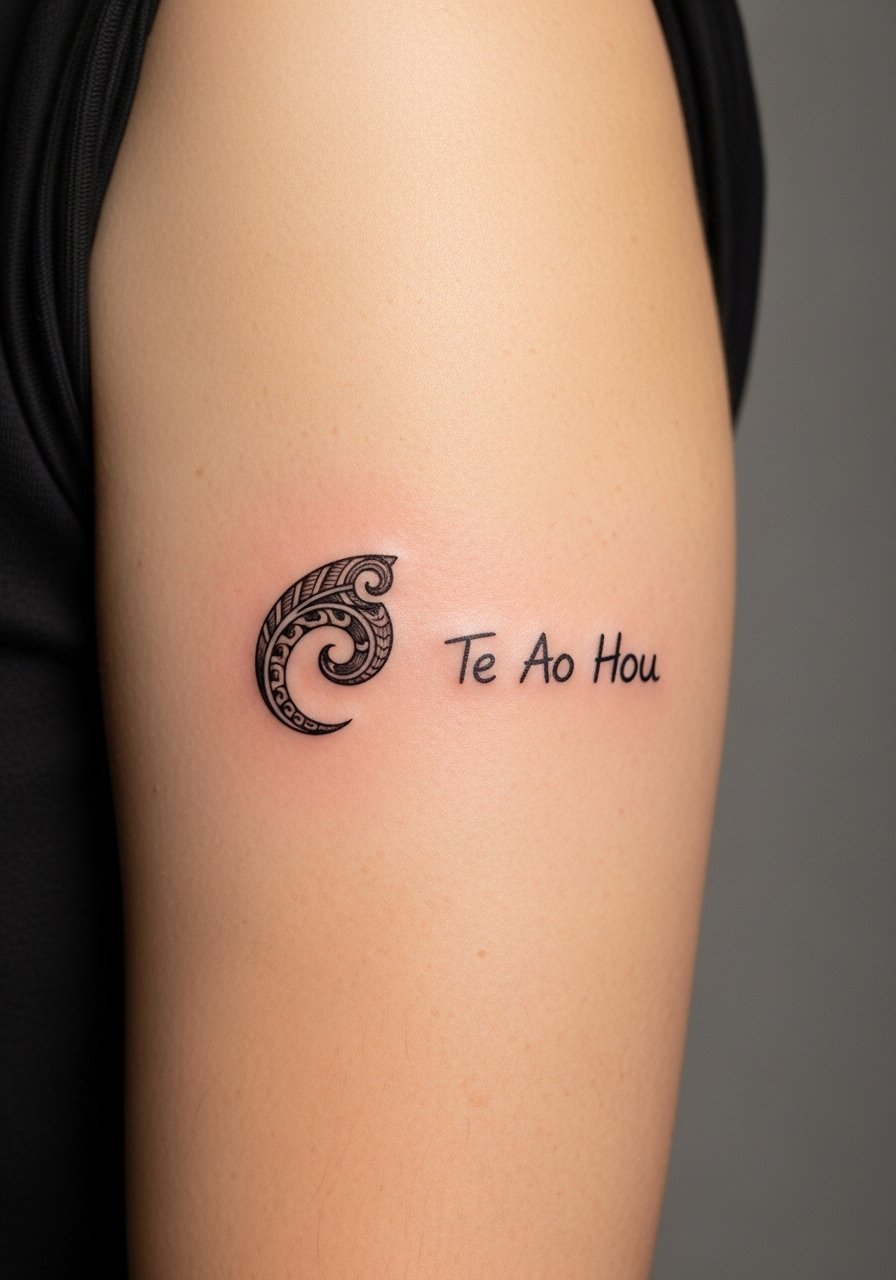
Style/Technique: Traditional motif with contextual note
Pain Level: 4/10
Session Time: 45 minutes to 2 hours
Best For: Upper arm, chest, thigh
If you choose a motif from a living culture, keep it small and consult with someone from that culture or use an artist trained in that tradition. Place the design so it is coverable for professional settings if needed, and include a short note about its meaning when booking. Many artists will suggest simplified elements that honor the form without copying sacred symbols outright. A respectful approach reduces the risk of regret later.
Mistake to Avoid: Requesting sacred or ceremonial symbols without understanding their context.
Your Aftercare Kit
Ink-safe soap and fragrance-free ointment
- "Honestly the best thing I used the first week. Fragrance-free tattoo aftercare balm (~$10-18). Use for the first three days."
Gentle liquid soap - "A soft, pH-balanced option. Mild liquid soap (~$6-12) cleans without stripping."
Second-skin-friendly bandage - "Waterproof bandages for tattoos (~$12-20) for the first 24 hours."
Broad-spectrum sunscreen - "For settled pieces. Mineral sunscreen SPF 50 (~$10-20)."
Non-stick gauze pads - "Non-stick sterile gauze pads (~$8-15) for any drainage."
Soft clothing for healing - "A light cotton tee or loose button shirt. Pack of plain cotton tees (~$20-35) avoids rubbing."
Moisturizing lotion for weeks two to four - "Switch to a gentle lotion like unscented body lotion (~$6-14)."
Gentle exfoliant for older tattoos - "When fully healed, a soft scrub keeps the surface even. Mild exfoliating gloves (~$8-15)."
Cooling pack for swelling - "Reusable gel cooling pack (~$10-18) for immediate comfort."
Salt-free barrier soap - "For sensitive skin during healing. Salt-free soap bar (~$6-12)."
High-contrast reference binder - "Bring a small printed book of reference images. A5 binder for prints (~$12-20)."
Tiny travel mirror - "Check placement before healing. Compact travel mirror (~$6-10)."
Aftercare Tips From Real Healing
Keep it dry the first 24 hours. A sealed bandage prevents smudging and excess scabbing. I used waterproof bandages for the first day and it saved a panic clean-up.
Use thin layers of ointment. Too much product traps moisture and prolongs scabbing. Grab a small tube of fragrance-free aftercare balm and apply a pea-sized amount twice a day after the first 48 hours.
Notice when to switch to lotion. After the scabs lift, move to an unscented lotion to keep the skin supple. I kept using unscented body lotion through week four and it reduced itching.
Avoid sun and pools for at least two weeks. UV and chlorine accelerate fading. Pack a travel-size mineral sunscreen SPF 50 for outings once the skin is fully closed.
When you see heavy scabbing, do not pick. Let flakes fall on their own. If a scab is stuck to clothing, use a warm shower and gentle soap like mild liquid soap to loosen it, then pat dry and reapply a thin balm.
If something feels off, check in. Redness that spreads or a strong odor warrants a call to your artist or clinic. Keep the shop's number in your phone and bring photos so they can advise without guessing.
