
I hated my first three attempts at a messy bun. They looked like a crumpled hat, too tight or falling apart by lunchtime. After washing and restyling about fifteen times I landed on a repeatable flow that looks undone but lasts. This guide is the version I reach for when I have ten minutes, a meeting on Zoom, or a Tuesday night and do not want to think too hard.
This method works across straight, wavy, and loose-curly hair, though you will tweak a few steps by texture. It takes about 5 to 12 minutes depending on how many times you wrap the elastic. Budget wise you do not need pro tools, just a few inexpensive items that make the style hold. I am still not sure this is the best way, but it has worked every time for me.
What You'll Need
Styling Products:
- texturizing-spray (~$8-20)
- light-hold-hairspray (~$5-15)
Tools:
- bobby-pins (~$4-8)
- snag-free-hair-ties (~$6-12)
- rat-tail-comb (~$4-10)
Treatments & Prep:
- dry-shampoo (~$6-18)
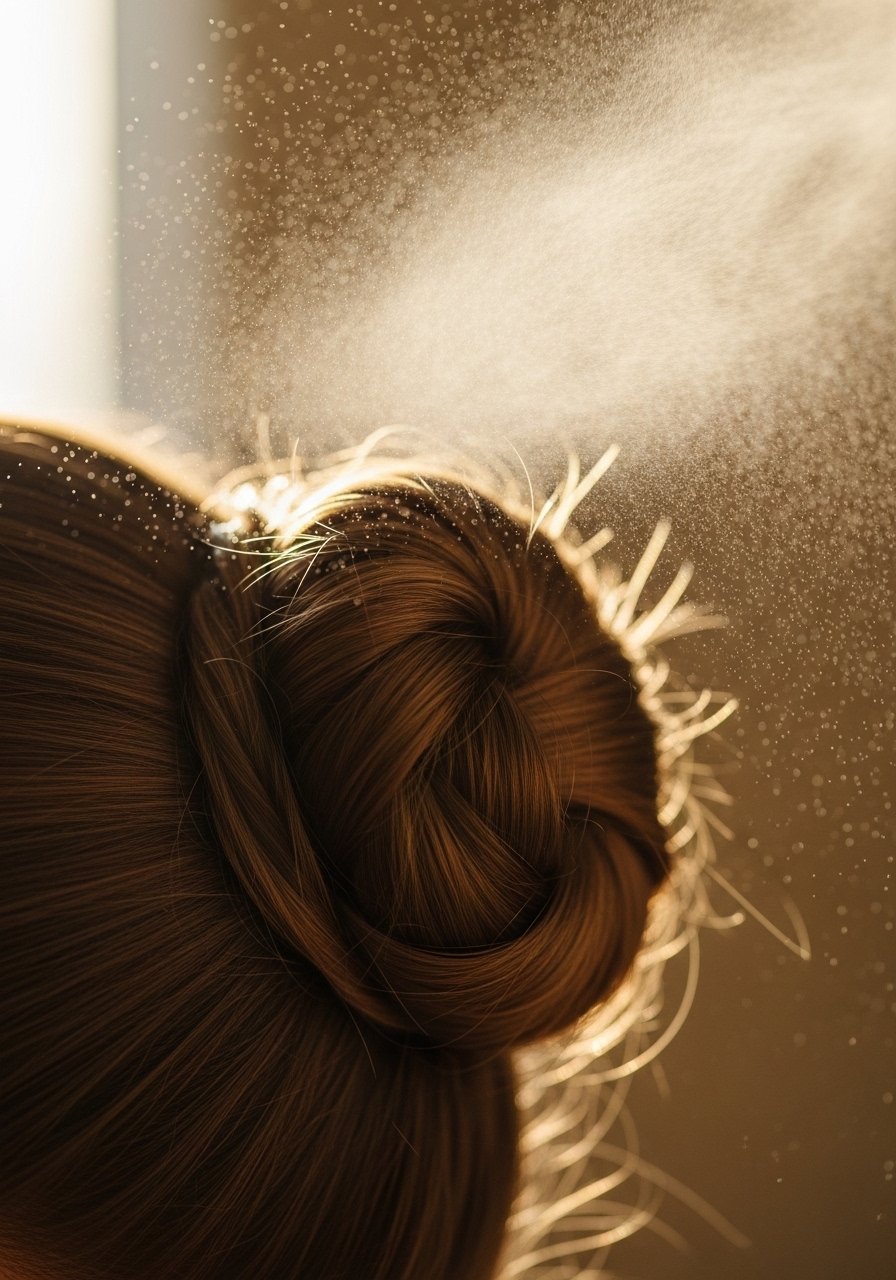
Step 1: Prep with texture, not overload
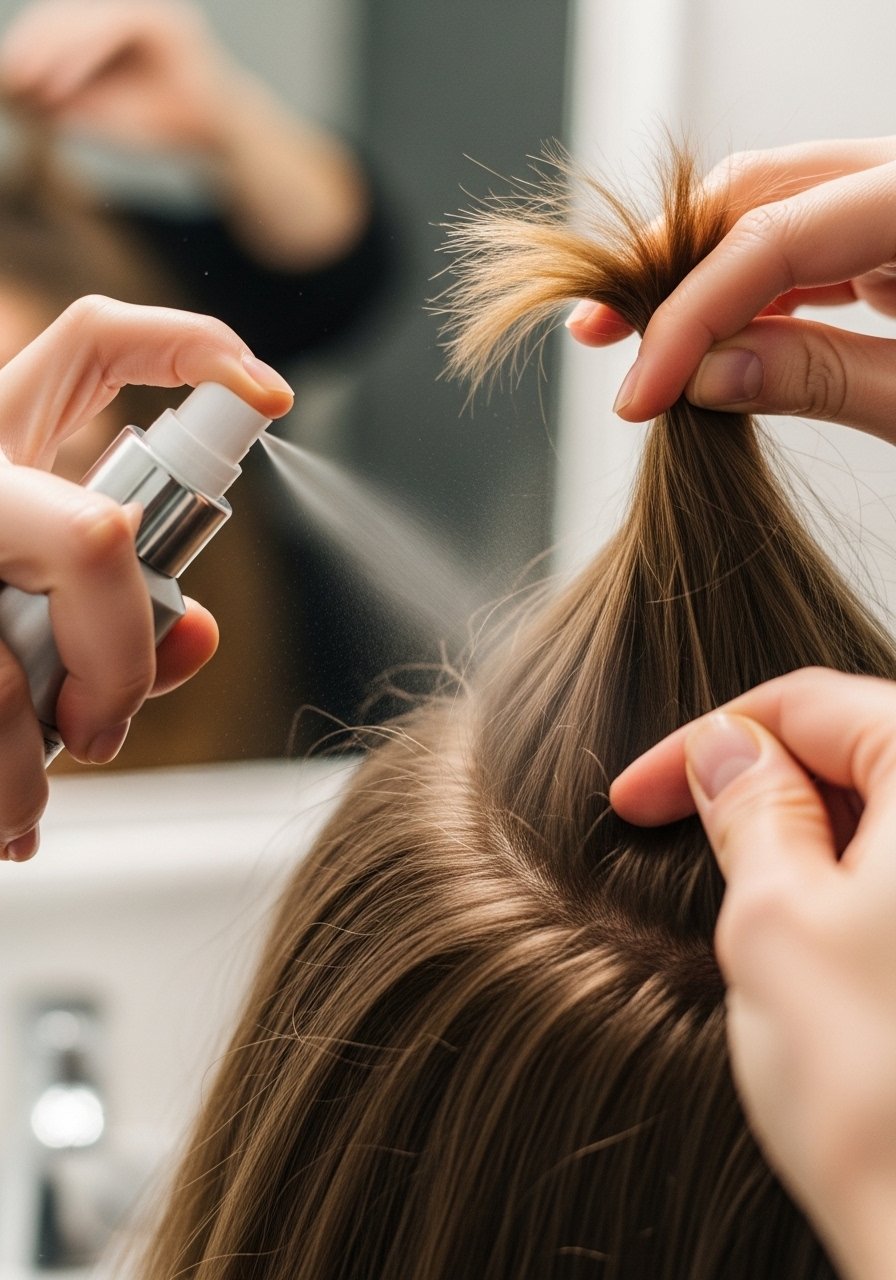
Start with second-day hair or spray two to three spritzes of dry shampoo into the roots to add grip. If your hair is freshly washed, use 3 to 4 spritzes of texturizing spray mid-length to ends. The trick is texture, not stickiness. It should feel slightly tacky, not crunchy. Listen for the soft rustle when you tousle; that tells you there is enough product. Across four hair textures I have styled, this single move saved me from the hair slipping out by noon.
Mistake to Avoid: Putting in so much product that the hair feels crunchy and heavy.
Step 2: Section with intention

Separate the top third of your hair from the bottom two thirds. Clip the top section out of the way. For most people a 1:2 ratio, top to bottom, makes the bun sit with enough volume while keeping control. If you have very thick hair, split into four sections and work one at a time. This step makes the rest feel intentional instead of frantic. I almost skipped this at first. Glad I did not.
Mistake to Avoid: Starting with all the hair at once and ending up with a lopsided shape.
Step 3: Create the base knot
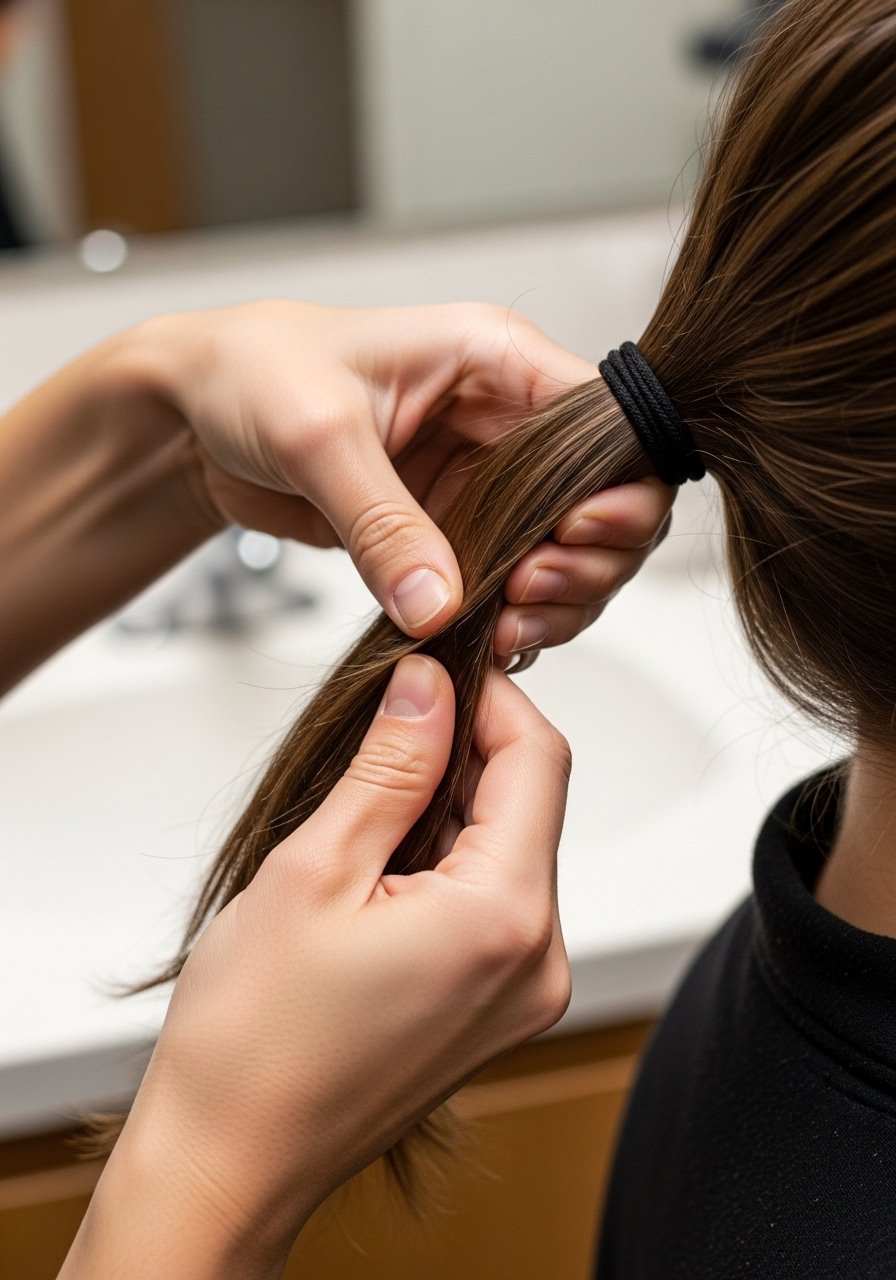
Gather the bottom two-thirds into a low pony at the nape or slightly off-center for a softer look. Wrap the elastic just once for loose hair, twice if your hair is fine and you need hold. Twist the pony until it folds into a loose knot and secure it with a second elastic or a few crisscrossed bobby pins. The principle here is balance over symmetry. Aim for a bun that weighs like a soft cloth, not a weighted ball. After trying different placements I prefer slightly off-center for daywear.
Mistake to Avoid: Wrapping the elastic too many times so the knot looks small and tight.
Step 4: Add the top section for shape
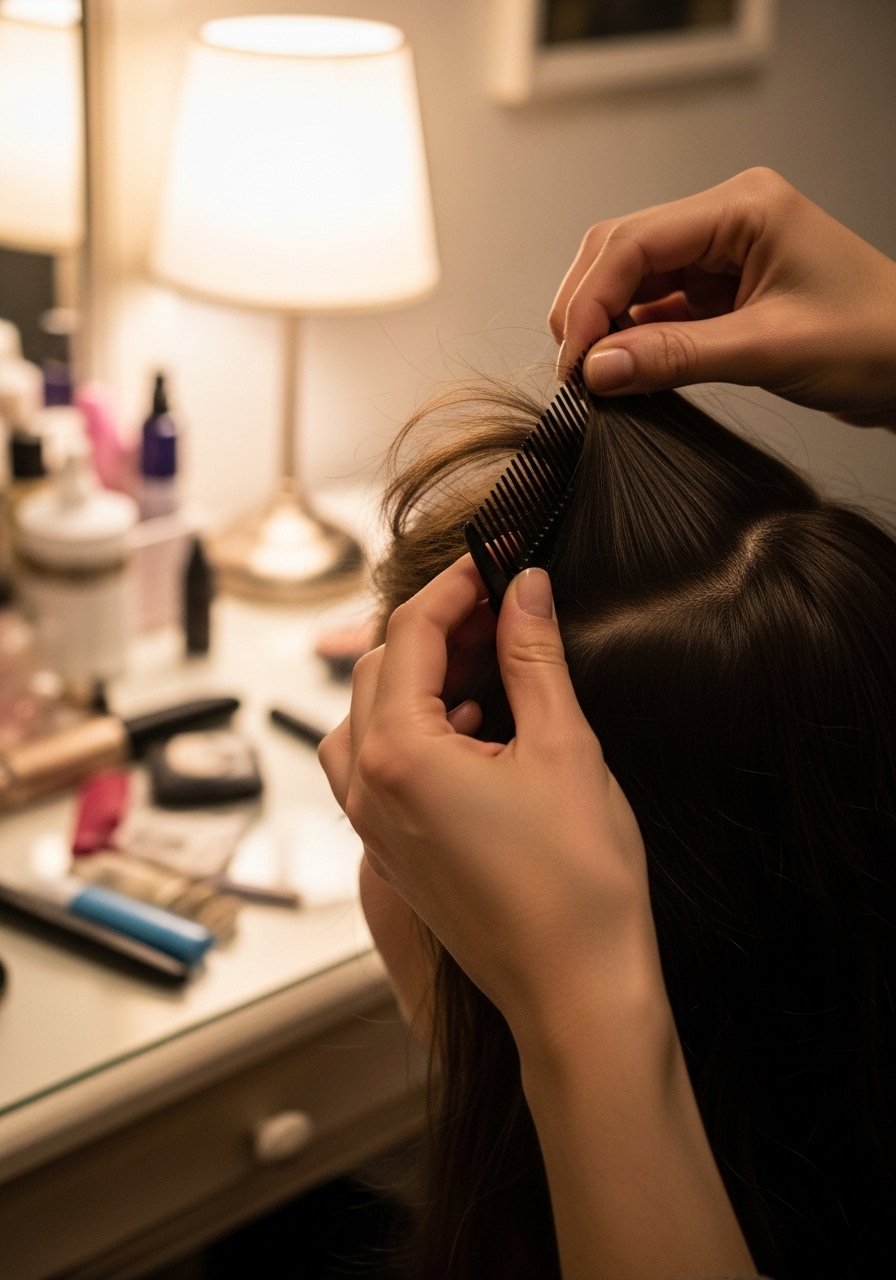
Release the top section and lightly tease the roots with a rat-tail comb, about 3 to 5 short pulses, not long runs. Smooth the surface with your fingers to keep it soft. Pull this section back over and around the base knot, letting a few face-framing pieces escape. Pin where the hair feels like it will fall, usually two to three bobby pins pushed in with the curve of the head. Honestly this step frustrated me at first because it felt wrong to leave it messy. Trust the shape.
Mistake to Avoid: Smoothing everything perfectly so the bun looks flat and staged.
Step 5: Tug, loosen, and define
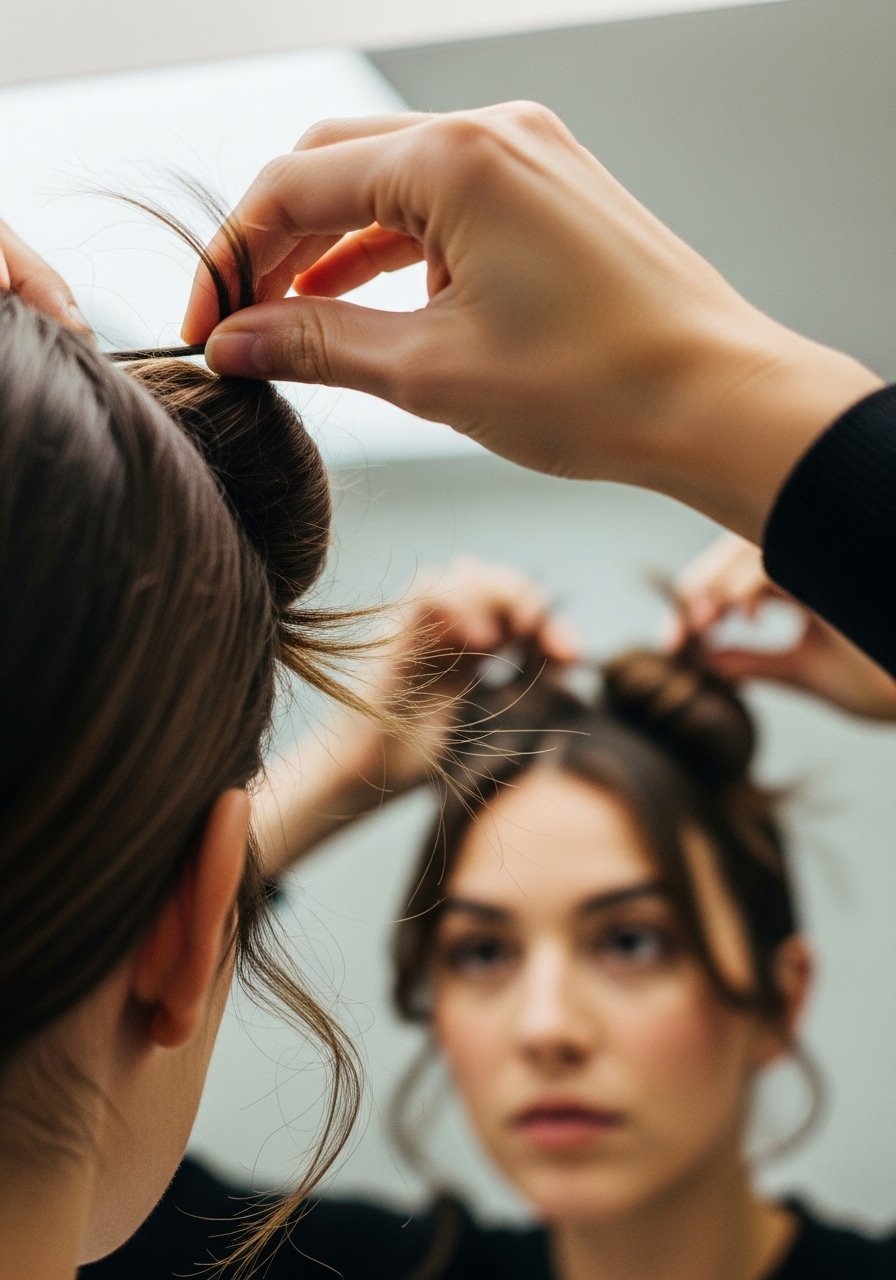
Now the messy part happens on purpose. Gently tug at loops and the crown to create volume. Pull out 3 to 6 small strands around the face, thinner for formal looks, chunkier for casual. For hold, press a bobby pin in so you hear the soft click, that click means it is anchored. The bun should look lived in, with visible texture and movement. I find that light pulls and a final spritz of light-hold hairspray make it survive a day of commuting.
Mistake to Avoid: Over-tugging until the bun comes undone.
Step 6: Lock the look and adapt
Finish with one to two short bursts of light-hold hairspray from about 8 to 12 inches away. If it is windy or you have fine hair, add an extra bobby pin behind the ear for security. For a heat-free alternative, try a second elastic around the bun instead of pins. For very curly hair you may prefer more pins and less teasing. Over 40% of women pick loose styles for daily wear, so adapt the tightness based on whether you want a weekend look or something that survives a full workday.
Mistake to Avoid: Spraying too close so the hair becomes stiff and obvious in photos.
Hair Styling Tips
Use small elastics at the base: They hide better and create a fuller-looking knot when you loop the hair around the elastic, try snag-free-hair-ties.
Swap teasing for volume spray: If your hair is fragile, skip backcombing and use a root-lifting texturizing-spray at the crown.
Pin in a pattern: Push pins in with the curve of the head for comfort and stronger hold, use the thicker end of bobby-pins for coarse hair.
Quick fix for slipping: Tuck a small elastic under the bun and loop the loose end of hair through it to anchor, then hide the elastic with hair.
Face-framing finesse: For action shots or video calls, pull out slightly asymmetrical strands to soften your jawline and add motion.
Texture rescue: Between washes spritz dry-shampoo at the roots and massage to refresh grip.
Day-to-night trick: Make it sleeker by smoothing with a tiny bit of oil on the ends and swapping a few loose strands for pinned twists near the temples.
Loose and Light
Practice this flow a few times and you will see what changes make the biggest difference for your hair. My first attempt was bad, the second barely better, the third one clicked and now I use it when I want simple polish without fuss. Final tip, try moving the knot up or down by an inch to find the spot that feels light and looks natural for your face shape. With a little insistence you will get to a version that stays put and still reads effortless.
