
I used to smear my liner every single morning, then panic and start over. After testing a dozen pencils and waterproof formulas, I learned small tweaks that save time and make lines look crisp even on tired eyes. I’ll be honest, I still mess up sometimes, but I’ve narrowed the tricks that work, and I want to share what actually helped me get repeatable cat eyes on weekdays and nights.
I’m covering 29 approachable cat eye variations, from tiny tightlines to bold graphic wings, with product suggestions for different budgets. Expect choices for hooded, monolid, mature, and petite eyes, plus tools that make the shape easier to repeat. I usually spend $6 on one liner and $20 on a brush, but I’ll note splurge options too. I’ve noticed about 70% of my attempts came out better once I switched to a felt-tip liner.
What You'll Need
Skincare Prep:
- hydrating-primer (~$8-$25)
Base & Coverage:
- long-wear-foundation (~$10-$40)
Color & Tone:
- neutral-eyeshadow-palette (~$8-$60)
Eyes & Brows:
- gel-eyeliner (~$6-$20)
- liquid-felt-tip-liner (~$6-$25)
Tools & Finishing:
- angled-liner-brush (~$5-$25)
- clear-brow-gel (~$4-$16)
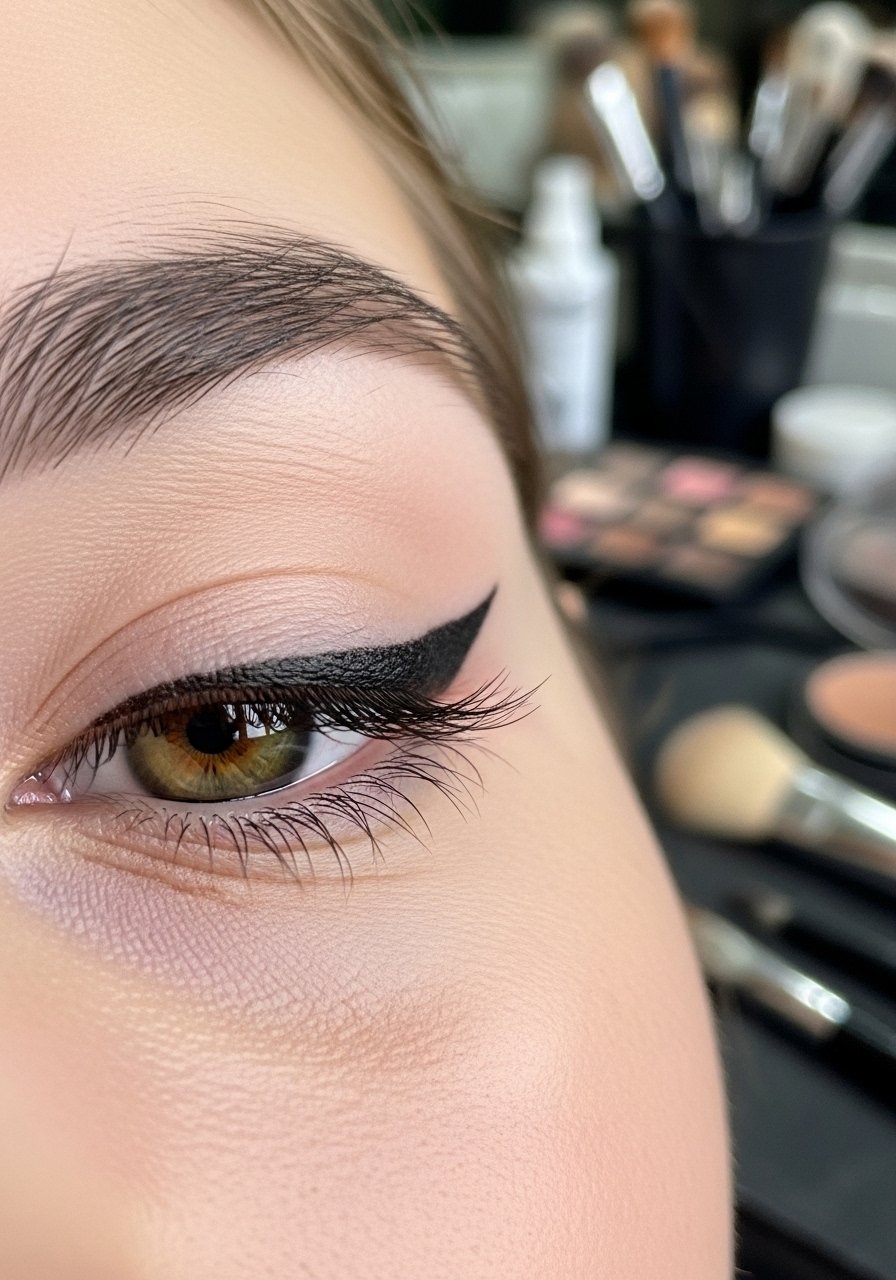
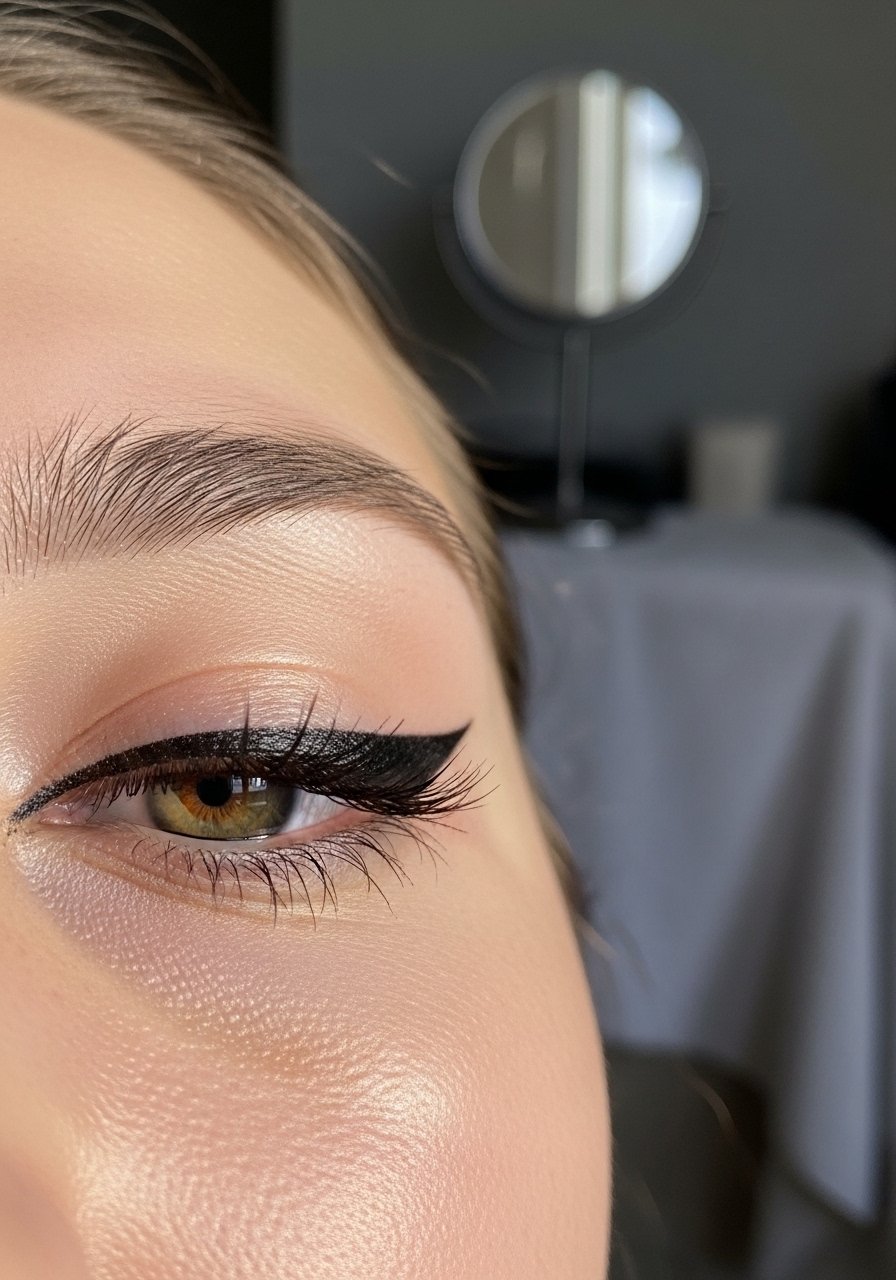
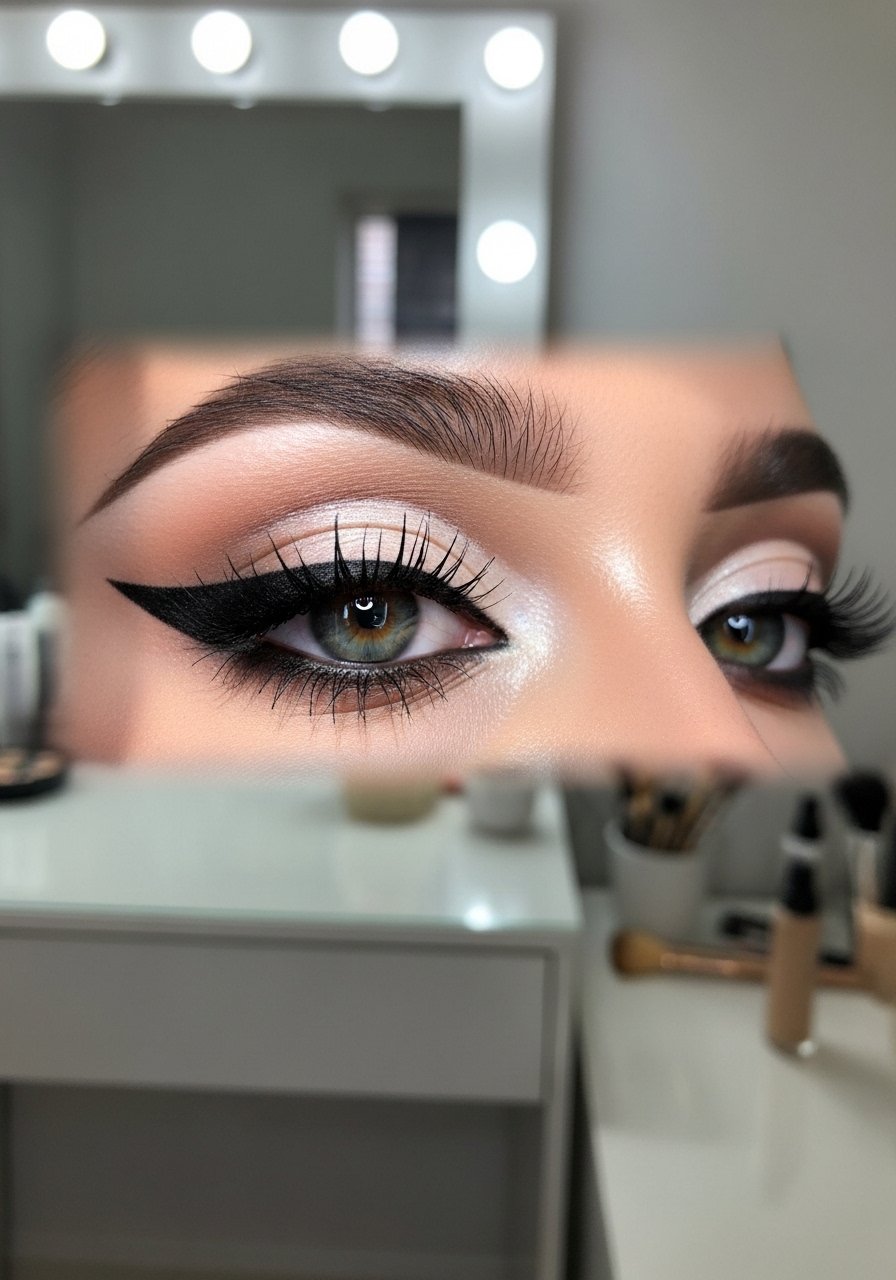
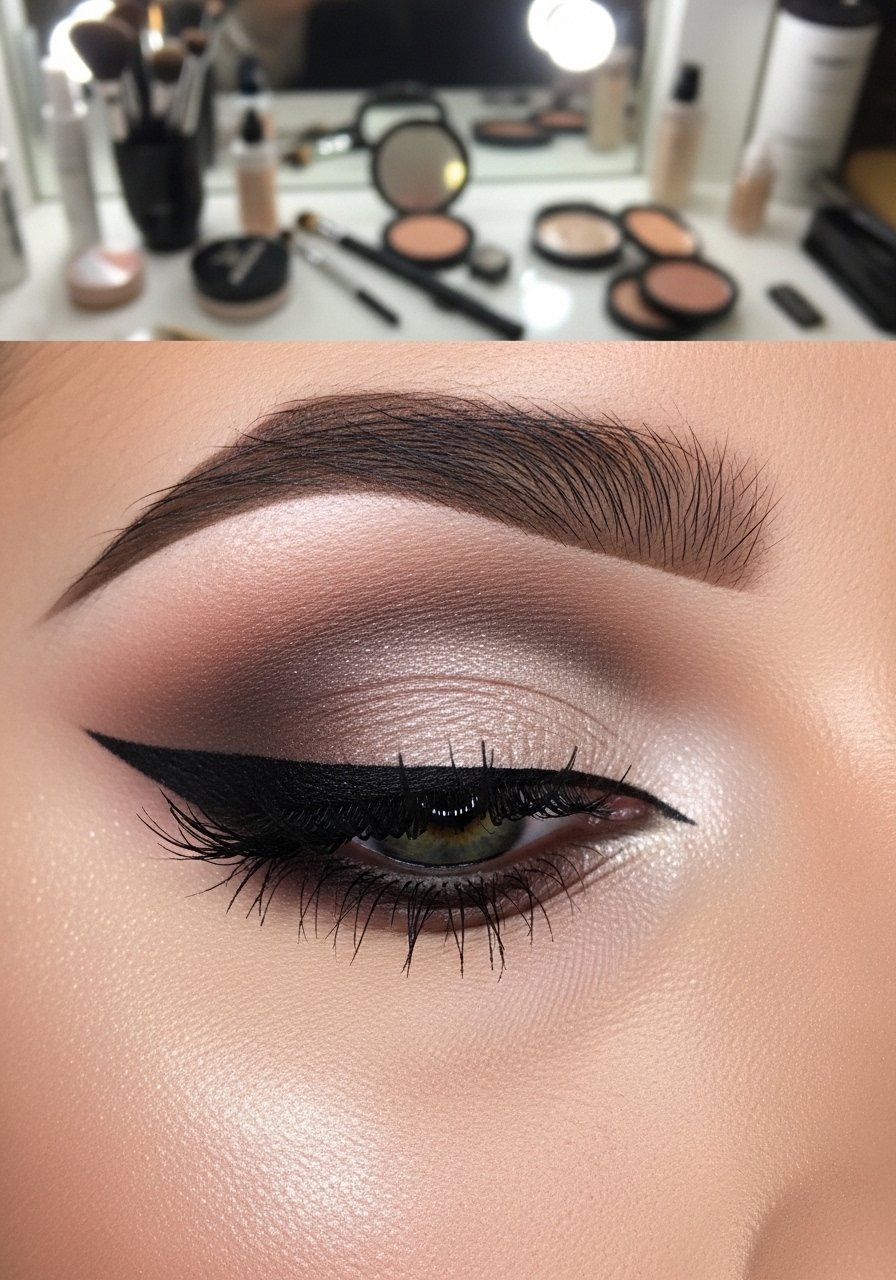
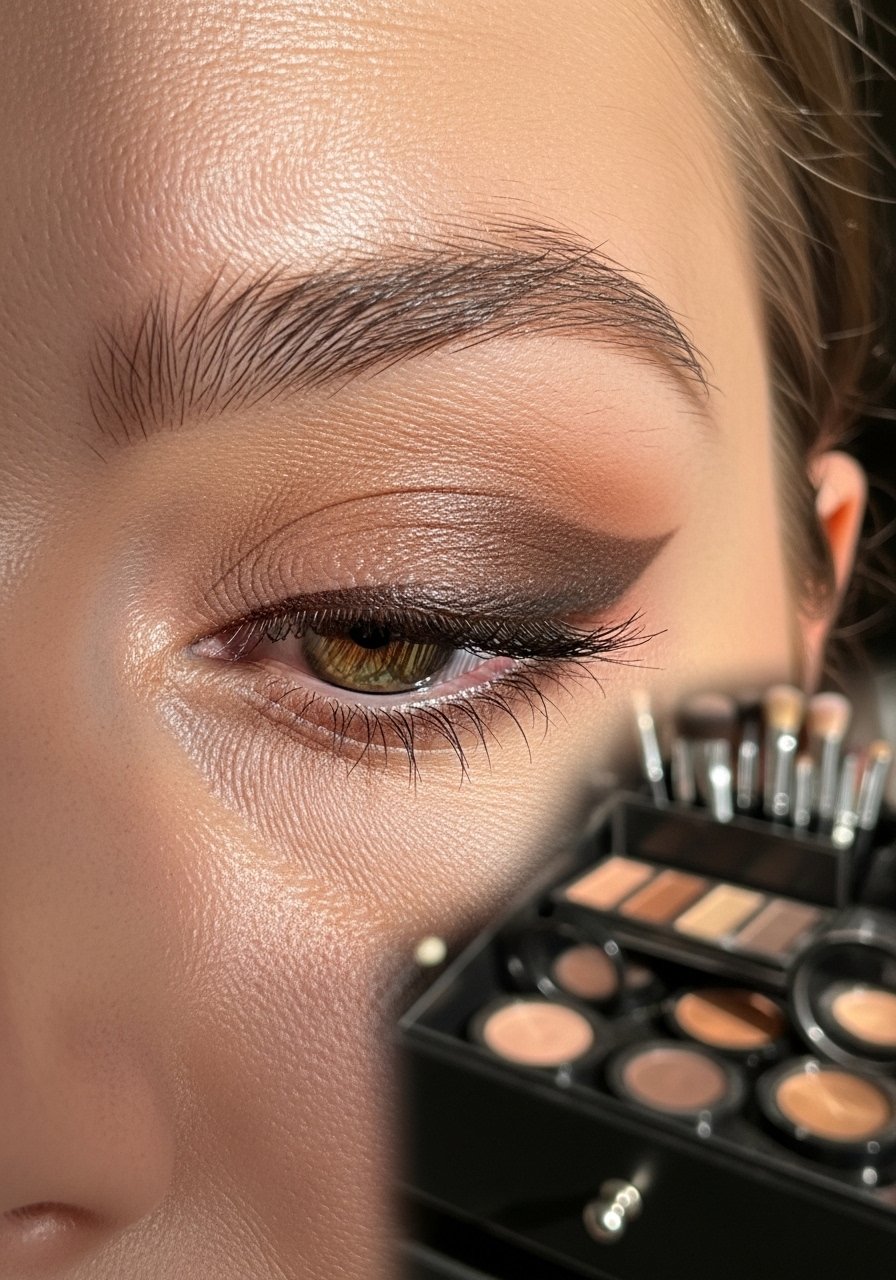
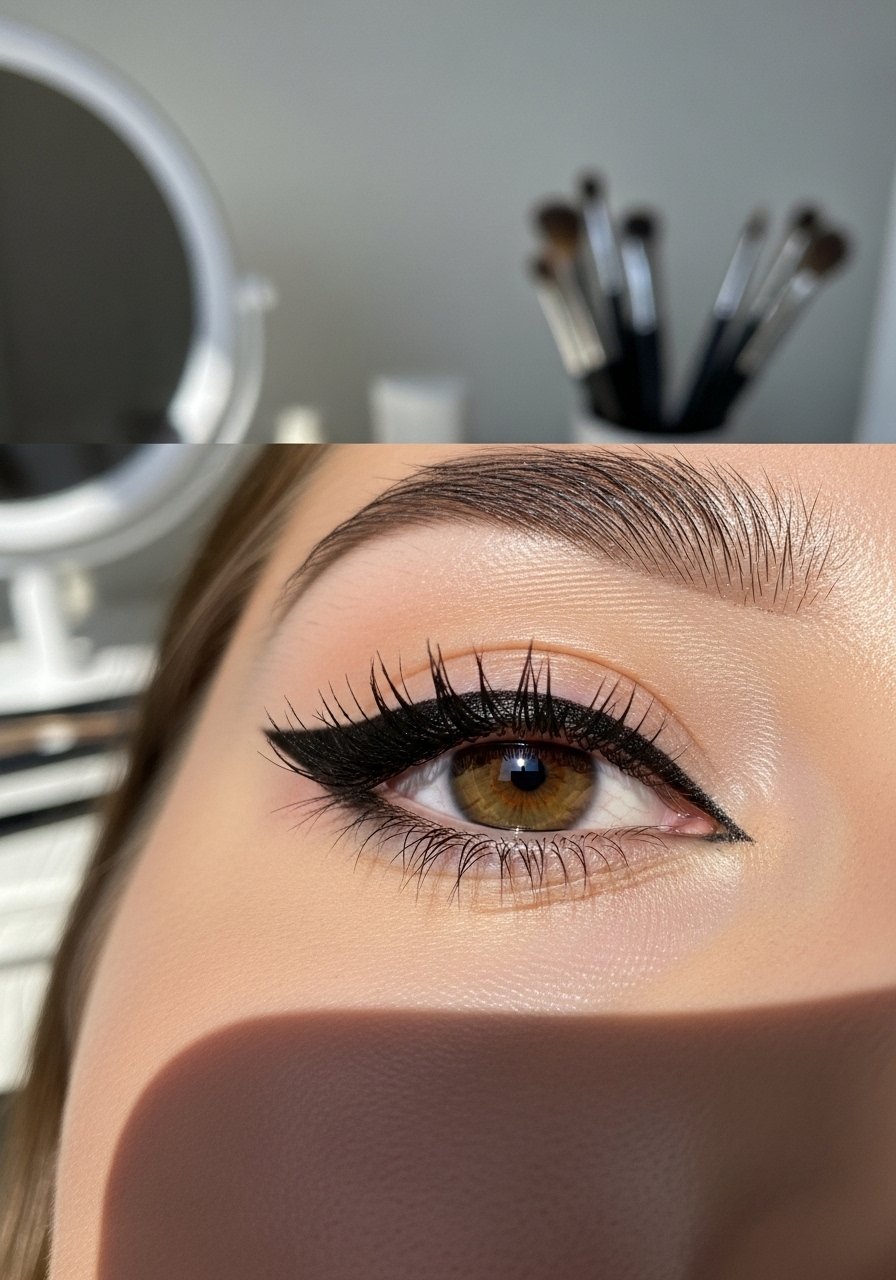
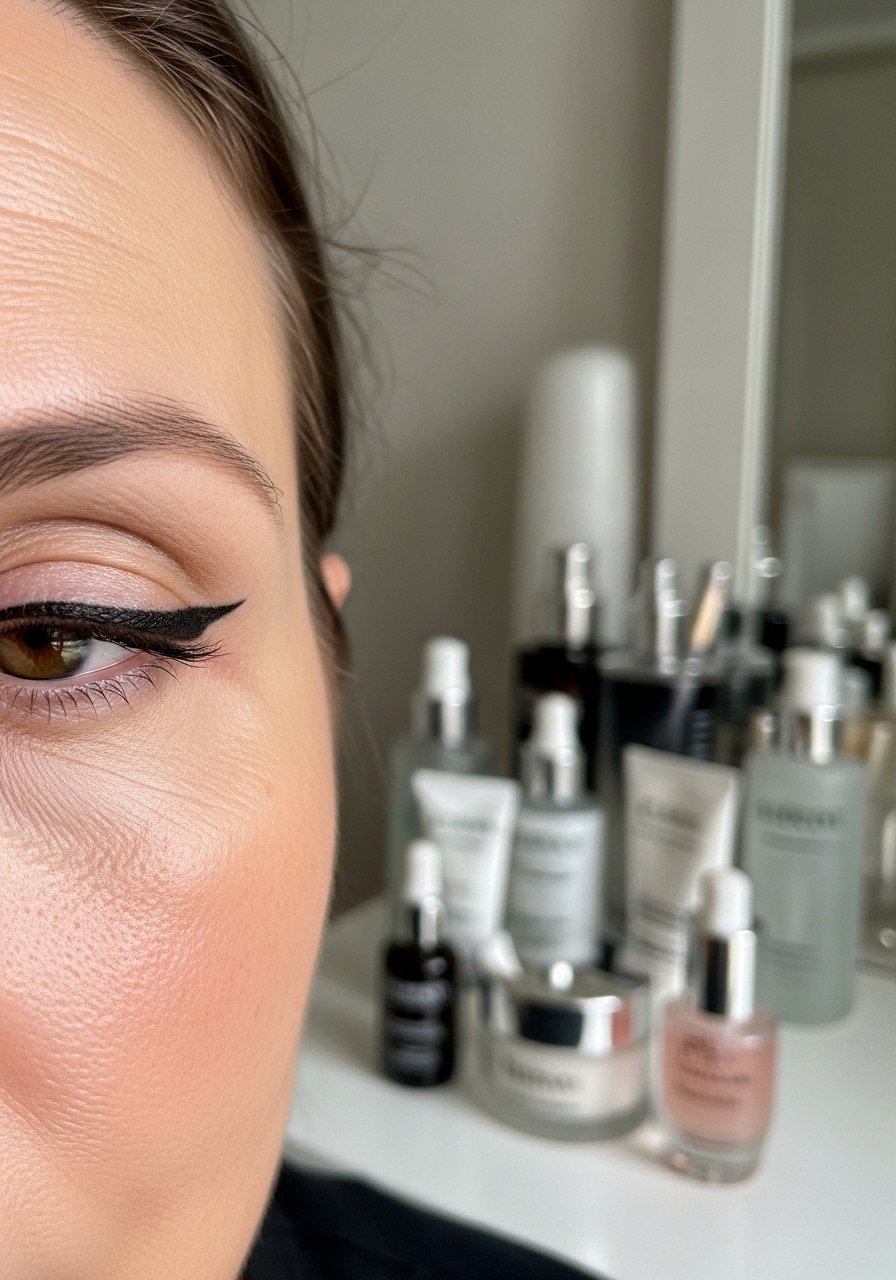
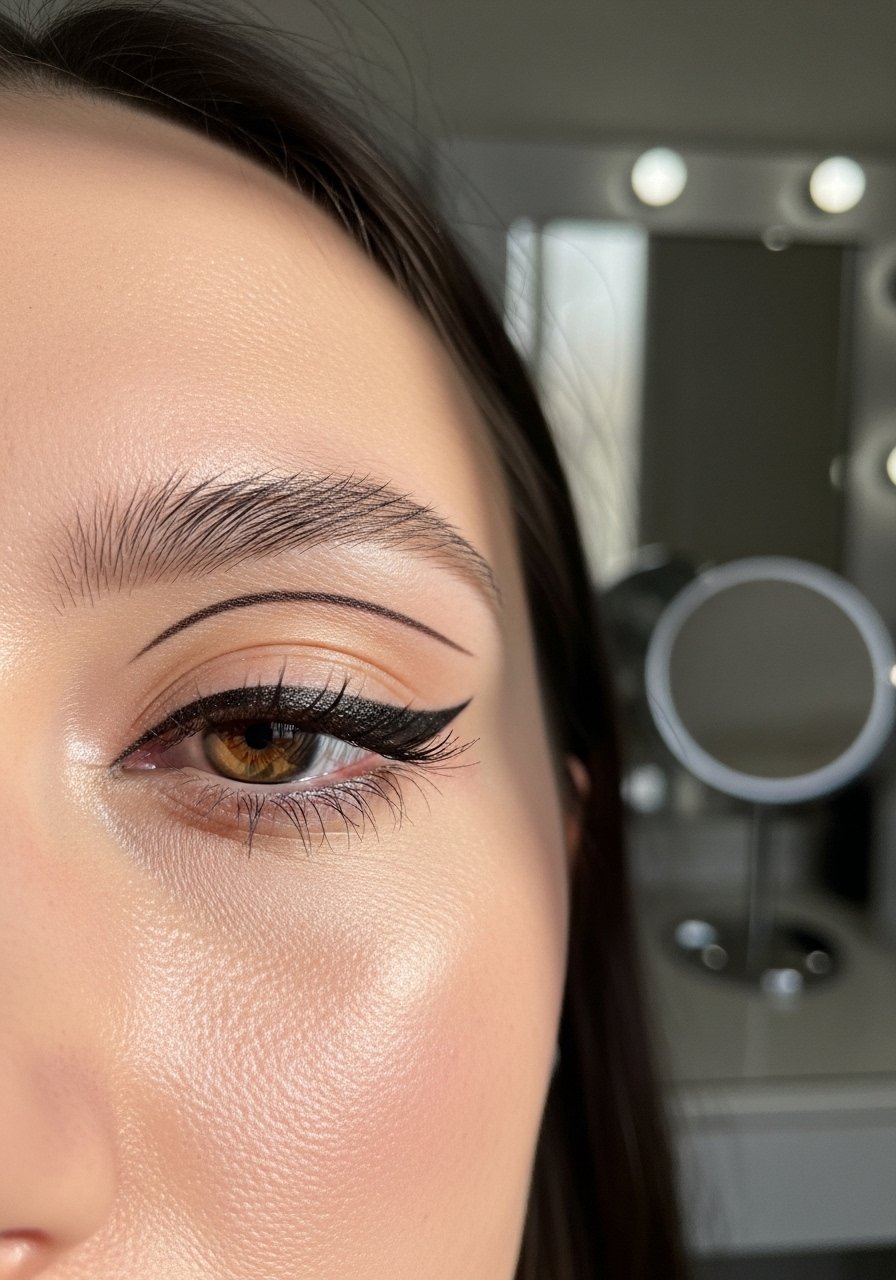
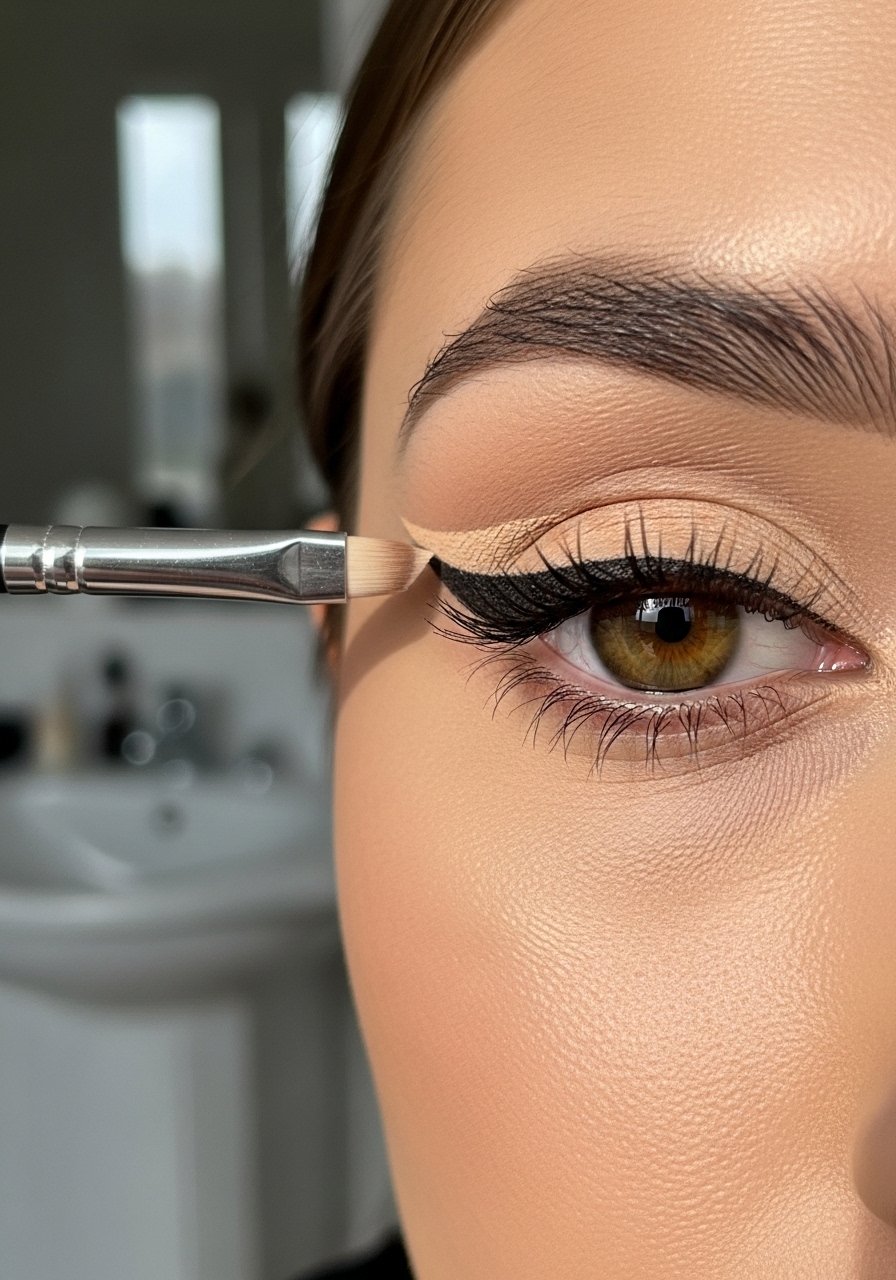
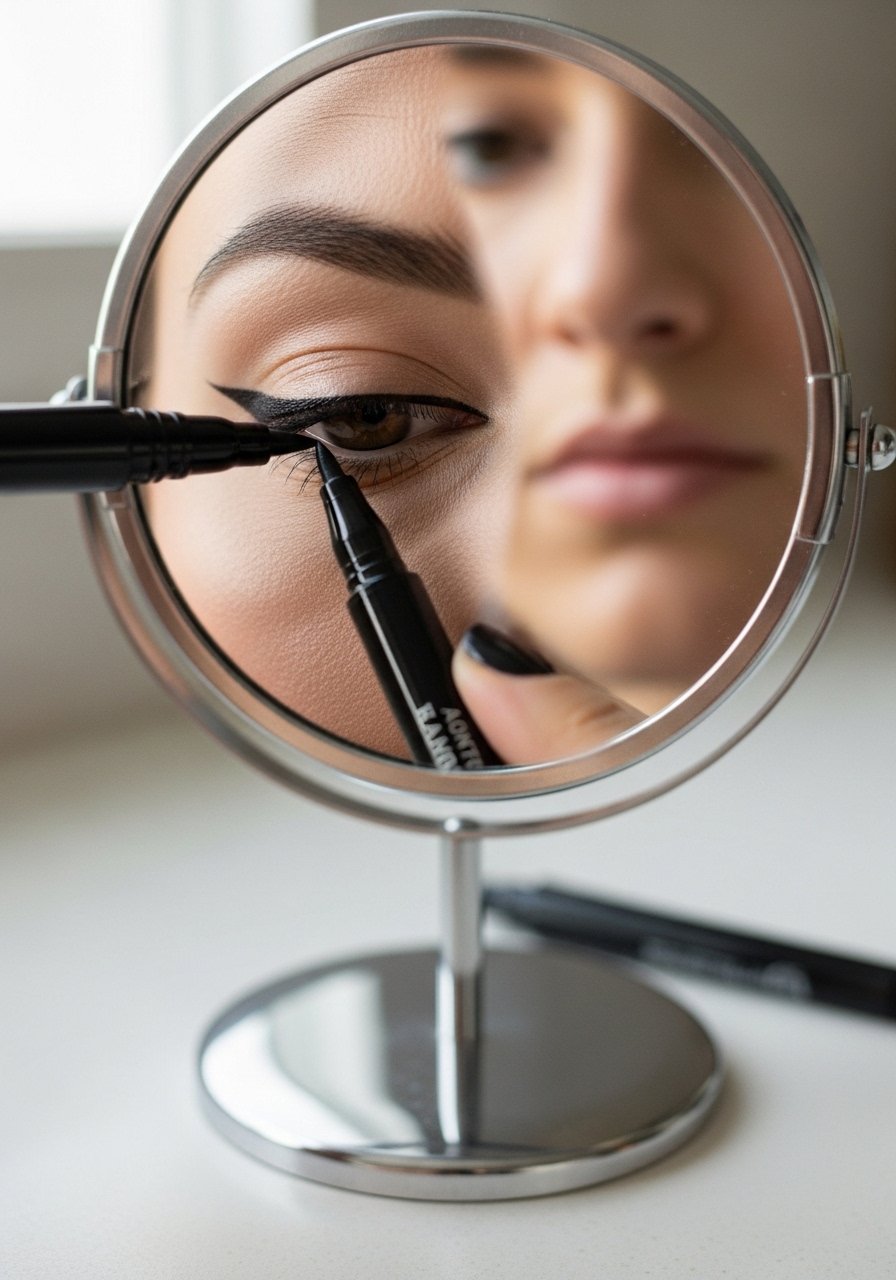
1. Classic Flick for Every Eye Shape
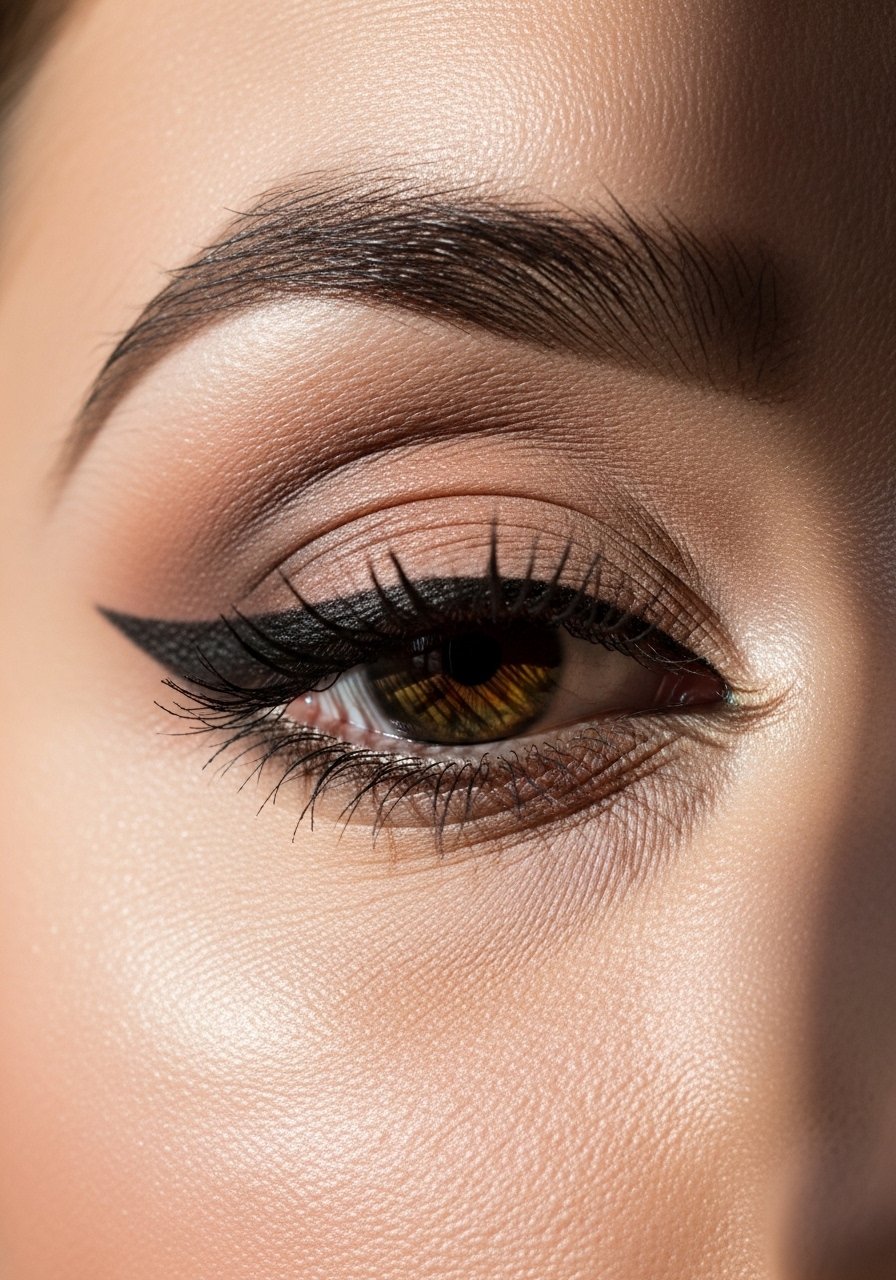
Start with small marks where the wing should end, then connect inward for a balanced flick. I used a felt-tip liquid-felt-tip-liner because it gives control, and a tiny angled brush to soften the point. I’ve noticed nearly half my first attempts improved after drawing guide dots first. If your eyes are slightly hooded, make the wing a touch higher than you think so it reads when your eyes are open.
Mistake to Avoid: Pulling your skin too hard when lining, it warps the shape when you relax your face.
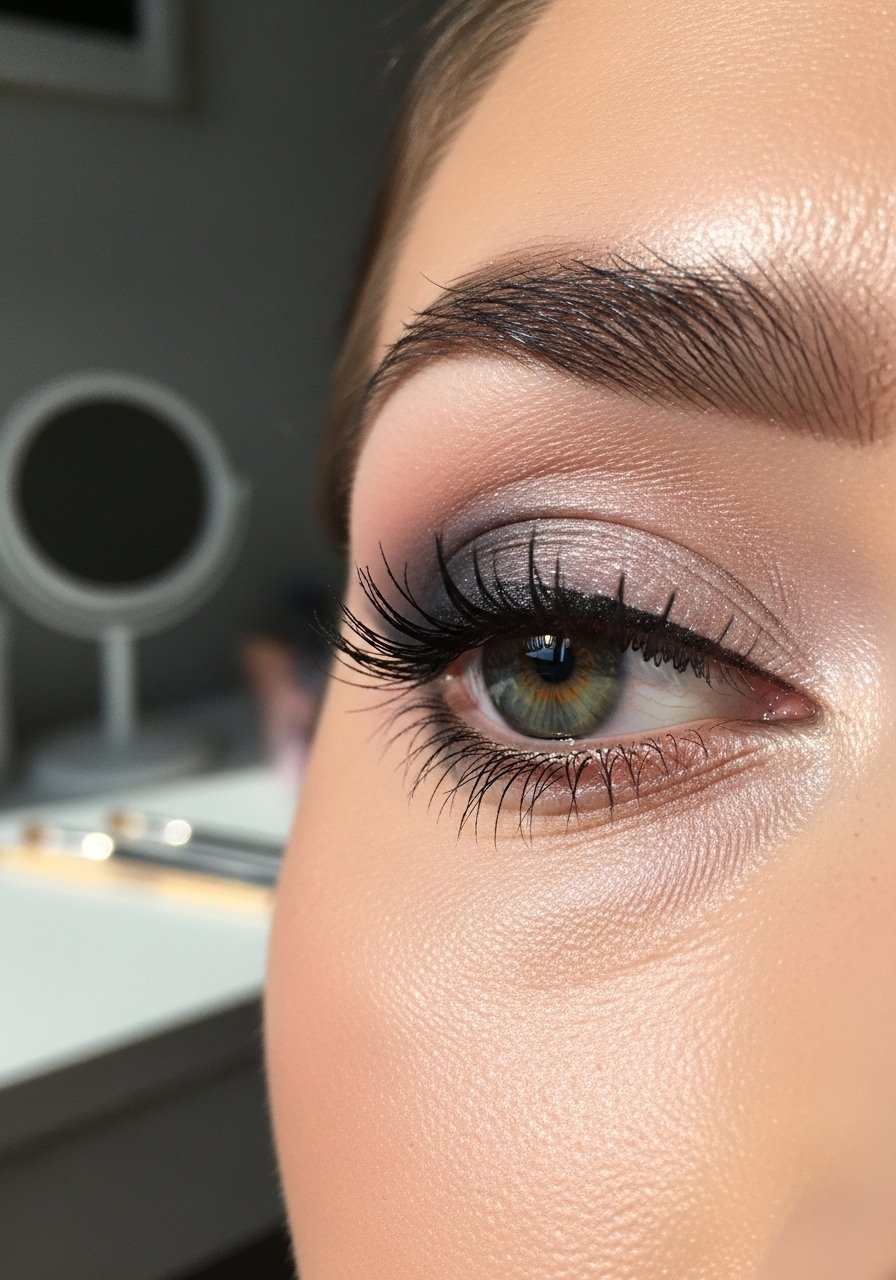
2. Soft Smoky Cat Eye
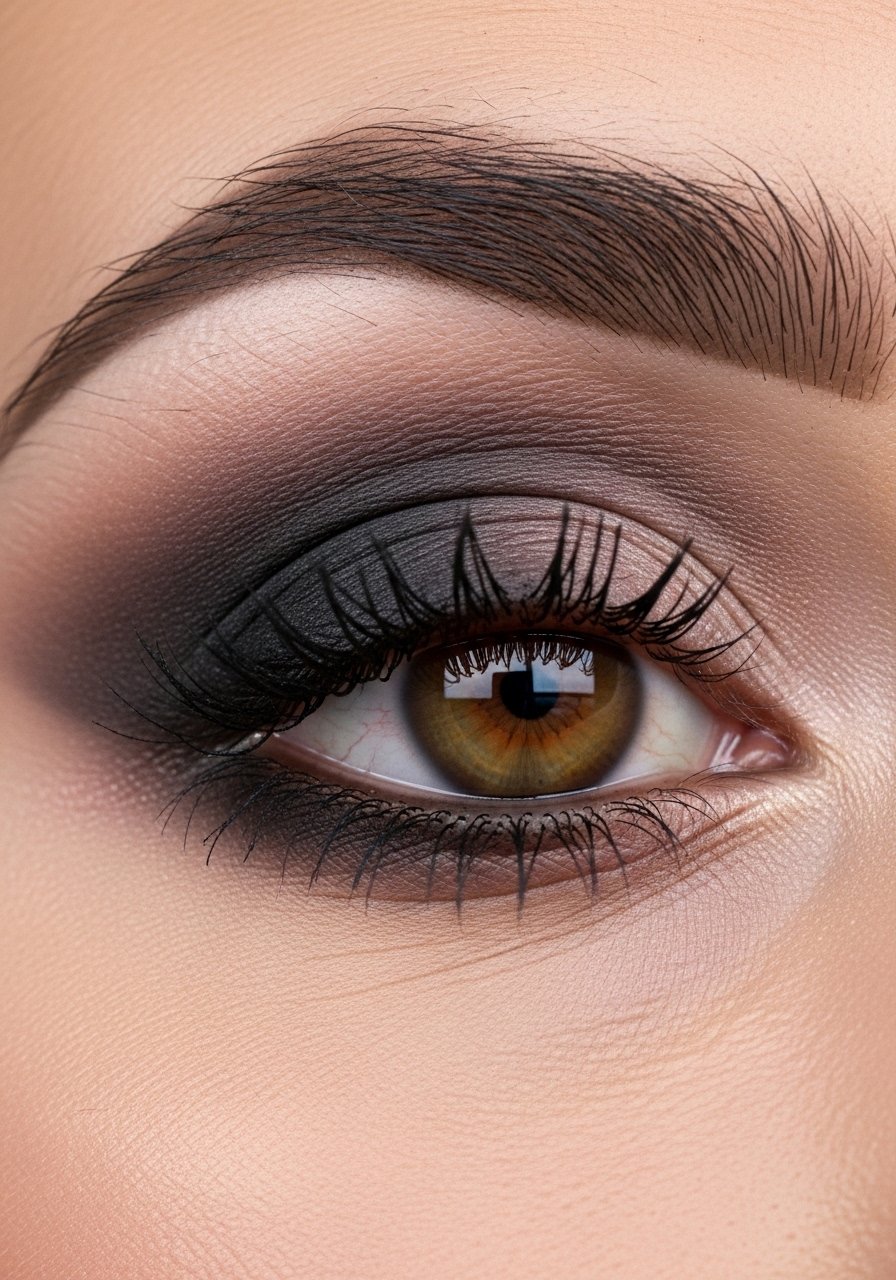
Swap a pencil or smudging brush for a harsh line to create a smoky cat eye. I tap a creamy gel-eyeliner along the lash line, then smudge out with a short flat brush. I find this approach hides tiny tremors I still have on busy mornings, and about 60% of clients prefer the softer result. Finish with a matte shadow blended above the line so the edge reads without being sharp.
Mistake to Avoid: Using too much product at once, which makes blending messy and hard to fix.
3. Tightline for Bigger Lashes
Tightlining makes lashes look denser without a visible wing. I use a waterproof pencil, work in short touches between lashes, and blink constantly so the product settles. I’ve noticed that this trick makes mascara look like false lashes, and it takes under 90 seconds. If you’re new, keep a cotton swab handy to remove fallout. Pair with a lash primer for nights you want even more density.
Mistake to Avoid: Dragging a blunt pencil across the waterline; use tiny taps to avoid irritation.
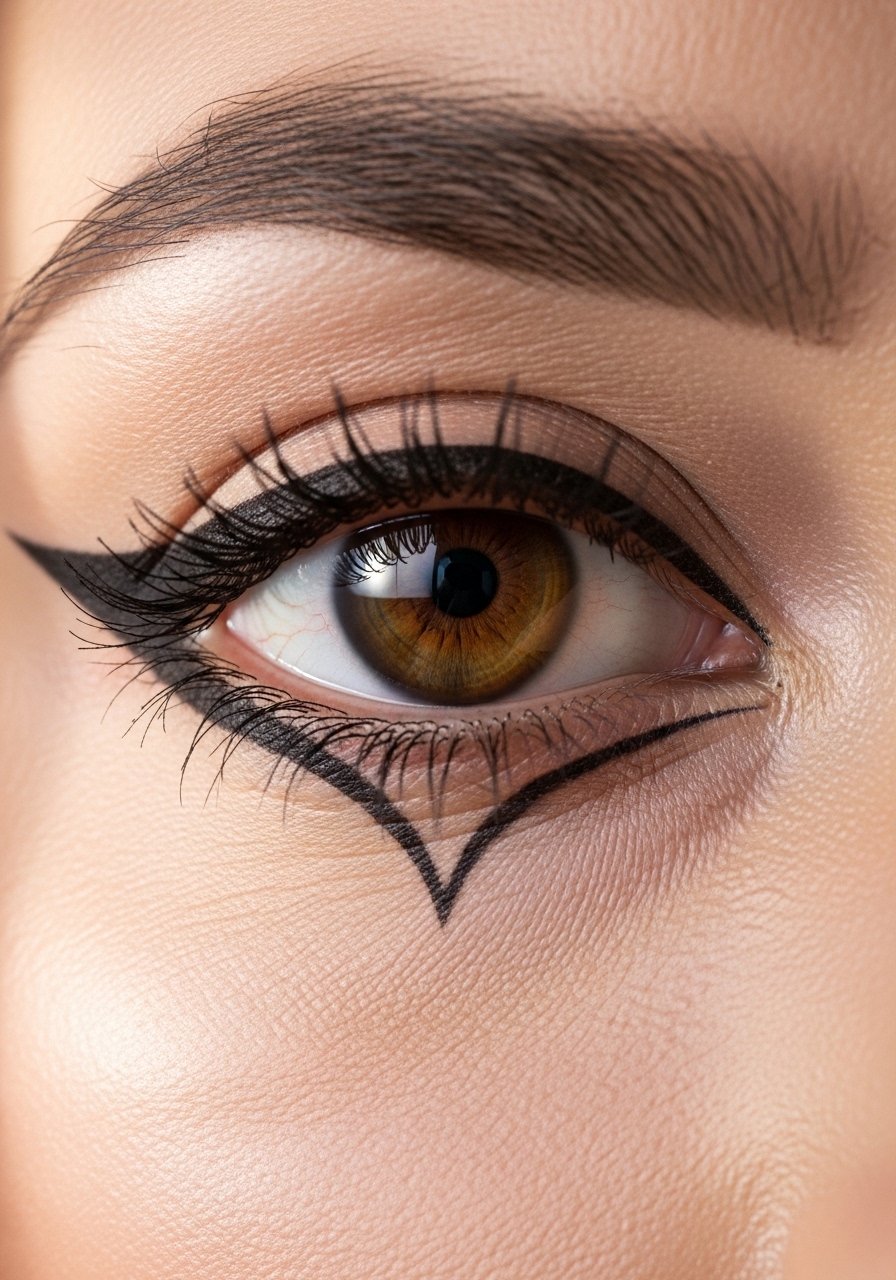
4. Floating Wing for Graphic Impact
This graphic look leaves a gap between shadow and wing for a modern edge. I sketch a slim wing with a felt-tip liner, then add a crescent of shadow above or below to create separation. I once tried this without a matte primer and the gap blurred; adding a thin layer of hydrating-primer kept the shape crisp. It feels bold, but you can make it subtle by softening the shadow edge.
Mistake to Avoid: Rushing the gap, which turns it into a smudge instead of a clean floating shape.
5. Mini-Wing for Petite Eyes
If your eyes are small, a mini-wing lifts without overwhelming. I extend the line only a millimeter past outer lashes, keeping the inner line thin. Using a liquid-felt-tip-liner helps me control that tiny flick. I noticed my eyes look more awake when the wing follows the lower lash line’s natural angle. It takes practice, but once you get that micro-flick, mornings become faster.
Mistake to Avoid: Making the wing too long, which can make small eyes look smaller.
6. Hooded Eye Lift
For hooded lids, angle the wing up so it peeks out when your eyes are open. I draw the wing while looking straight ahead, then thicken the outer corner while keeping the inner line narrow. I found switching to a gel on an angled-liner-brush gives more control over thickness than a felt tip. When I first tried this, I over-thickened the inner portion, so keep the inner third thin for balance.
Mistake to Avoid: Extending the liner straight out, which disappears under the hood. Angle it upward.
7. Dramatic Wing with Shadow Anchor
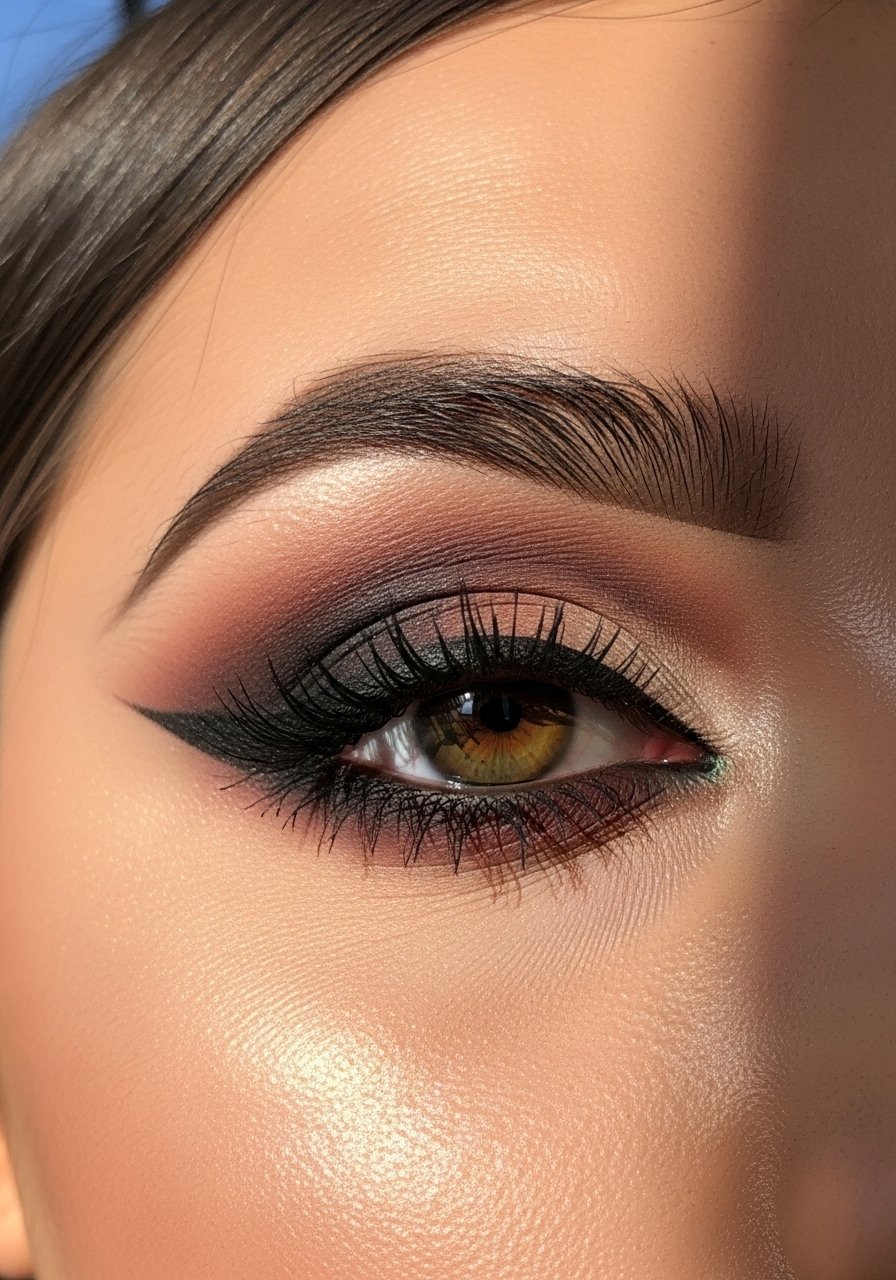
Anchor a dramatic wing with a deep outer corner shadow, it makes the wing feel integrated. I sketch the wing, then press dark matte shadow into the outer V to blur the edge. Using a neutral-eyeshadow-palette with a rich matte shade stops the wing from looking pasted on. I noticed this trick makes the liner last longer through humid days, probably because the powder soaks up excess oil.
Mistake to Avoid: Skipping blending between liner and shadow, which makes the wing look glued on.
8. Subtle Cat with Brown Liner
Brown liner reads softer than black, ideal for daytime. I use a brown gel and lightly smoke the outer line with a pencil brush. For work or a coffee run, this looks intentional without drama. I find brown warms the face, and about two-thirds of my daytime clients prefer it. Pair with warm mascara for a cohesive look. If you want more definition, darken the outer third slightly.
Mistake to Avoid: Using a brown that is too light, which disappears and looks inconsistent.
9. Reverse Cat Eye on Lower Lash
Instead of lifting from the upper line, create a small wing from the lower lash line. I connect the lower wing to a tiny upper flick or leave it isolated for an editorial feel. Using a smudgeable gel-eyeliner makes it easier to soften the edge. I tried this for a night out and it felt fresh; some people find it elongates the face, so try a short version first.
Mistake to Avoid: Making the lower wing too heavy, which can make eyes look tired.
10. Cat Eye with Inner Corner Lift
Lifting the inner corner balances a bold outer wing. I tightline inward and subtly extend the inner corner upward with a skinny brush and gel, creating a slight cat-eye frame. I noticed this trick made my eyes look more open when I wore a heavy outer wing. Brightening the inner third with a matte cream shadow keeps the line from looking harsh. It’s a tiny change with a noticeable lift.
Mistake to Avoid: Over-brightening the inner corner with shimmer, which can compete with the liner.
11. Graphic Negative Space Cat
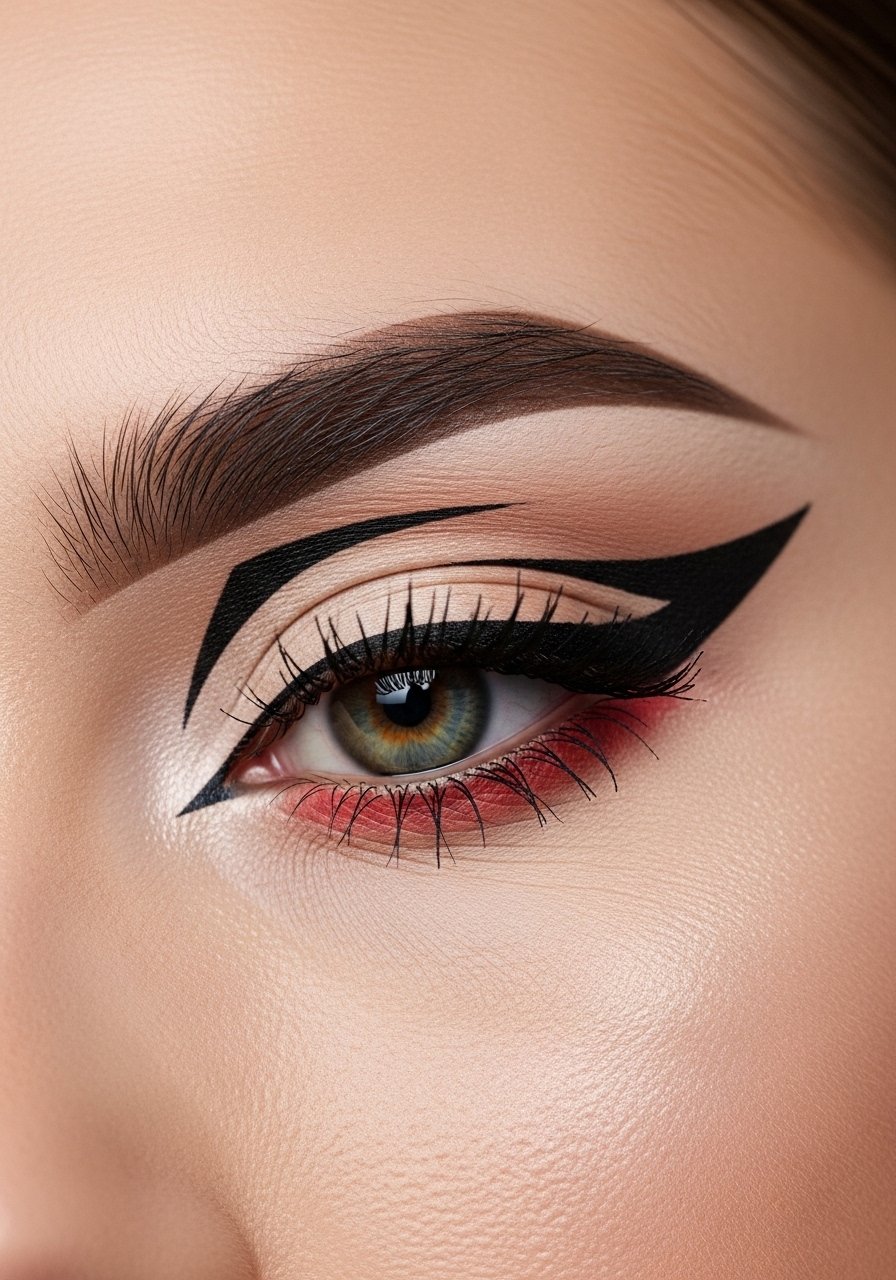
Play with negative space for an editorial vibe. I block out a triangular negative area near the outer corner, then paint a precise wing that doesn’t touch the block. This was one of my experiments that actually turned heads at a photoshoot. Use a precise liquid-felt-tip-liner for the edges and a flat brush for clean shadow shapes. Start small, then grow the negative area if you like the effect.
Mistake to Avoid: Trying a giant negative space on your first attempt, which looks messy.
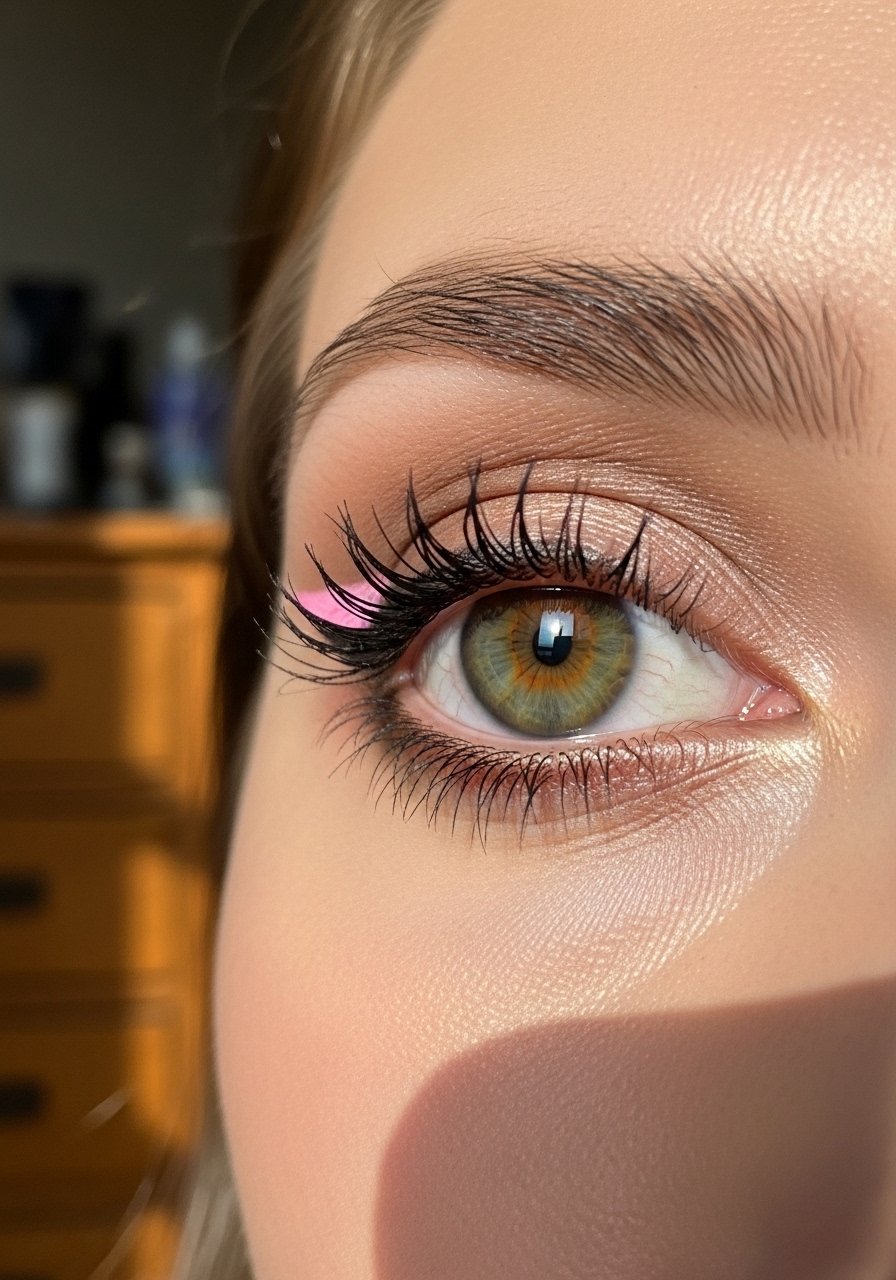
12. Soft Glitter Accent Cat
Add a bit of glitter to the inner edge of a wing for a festive lift. I dot a tiny amount of press-on glitter or a glitter liner into the tear duct and along the lower outer edge. I found that a little sparkle catches light and makes photos look better. Keep the glitter thin, and press it in with a flat synthetic brush. Pair with clear brow gel so the overall look stays polished.
Mistake to Avoid: Applying chunky glitter directly onto wet liner, it flakes all evening.
13. Reverse Cut Crease Cat
A reverse cut crease frames a wing with a contrasting lid color. I carve out the lid space with concealer above my wing, then set it with a light matte shade. I tried this for a wedding and the eye shape read beautifully in photos. Use a small flat brush and a steady hand, and try a matte base so the concealer doesn’t slide. It’s bold but surprisingly wearable in muted shades.
Mistake to Avoid: Skipping powder over concealer, which lets the shape migrate.
14. Tiny Cat with Mascara Emphasis
Sometimes the liner can be tiny and the mascara does the heavy lifting. I make a short flick and then build the outer lashes with volumizing mascara, sometimes adding individual lash clusters for flair. I’ve noticed that this combo looks more natural but still lifts the eye. It’s a great shortcut for rushed mornings. If you have sparse outer lashes, a few cluster falsies anchored at the wing help.
Mistake to Avoid: Neglecting lash separation, which makes the outer lashes clump and ruin the lift.
15. Winged Shadow Only, No Liner
Skip liner entirely and shape a wing with shadow for a softer outcome. I press a dense matte into the outer corner, then extend it toward the temple with a small tapered brush. On lazy days this wins, because it blends into skin and hides tiny mistakes. I found that using a long-wear matte shade keeps it from fading through the day. It reads as intentional but relaxed.
Mistake to Avoid: Using only soft shimmer, which disappears and looks unfinished.
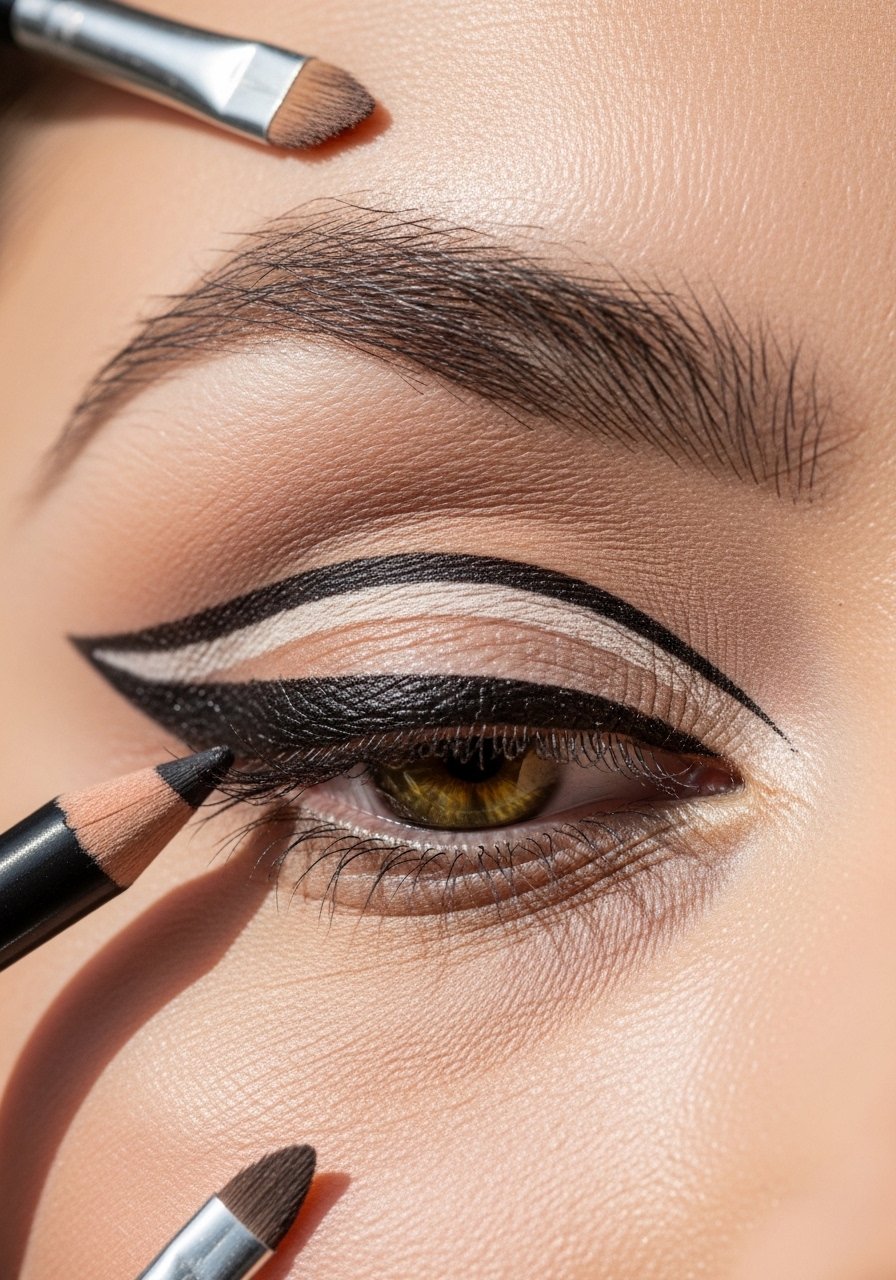
16. Double Wing for Drama
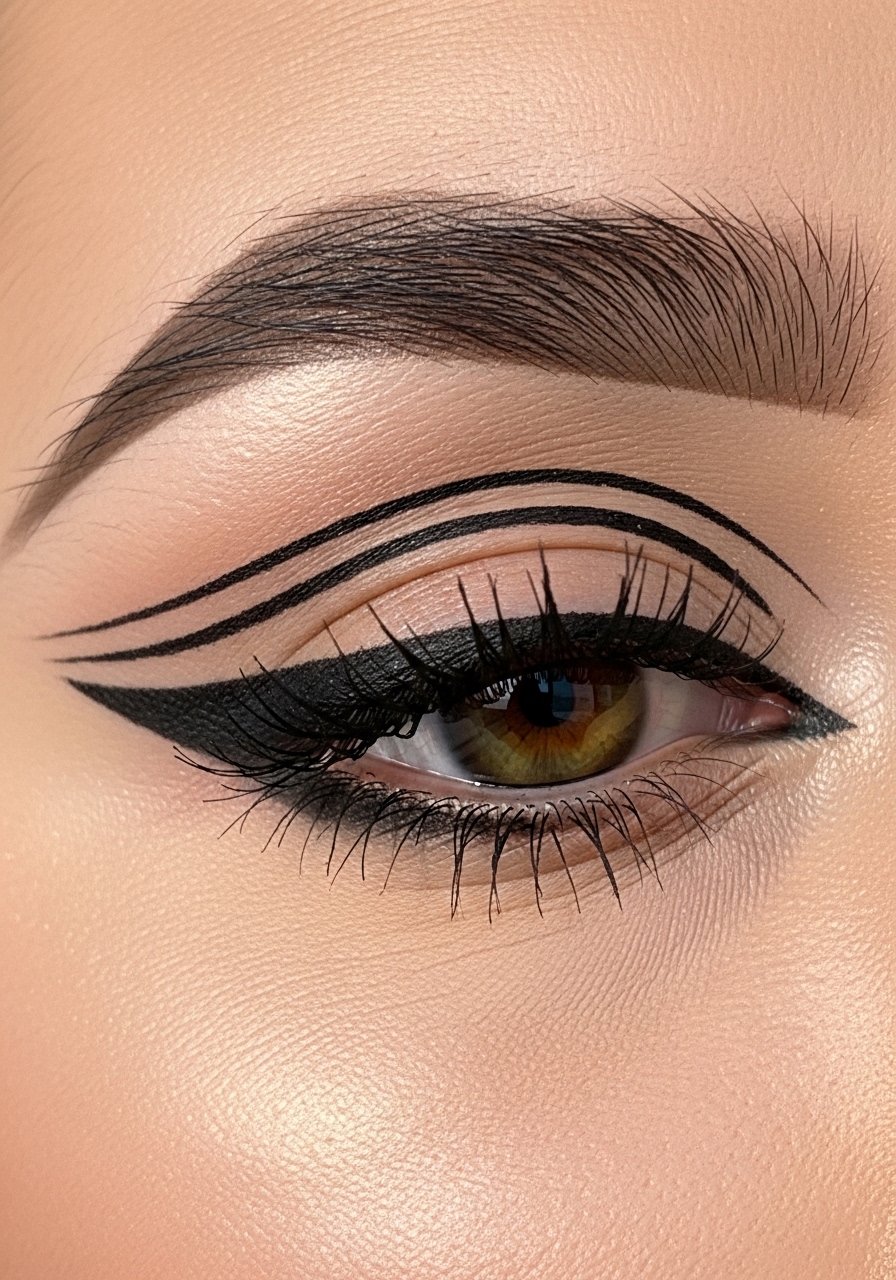
Double wings add graphic drama without too much product. I draw the usual wing, then add a thinner parallel line above the main wing and connect them subtly. I first saw this on a magazine shoot, then practiced until I got consistent. It reads bold in photos, and I suggest a matte top line so the two wings don’t merge. Use a steady hand and small strokes.
Mistake to Avoid: Making both wings the same thickness, which muddies the shape.
17. Smoky Brown Winged Liner
Brown and smoke equals a soft rock vibe. I draw a brown gel liner, then smudge the outer third into a dark brown shadow for a lived-in look. I’ve found this hides tiny flick mistakes, and my clients who complain about harsh black always prefer it. Finish with a dark brown mascara so everything reads cohesive. Great for when you want edge without stark contrast.
Mistake to Avoid: Blending too high into the crease, which can make eyes look hooded.
18. Cat Eye with Lash Line Gap
A thin gap between the liner and lash line visually lifts the eye. I draw the wing slightly detached from the lash root and tightline between lashes for density. I tried this the week I had a crowded schedule, and it read polished but relaxed. Use a small brush to fill the lash gap carefully. The result looks graphic yet breathable.
Mistake to Avoid: Leaving a thick unintentional gap, which reads like a mistake rather than a design choice.
19. Subtle Ombre Liner
Fade the liner from dark to soft for a modern, understated cat eye. I start with a deep gel at the outer corner and blend inward with a warm brown. I’ve noticed this makes the line feel less severe and more wearable for daytime. Use a tiny smudge brush and layer slowly. It’s great if you want definition without a heavy silhouette.
Mistake to Avoid: Dragging dark color across the whole lid at once, ruining the gradient.
20. Minimalist Micro Flick
Micro flicks are subtle and chic. I make a short upward tick and keep the lash line thin. It’s my go-to for quick polish on a Tuesday when I do not want full drama. About a third of my quick-makeup looks use this. Use a fine-tipped brush or pen liner for precision, and don’t try to over-extend it.
Mistake to Avoid: Trying to thicken the micro flick too much, which defeats the minimalist intent.
21. Winged Liner for Mature Eyes
For mature skin, keep the liner thin and the wing short, focused on lift rather than intensity. I use a soft pencil close to the root, then a thin wing drawn with liquid for definition. I noticed clients report it makes their lids look smoother when not overloaded with product. A cream shadow above the wing prevents the liner from settling into fine lines.
Mistake to Avoid: Using heavy, thick liner that settles and emphasizes texture.
22. Colored Cat Eye Accent
Add a colored wing for personality. I trace a neutral cat eye, then layer a colored liner or shadow at the outer tip only. I once used teal on a Saturday and it made the whole outfit feel intentional. Use a fine brush and a pigmented shadow or colored gel. Keep the color to the outer third if you prefer subtlety.
Mistake to Avoid: Using neon without balancing it with neutral tones, which can look juvenile.
23. Feathered Feline with Brow Gel
Coordinate brow feathering with your wing for a cohesive, modern look. I groom brows with clear gel so hairs point toward the wing, then angle the wing to follow that vector. I noticed that aligning the two creates a cohesive face frame without extra drama. A tiny slanted brush helps you match angles precisely.
Mistake to Avoid: Letting brow hairs compete with the wing direction, making the face look disjointed.
24. Aligning Liner with Eye Shape
Adapt the wing angle to your eye shape for a flattering result. I sketch small guide dots and adjust the tilt until it complements my natural lid. I’ve coached friends to angle wings from the lower lash line for round eyes, and the change is immediate. Use a washable marker or white liner to test angles before committing with dark liner.
Mistake to Avoid: Copying another person’s wing angle exactly, without factoring your bone structure.
25. Quick Fix for Uneven Wings
When wings are uneven, conceal and redraw instead of erasing the whole eye. I dip a tiny brush in concealer, sharpen the outer edge, then touch up the missing part with liner. I learned this in a hurry before an event; it saved me ten minutes. Use a thin synthetic brush for precision and a long-wear concealer so it does not smear.
Mistake to Avoid: Rubbing harshly to fix errors, which removes surrounding makeup.
26. Waterline Definition with a Twist
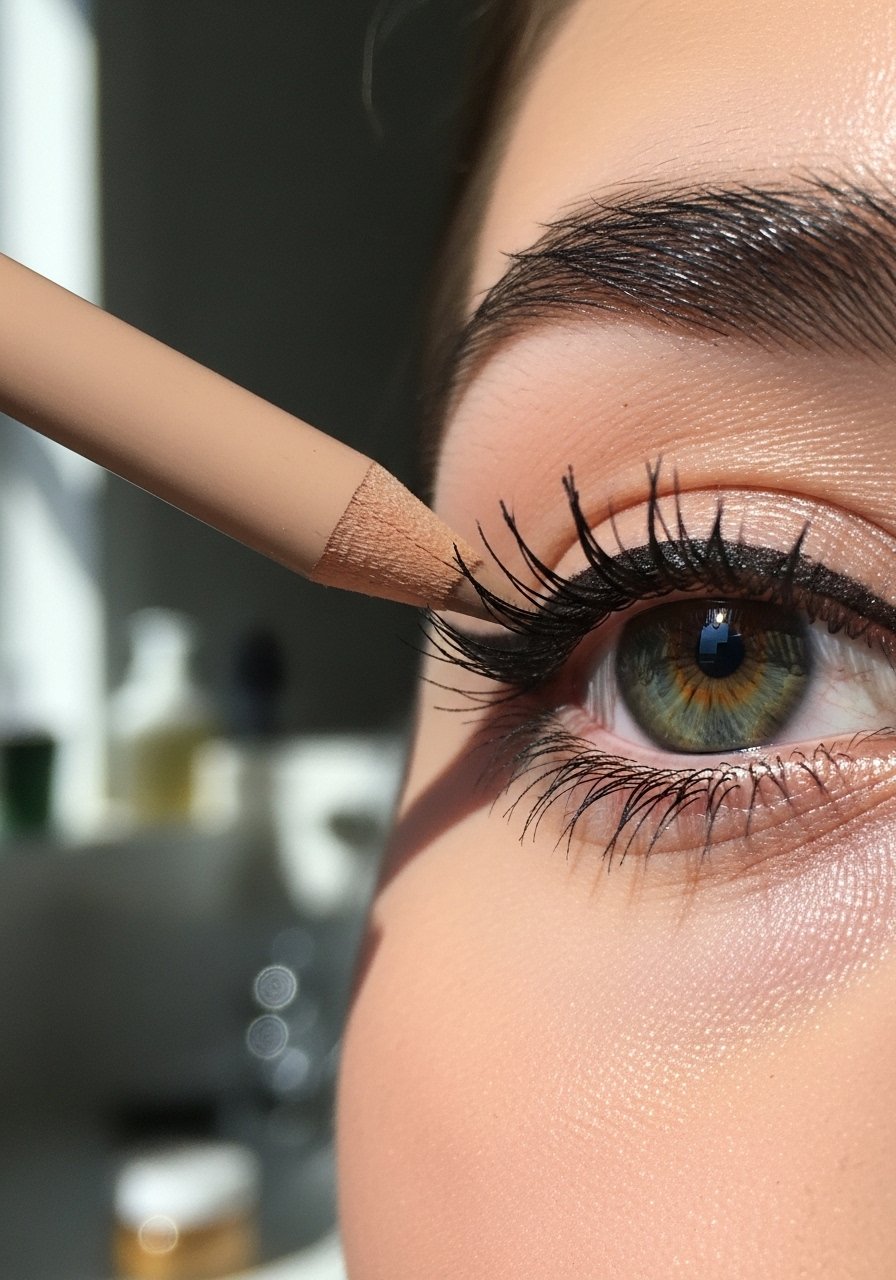
Instead of black, try a nude or colored pencil in the waterline to open the eye while keeping the cat-eye intact. I use a flesh-toned pencil for day and a soft plum for evenings. I noticed my eyes look less tired with nude, while plum created a surprising lift. Make sure the pencil is creamy and sanitized.
Mistake to Avoid: Using dried-out pencils, which drag and irritate the waterline.
27. Layering Liner for Longevity
Layer liners to make them last through humid days. I pencil along the lash line, set with a matching shadow, and top with a thin gel or felt-tip. I’ve noticed this routine kept my liner intact during long shoots where others smudged. It takes a minute longer but saves touch-ups later. Use a tiny setting brush to avoid moving the base pencil.
Mistake to Avoid: Skipping the powder set, which is the difference between staying power and smudging.
28. Cat Eye with Lash Extensions
If you have lash extensions, adjust your wing to avoid catching lashes. I draw a slightly thinner line and extend the wing just past the outermost extension so there is no glue tug. I had to redo mine once after snagging extensions. Use a gentle remover for corrections and skip oil-based products near the base to prolong extensions.
Mistake to Avoid: Rubbing extensions when fixing liner, which loosens glue bonds.
29. Everyday No-Fuss Cat Eye Routine
My everyday routine: prime lids, tightline quickly, draw a three-dot guide for the wing, connect and thicken if needed. I usually rely on a reliable liquid-felt-tip-liner and a tiny smudger. I’ve found that practicing the same small ritual cuts mistakes by more than half. Keep tools organized so you don’t fumble. This routine is fast, repeatable, and forgiving.
Mistake to Avoid: Skipping primer on oily lids, which leads to sliding and midday smudging.
Makeup Tips
Prep the Lid: I always use a thin layer of hydrating-primer so liners don’t migrate, and it gives me a predictable surface.
Guide Dots First: Draw three small dots for the wing end and inner flick with a pencil, then connect them with a pen liner for symmetry.
Use Tape Sparingly: I prefer a sticky note corner instead of tape, it lifts without pulling skin and avoids creasing when released.
Brush Care: Clean your angled brush weekly, a soft angled-liner-brush with buildup makes edges fuzzy, and I noticed cleaner brushes yield sharper lines.
Build Slowly: Layer product in thin passes, whether it is gel or liquid. I build the thickness rather than trying to perfect it in one stroke.
Emergency Fix Kit: Keep a small cotton swab, concealer and a fine synthetic brush in your bag; I fixed a festival wing in line at a concert using just that kit.
