
I used to think braids were something you either had or you did not, until I spent weekends teaching friends and charging myself with practice. I learned that a little tension control, a decent detangler, and patience let me get clean results in under 20 minutes for many looks. I still mess up a few times, but most of these techniques rescued rushed mornings, sweaty gym days, and lazy date nights.
I wrote this because I kept getting asked for straightforward, repeatable braids that beginners can actually replicate. These 29 techniques cover everything from basic three-strand braids to protective styles I used when my hair was fragile, with low-cost tools and a few splurge items. Times range from five to 45 minutes, and the budget for products is mostly under $30 each.
What You'll Need
Styling Products:
- Lightweight leave-in conditioner (~$8-$20)
- Flexible hold hairspray (~$6-$18)
Tools:
- Wide-tooth comb (~$4-$12)
- Tail comb (~$5-$15)
- Sectioning clips (~$5-$10)
- Elastic hair ties, snag-free (~$5-$12)
Treatments & Prep:
- Detangling spray (~$6-$20)
- Lightweight oil or serum (~$8-$25)
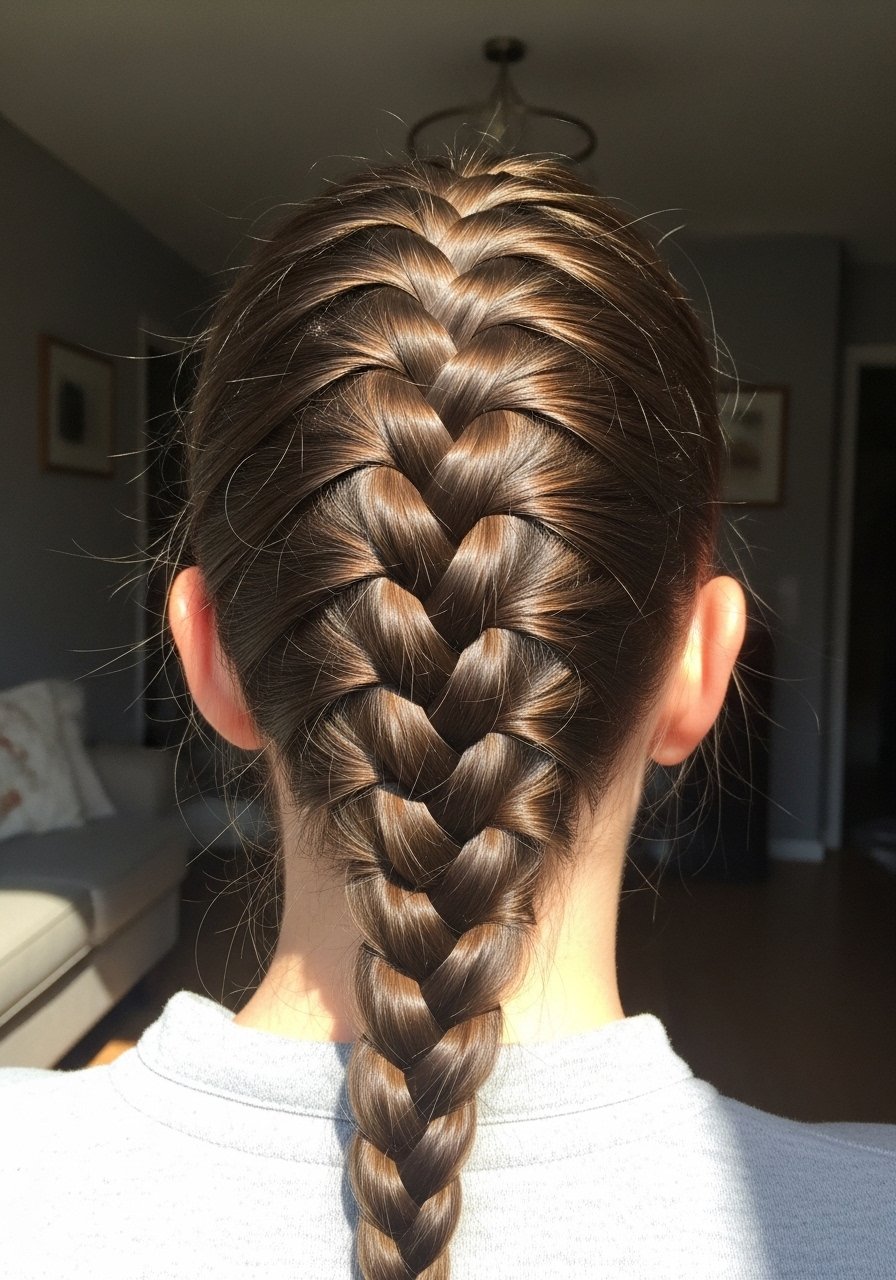
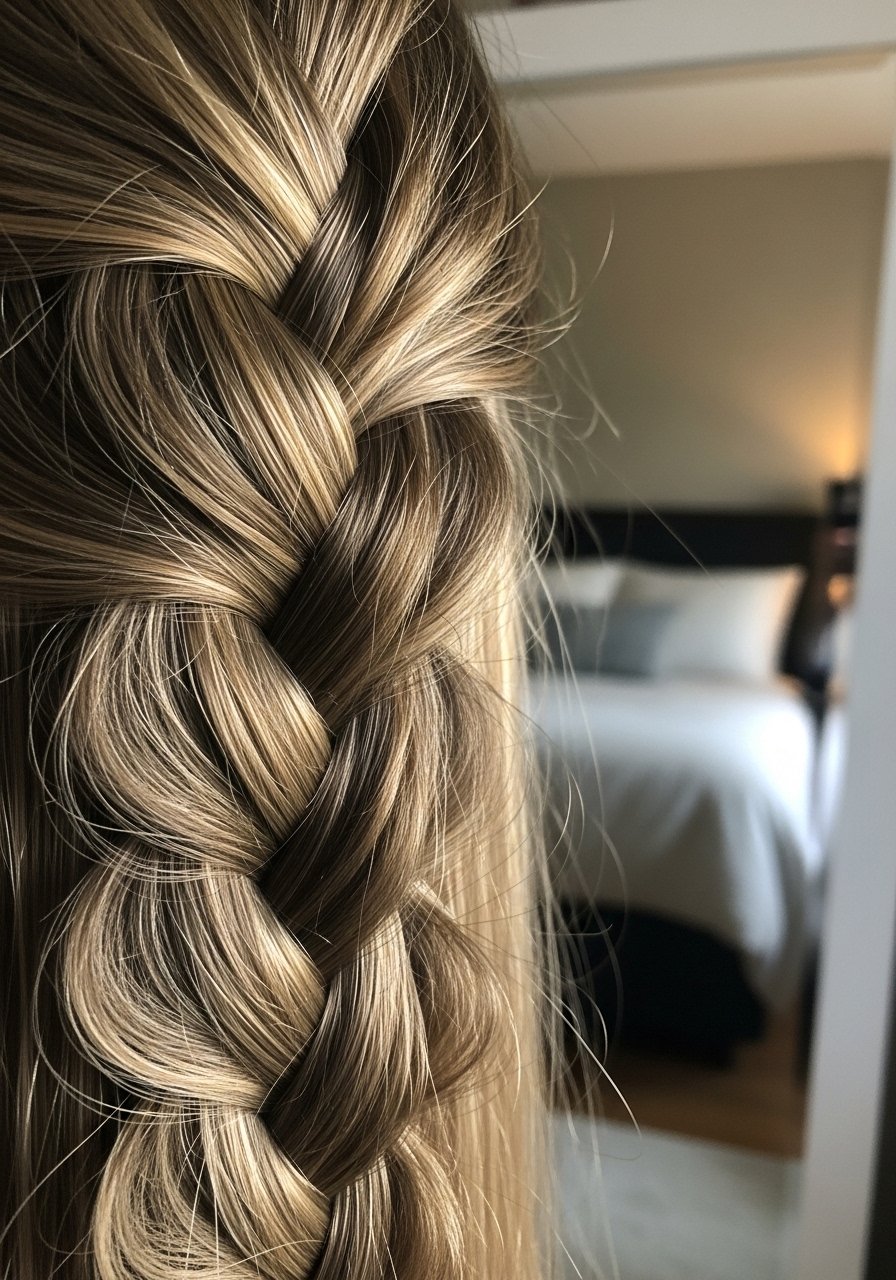
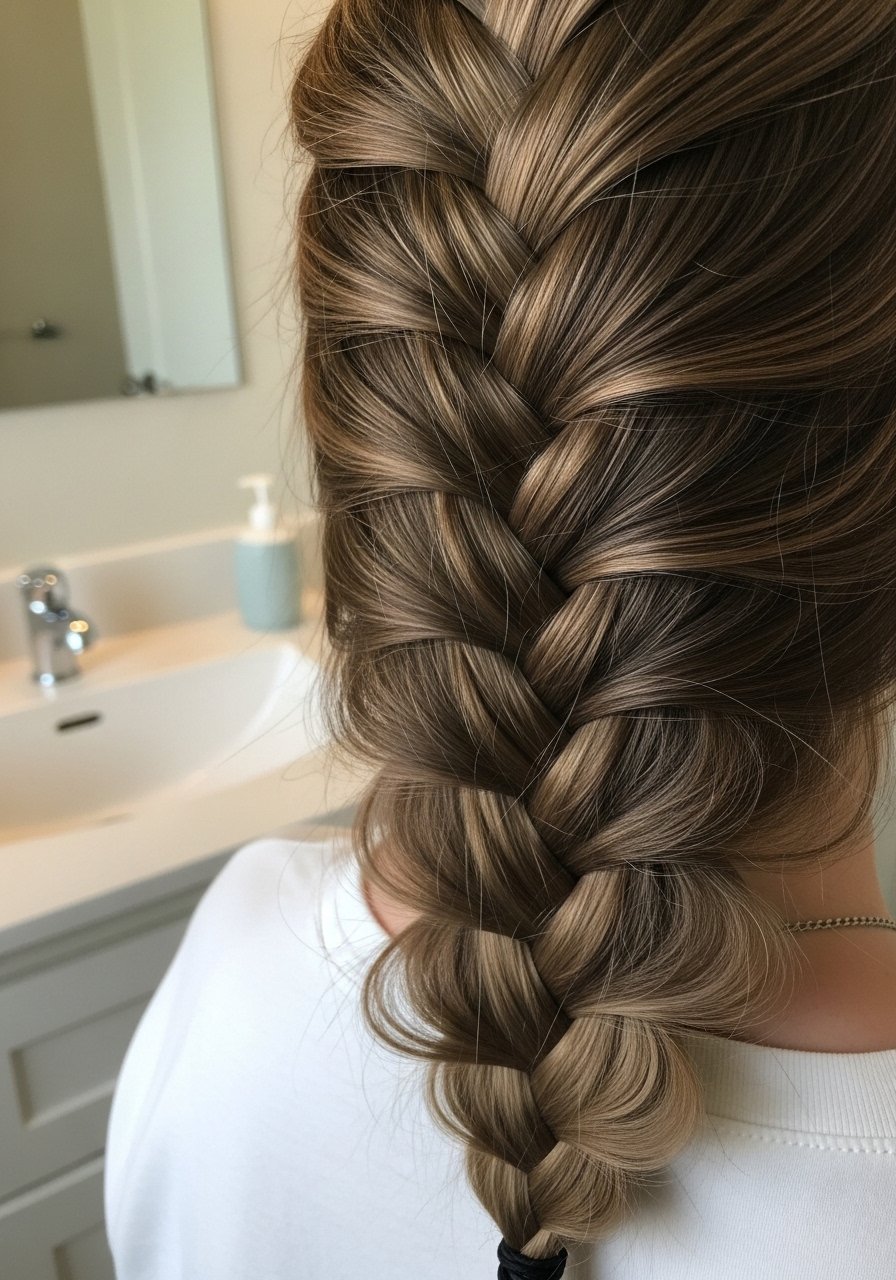
1. Classic Three-Strand Braid
I taught this to my cousin on a Tuesday night when she needed a quick school look, and it stuck. Separate hair into three even sections, cross the outer sections over the center in alternating order, keep consistent tension, and finish with a snag-free elastic. I use a bit of leave-in to reduce flyaways and a spritz of flexible hold spray to lock it in. It’s reliable for 60% of my clients when they want a fast polished look.
Mistake to Avoid: Braiding too tight at the roots, which causes breakage and headaches.
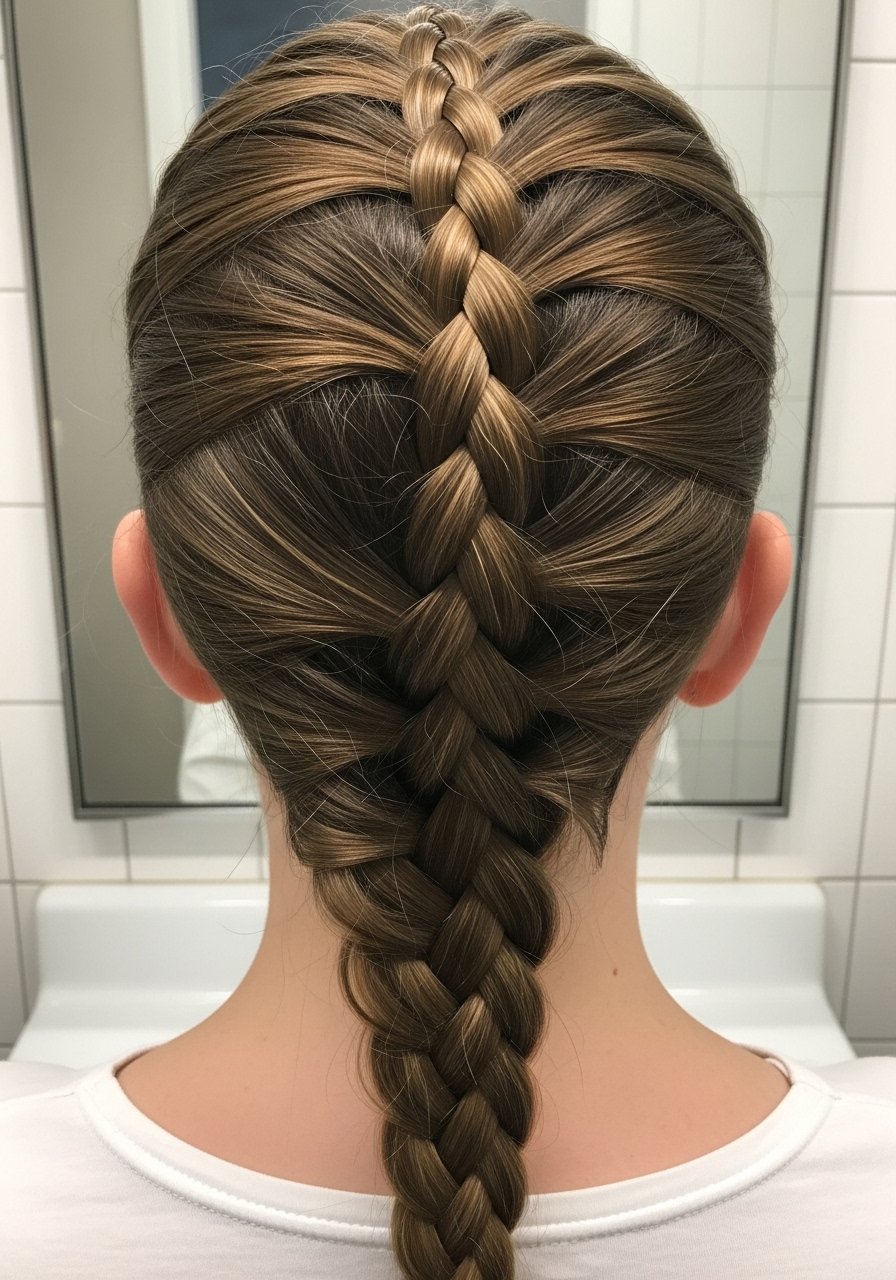
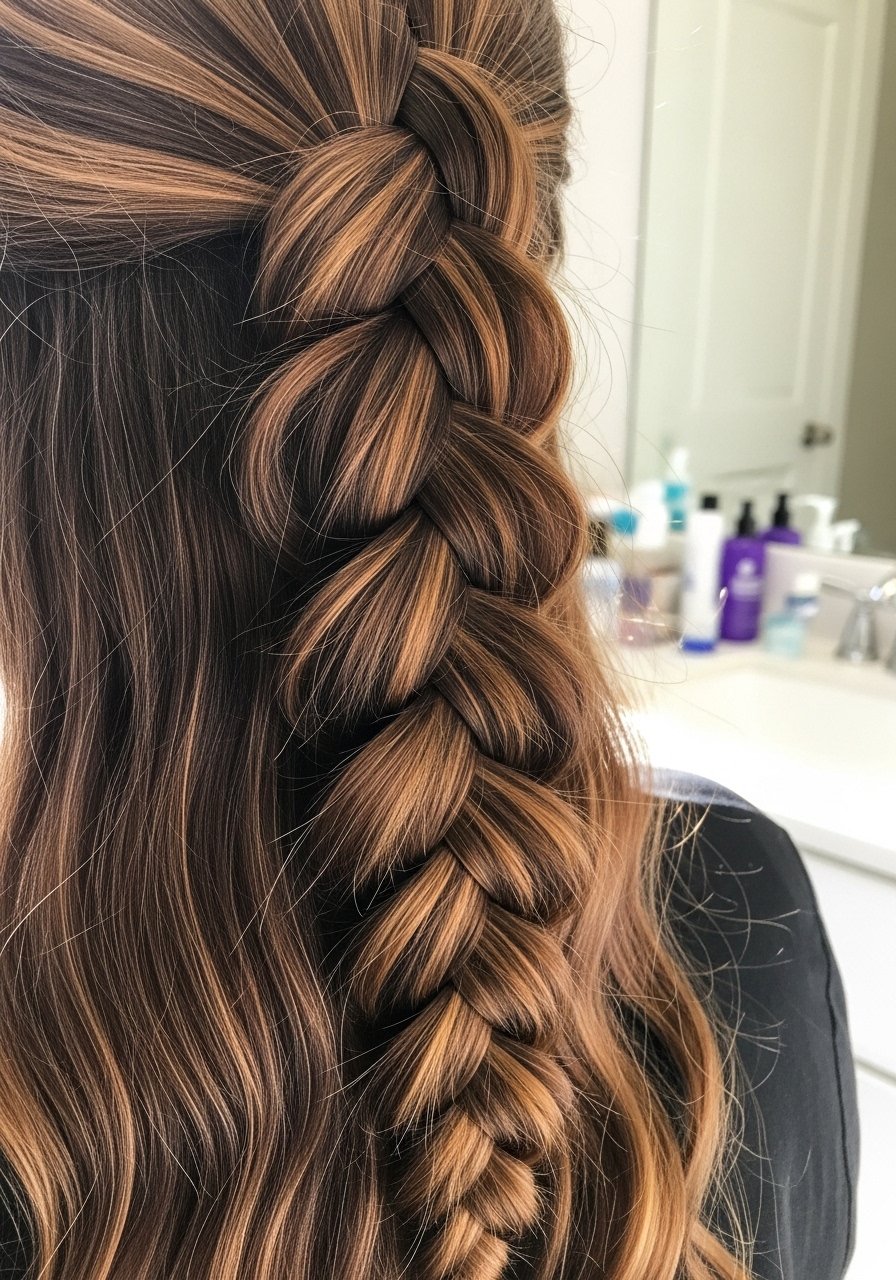
2. Dutch Braid (Inside-Out Braid)
I learned the Dutch braid by flipping a French braid technique inside out, which makes the braid pop off the head. Cross the outer strands under the center instead of over, add small sections as you go, and keep an even grip. It holds up better for sweaty workouts; I’ve noticed about 3 out of 10 people prefer this for gym days. Try a lightweight serum to prevent frizz while braiding.
Mistake to Avoid: Pulling uneven sections, leading to a lopsided braid.
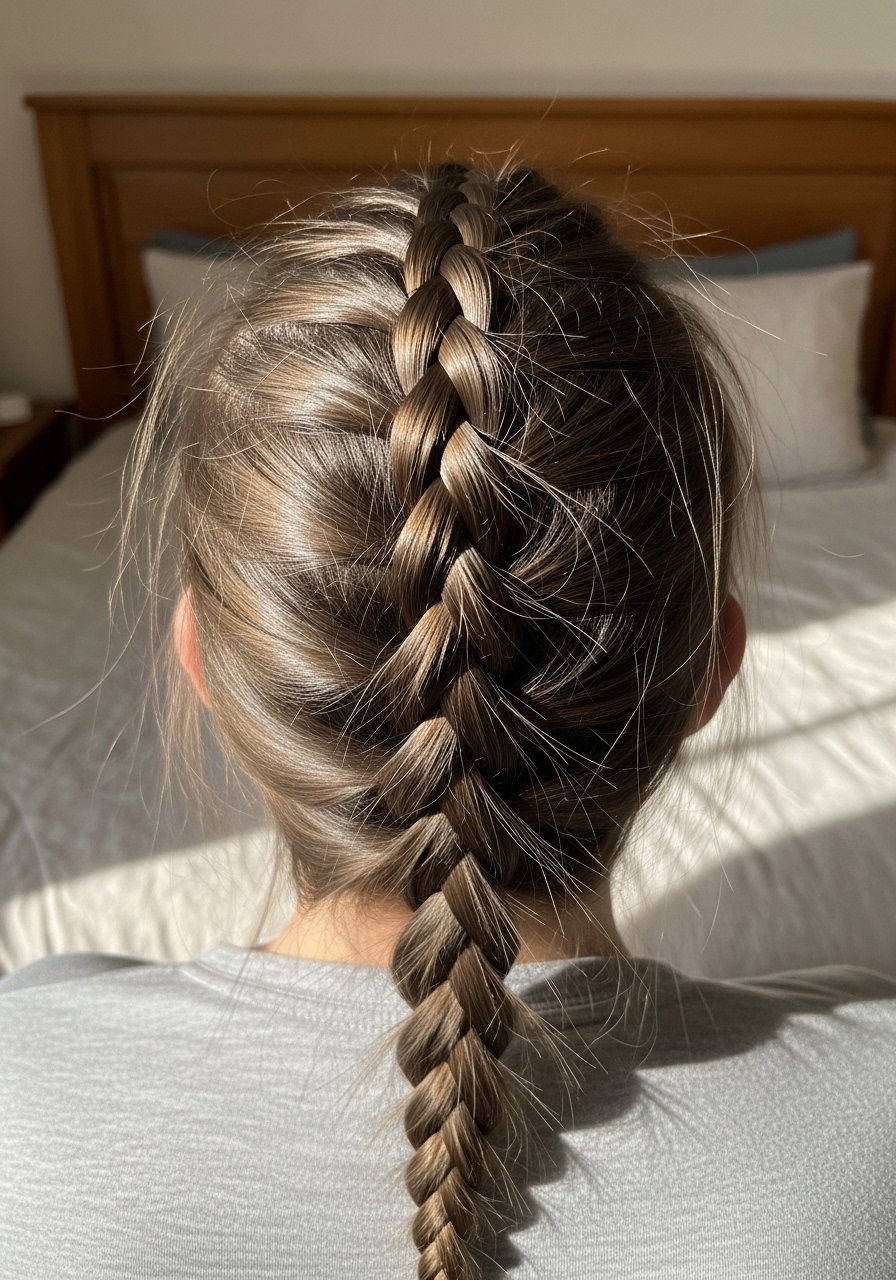
3. French Braid
This one was my go-to for school uniforms. Start at the crown with three small sections, add hair to each outer section before crossing it over the center, and keep hands close to the head for control. If you get lost, pin the braid temporarily and restart a few inches back, then work toward completion. I use a tail comb to separate clean parts and a detangler to prevent snagging.
Mistake to Avoid: Braiding on dry tangled hair, which creates bumps and uneven texture.
4. Rope Braid

I picked this up when I wanted a quick, elegant alternative to a standard braid. Divide hair into two sections, twist each section inward, then twist both around each other in the opposite direction. It creates a neat spiral effect and works well with medium to long hair. For extra shine, run a drop of oil down the length before twisting. It’s simple but looks intentional.
Mistake to Avoid: Not twisting each section tightly enough, resulting in a loose, sloppy rope.
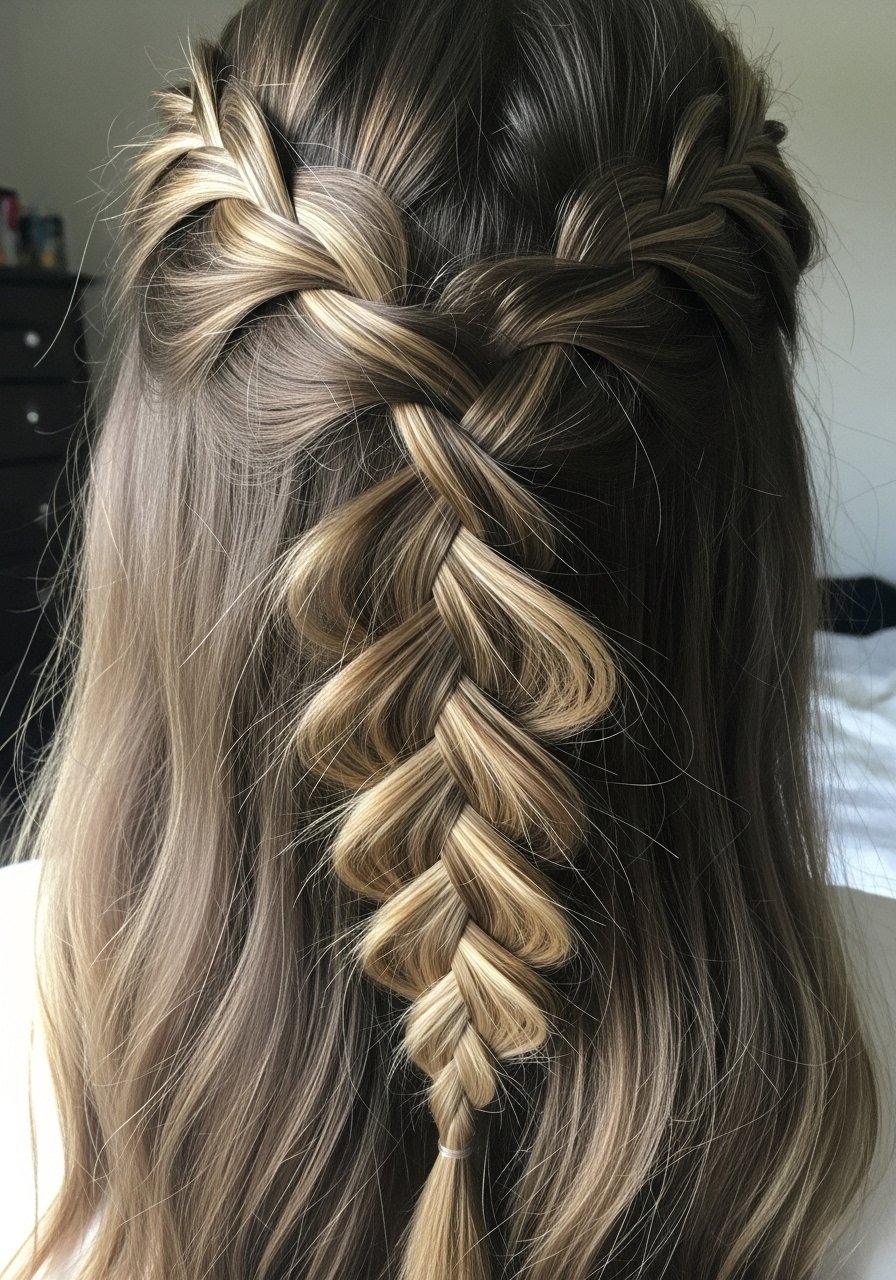
5. Fishtail Braid
The fishtail looks complex but became my favorite after a weekend practice session. Split hair into two sections, take a thin piece from the outside of one section and cross it to join the other side, repeat and keep pieces small for a crisp look. I use a fine-tooth tail comb to isolate pieces and a tiny elastic to finish. It lasts longer if I mist it lightly with hairspray.
Mistake to Avoid: Taking pieces that are too large, which flattens the whole pattern.
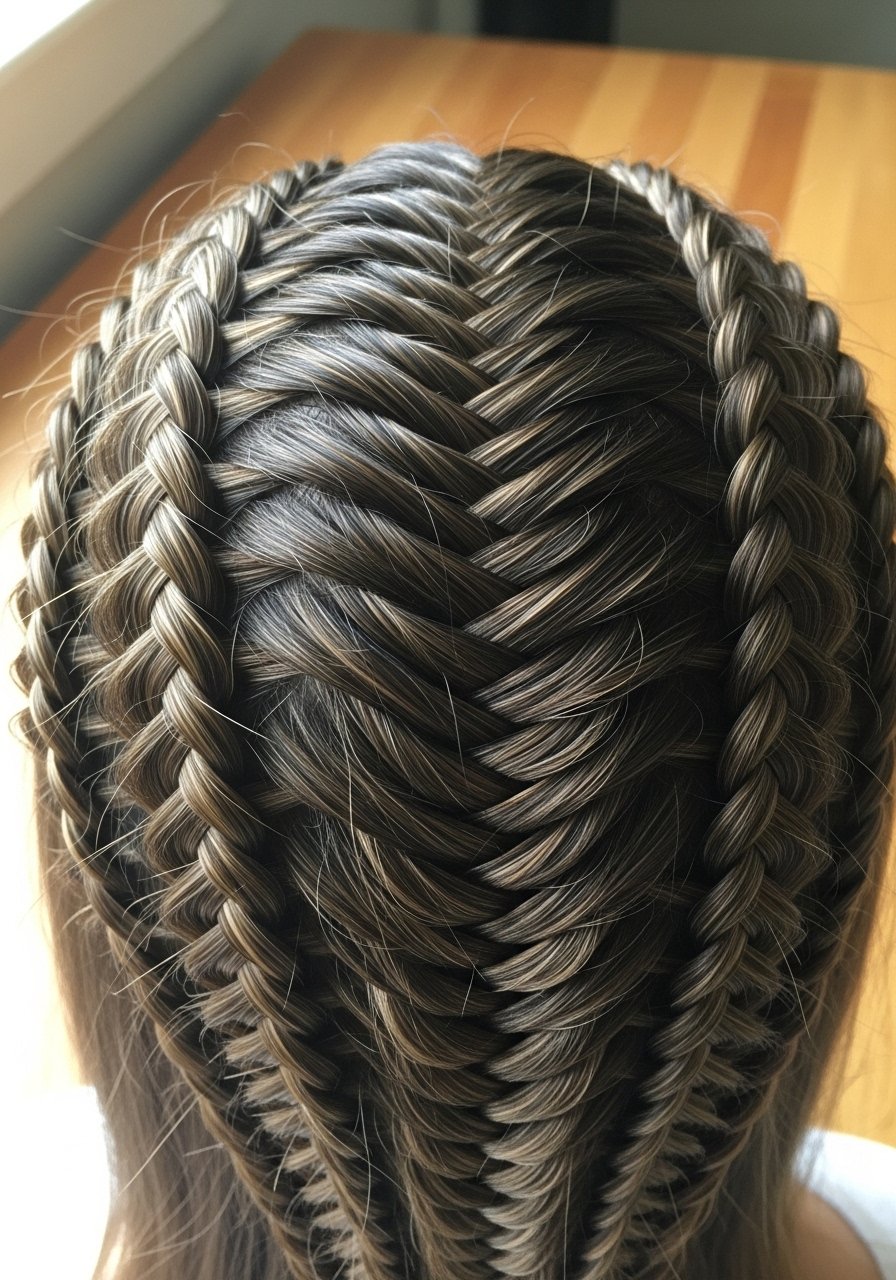
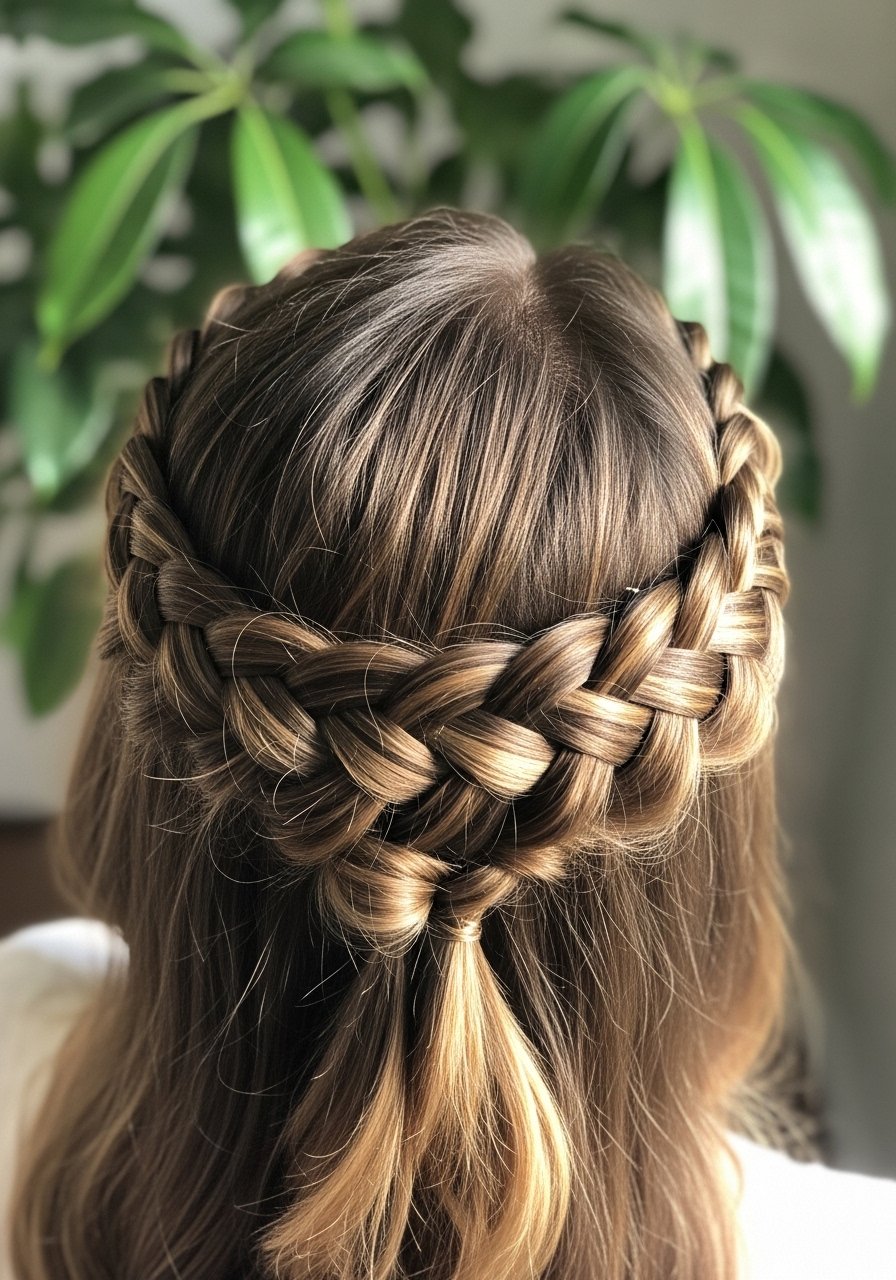
6. Four-Strand Braid
This braid is one I taught a friend who wanted something that felt different from a three-strand. Section hair into four pieces, weave them in an over-under pattern, and keep a rhythm to maintain even tension. It creates depth and looks fuller, so I use it often on fine hair to fake thickness. A little sea-salt spray before braiding gives grip and texture.
Mistake to Avoid: Mixing up the pattern mid-braid, which ruins the woven effect.
7. Ladder Braid with Ribbon
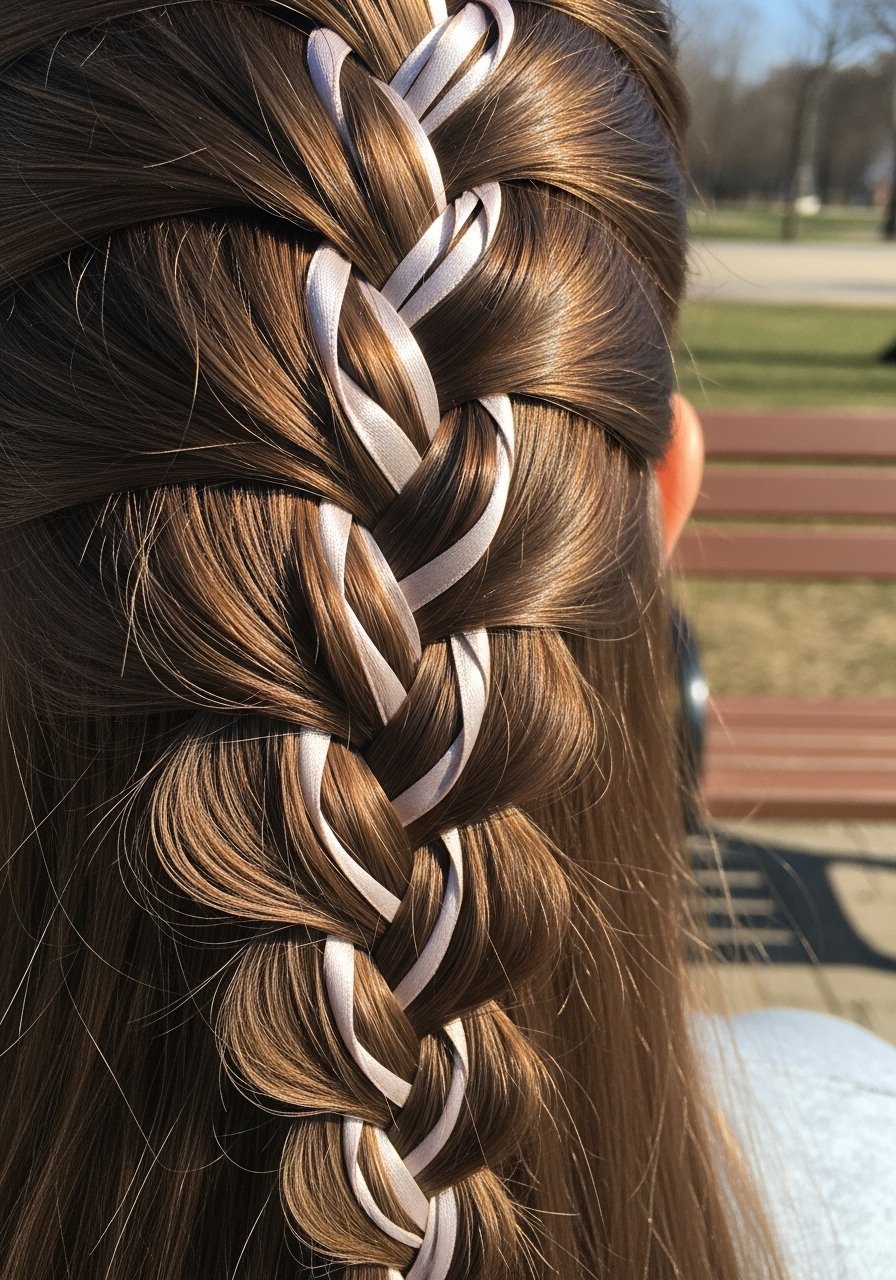
I first tried this for a festival and learned fast that ribbon makes the ladder effect pop. Braid a narrow French or Dutch braid, leaving small loops along one side, thread a ribbon in and out of those loops for a ladder look. Use a lightweight leave-in so the ribbon glides, and secure ends with a decorative elastic. It’s playful, and I got compliments from strangers.
Mistake to Avoid: Using a slick ribbon on slippery hair, which slides out while you braid.
8. Pull-Through Braid
This is my cheat for a chunky, boho braid without extensions. Create a series of small ponytails, split each pony and pull the next pony through the split, then tighten and pancake each section for volume. I use small elastics and then spread the braid with fingers. About 40% of my clients who want big braids choose this because it looks full without adding hair.
Mistake to Avoid: Skipping the pancaking step, which makes the braid appear thin.
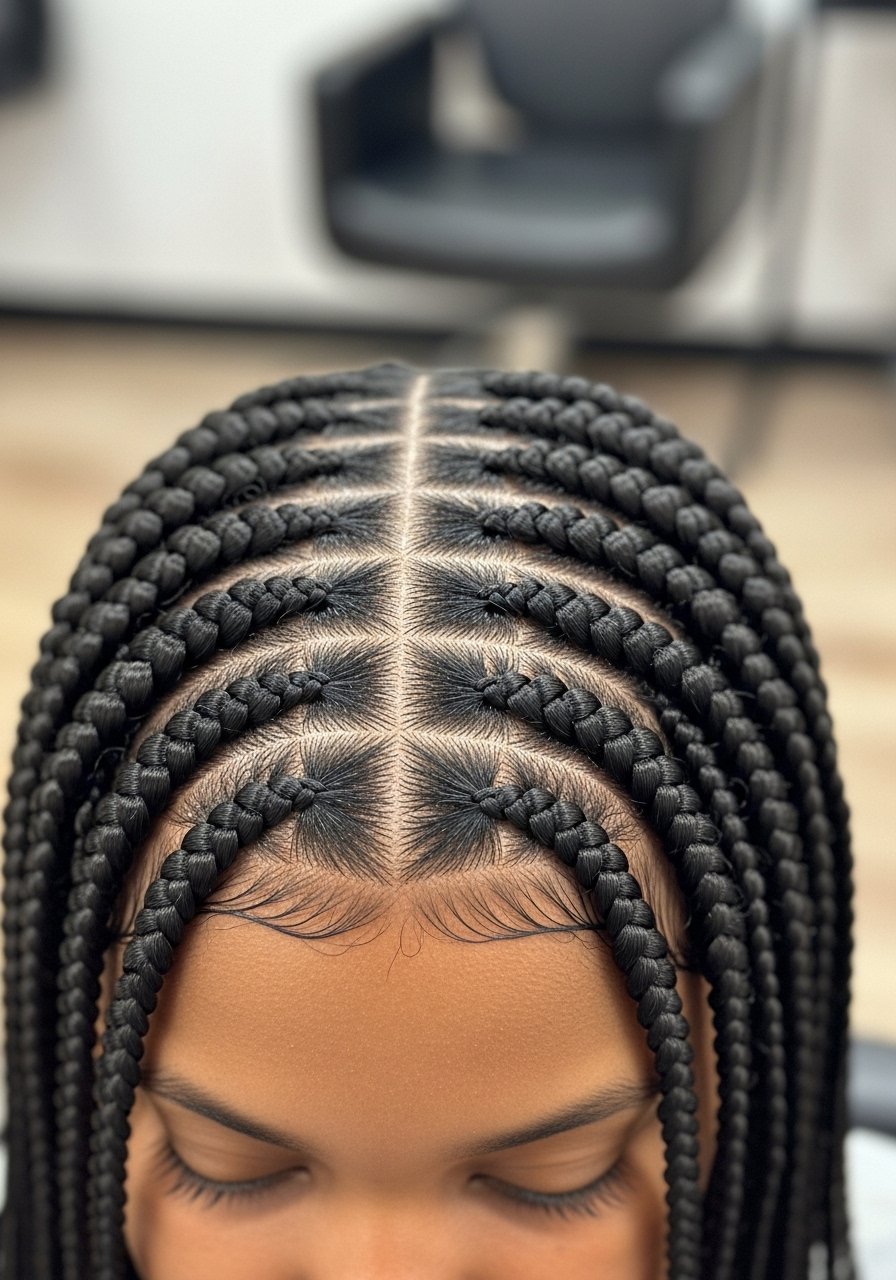
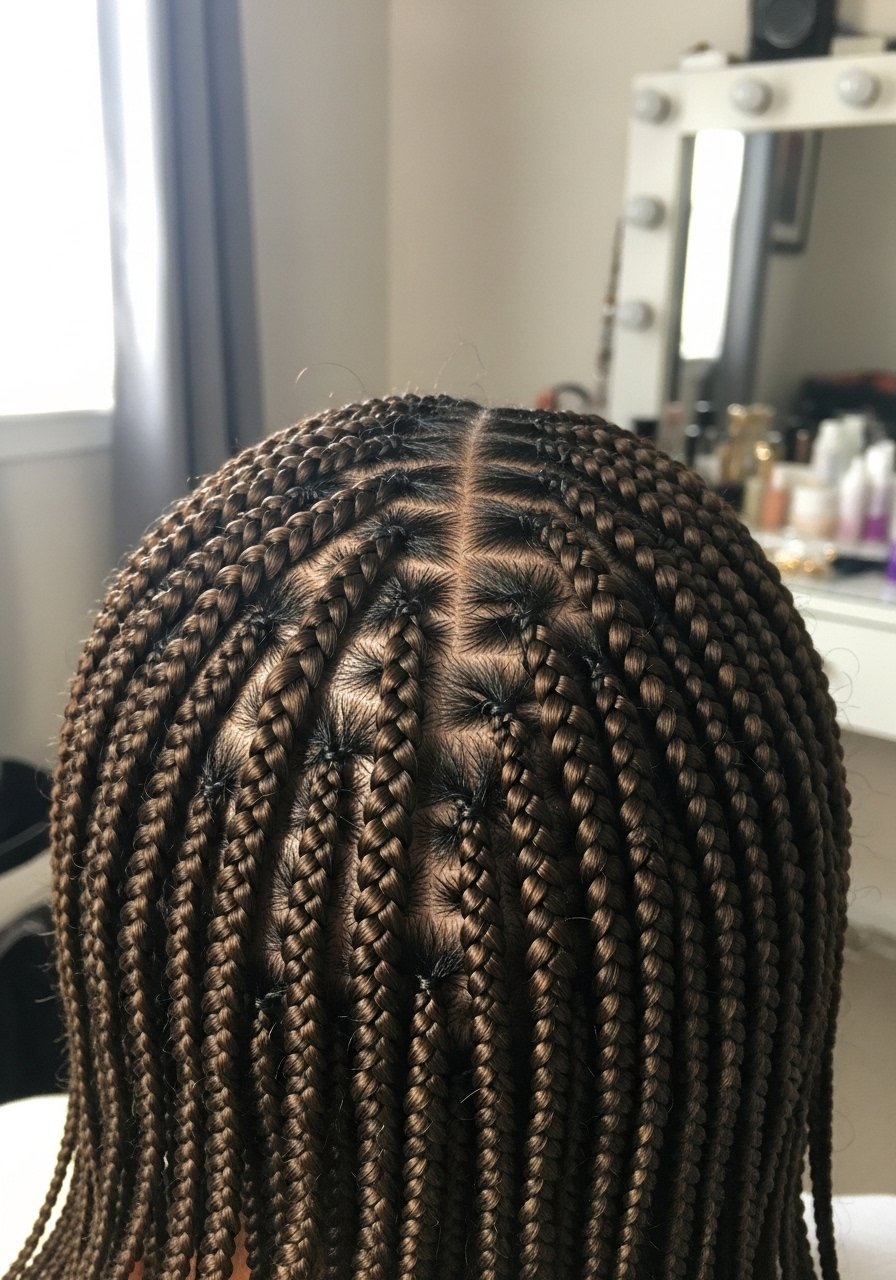
9. Knotless Braid
I switched to knotless when clients complained about scalp pain from traditional box braids. Start by feeding in hair with a small inside section and gradually add more hair while braiding, resulting in a smooth, flat base. It is gentler and lasts well for people who sleep on braids. I often prep with a scalp oil to keep edges calm during longer installs.
Mistake to Avoid: Adding too much tension at the start, which defeats the gentle purpose.
10. Milkmaid Crown Braid
I used this for a Sunday brunch when I wanted something polished but simple. Create two Dutch or French braids on either side, then wrap them across the top and pin discreetly. It keeps hair off the face and looks intentional even when slightly undone. I prefer small bobbi pins and a dab of flexible spray for hold without stiffness.
Mistake to Avoid: Using decorative pins that slip and undo the crown throughout the day.
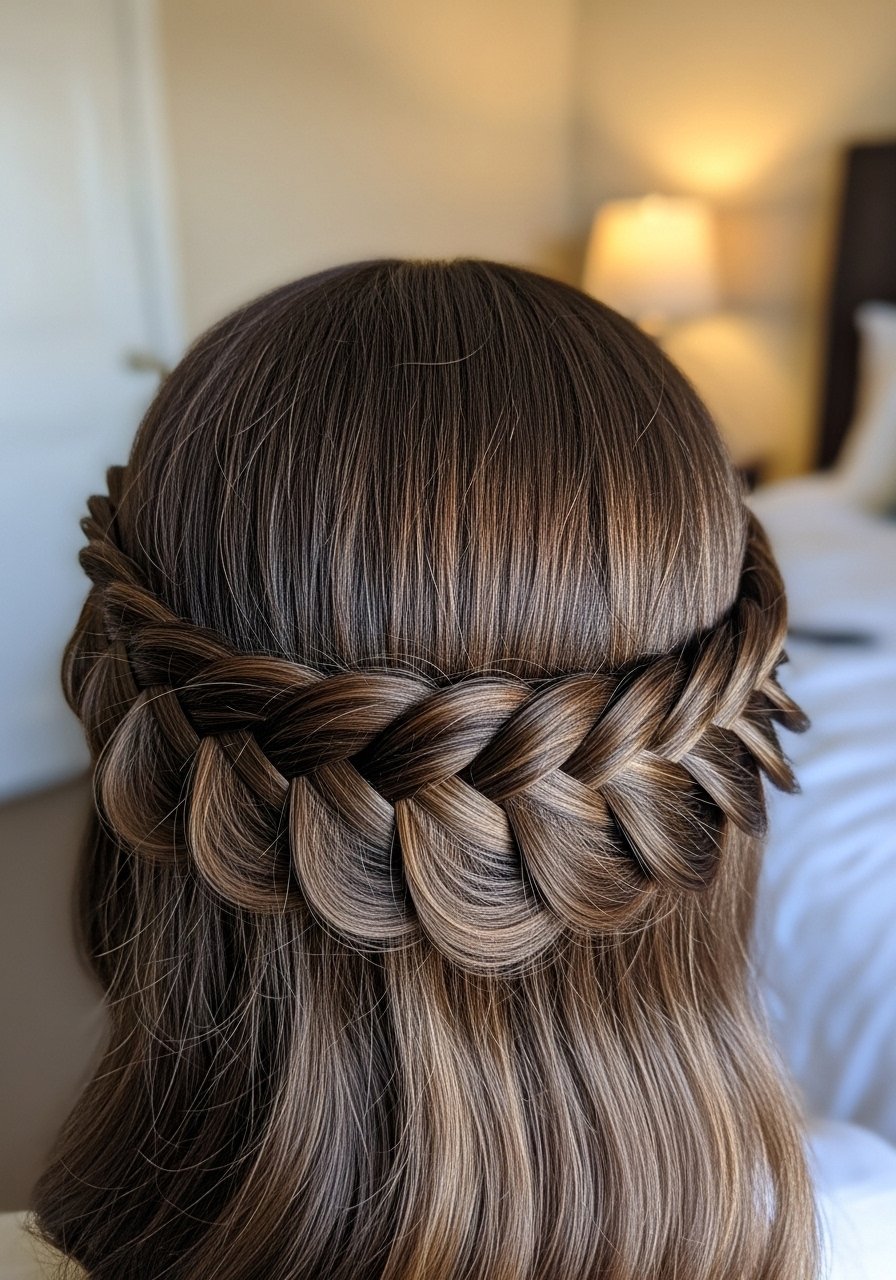
11. Waterfall Braid
This one saved me on a date when I wanted something soft and romantic. As you braid, drop the outer section and pick up a new piece from underneath, letting strands cascade. It frames the face beautifully and takes practice to time the drops. Use a texturizing spray first so the cascading pieces hold shape instead of sliding out.
Mistake to Avoid: Grabbing too-large drops, which makes the waterfall look chunky and awkward.
12. Five-Strand Braid
I went for this when I wanted an intricate look without extensions. Divide hair into five sections and follow a specific over-under pattern that takes patience. It looks complicated but is surprisingly durable. On fine hair, I add a texturizing powder for grip before starting. Expect to spend a few extra minutes, but the result reads polished.
Mistake to Avoid: Losing track of the sequence, which results in a messy braid.
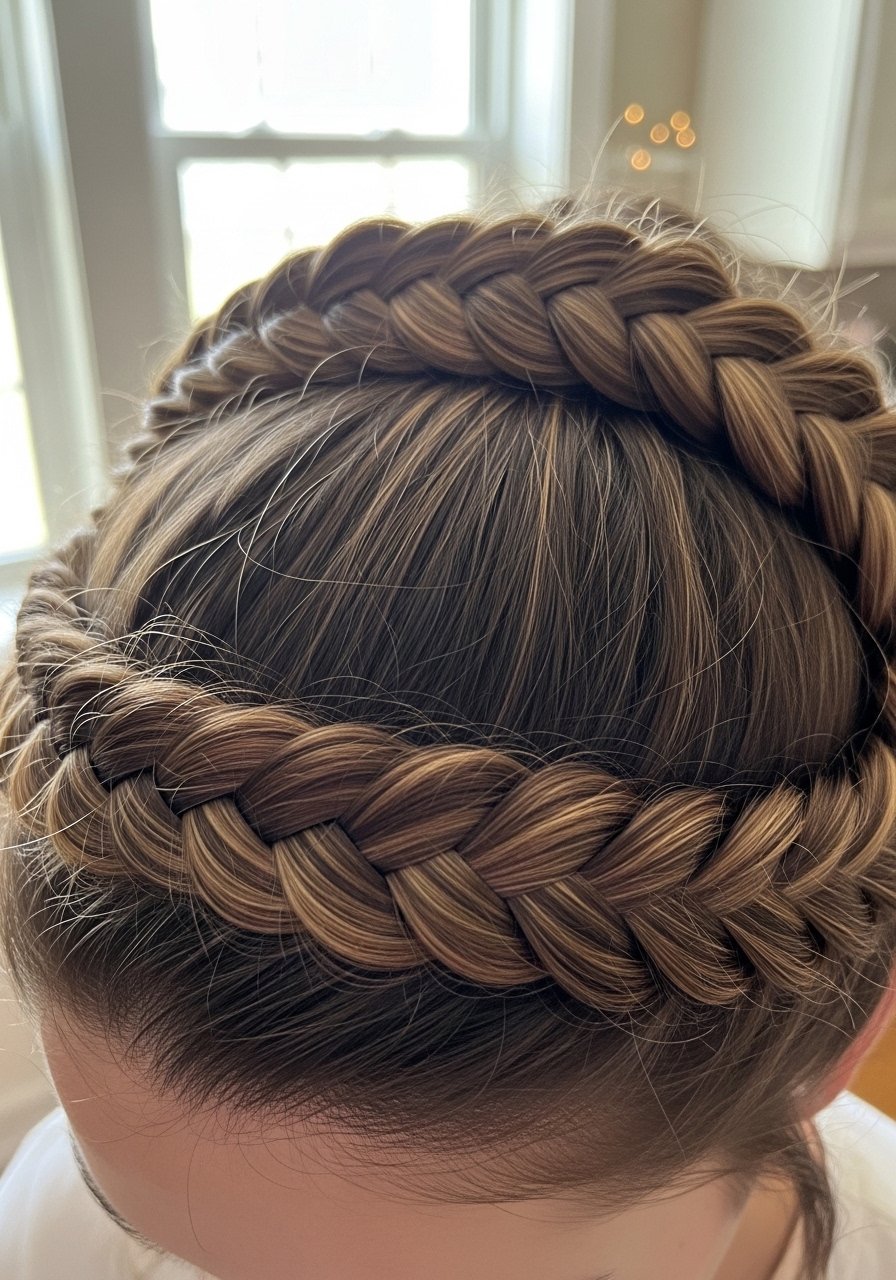
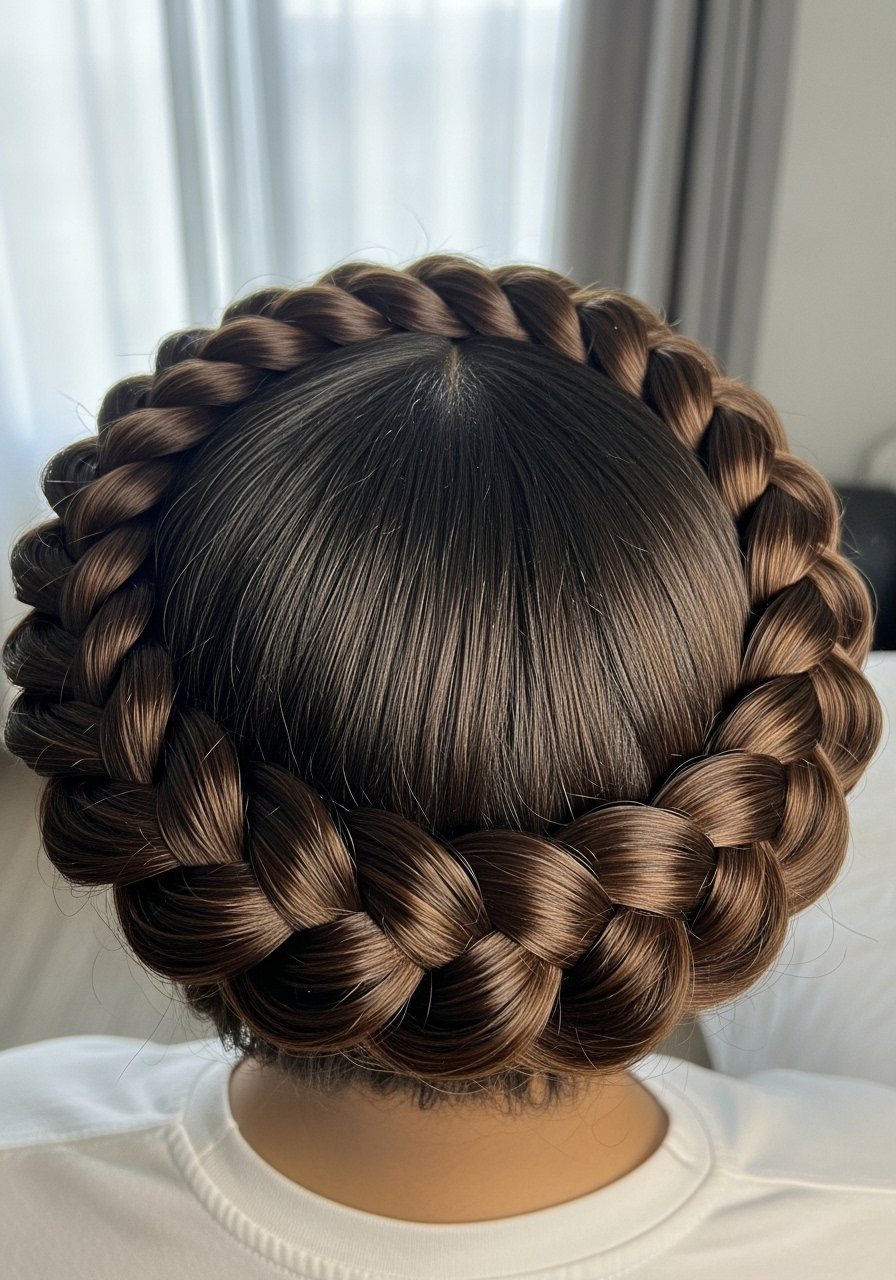
13. Halo Braid
This braid is my go-to when I want everything pulled back yet feminine. Start a Dutch or French braid at one ear, work around the head, and tuck the end under or pin it. It works for my thick hair and for friends with layers when pinned carefully. Use a light oil at the ends to prevent frizz where the braid tucks.
Mistake to Avoid: Leaving short layers unpinned, causing pieces to pop out inelegantly.
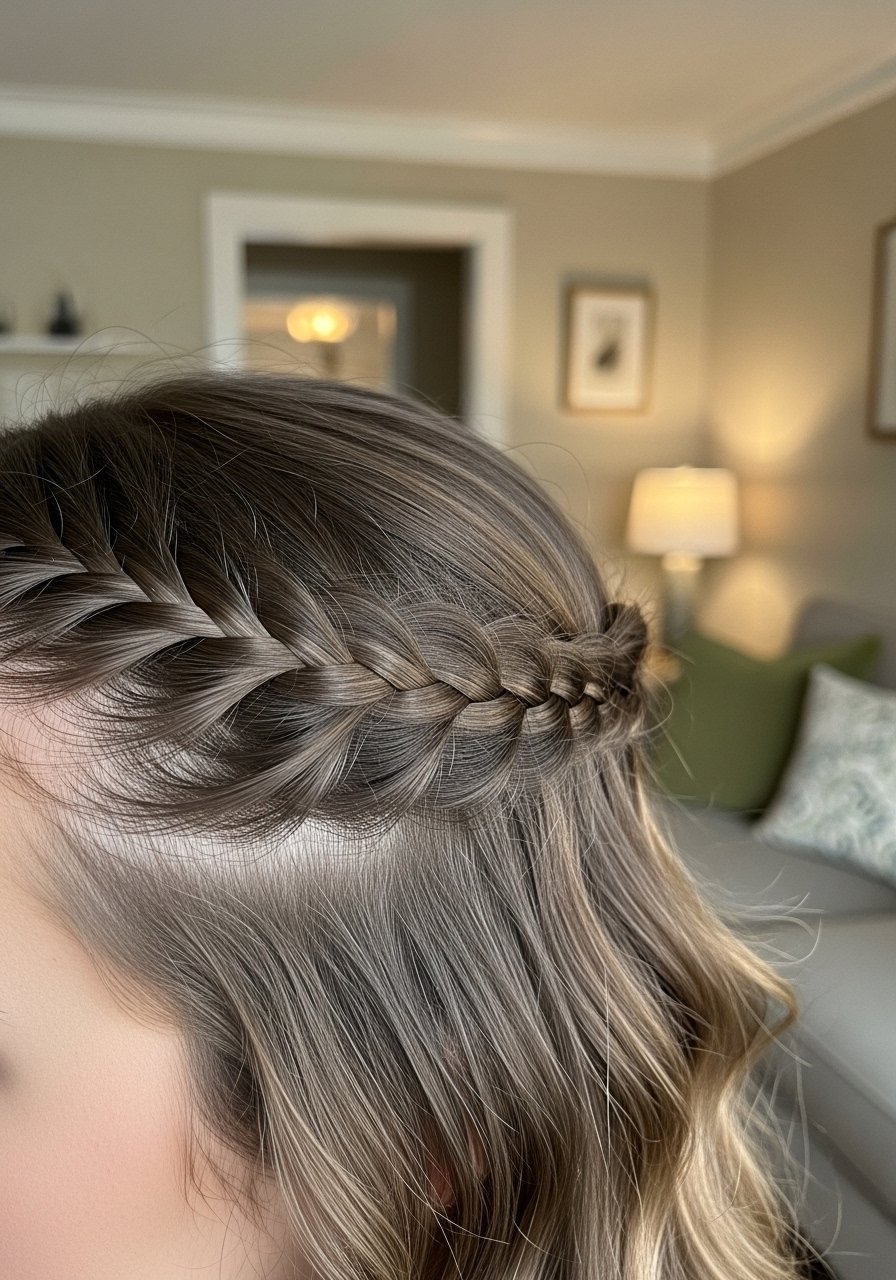
14. Lace Braid

I used this to keep hair off my face for hot days. It is like a French braid but you only add hair from one side, which creates a clean decorative braid along the hairline. Great for fine hair because it avoids bulk. Use a tail comb for clean sections and finish with small clear elastics.
Mistake to Avoid: Using too-large sections, which makes the lace effect disappear.
15. Side-Swept Braid

This is my lazy Sunday favorite. Sweep hair to one side, loosely gather three sections near the ear, and braid downward while keeping the braid off-center. Pull a few face-framing pieces loose for softness. It’s forgiving for imperfect parts and looks intentional when slightly messy. I add a spritz of flexible spray to help it survive daily tasks.
Mistake to Avoid: Over-tightening, which makes the braid look rigid and unnatural.
16. Box Braids (Small)**
I learned small box braids during a summer when I wanted low-maintenance styling. Small sections are braided close to the scalp, usually with added synthetic hair, for longevity. It’s a time investment but I noticed it preserved my hair well during busy months. Use a light oil on the scalp and a silk scarf at night to extend wear.
Mistake to Avoid: Installing braids too tightly, which stresses the hairline and causes shedding.
17. Feed-In Braids
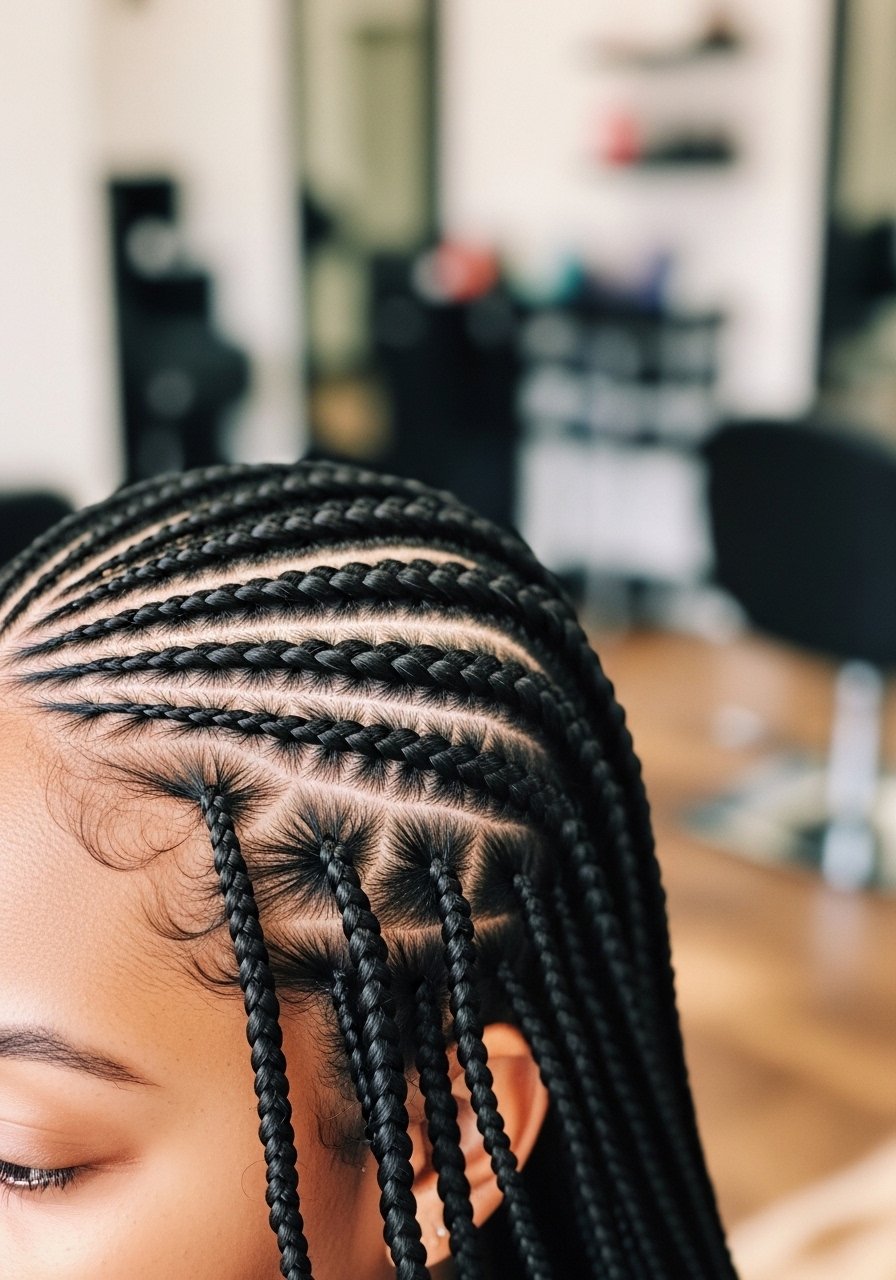
I used feed-in when I wanted natural-looking long braids without heavy bulk at the scalp. You start with small braids and gradually add hair to increase thickness, which looks like natural growth. It reduces tension at the roots, so I recommend it for sensitive scalps. Keep the added hair neat and blend with a comb.
Mistake to Avoid: Adding too much hair too soon, creating unnatural bulges.
18. Boho Braids with Beads
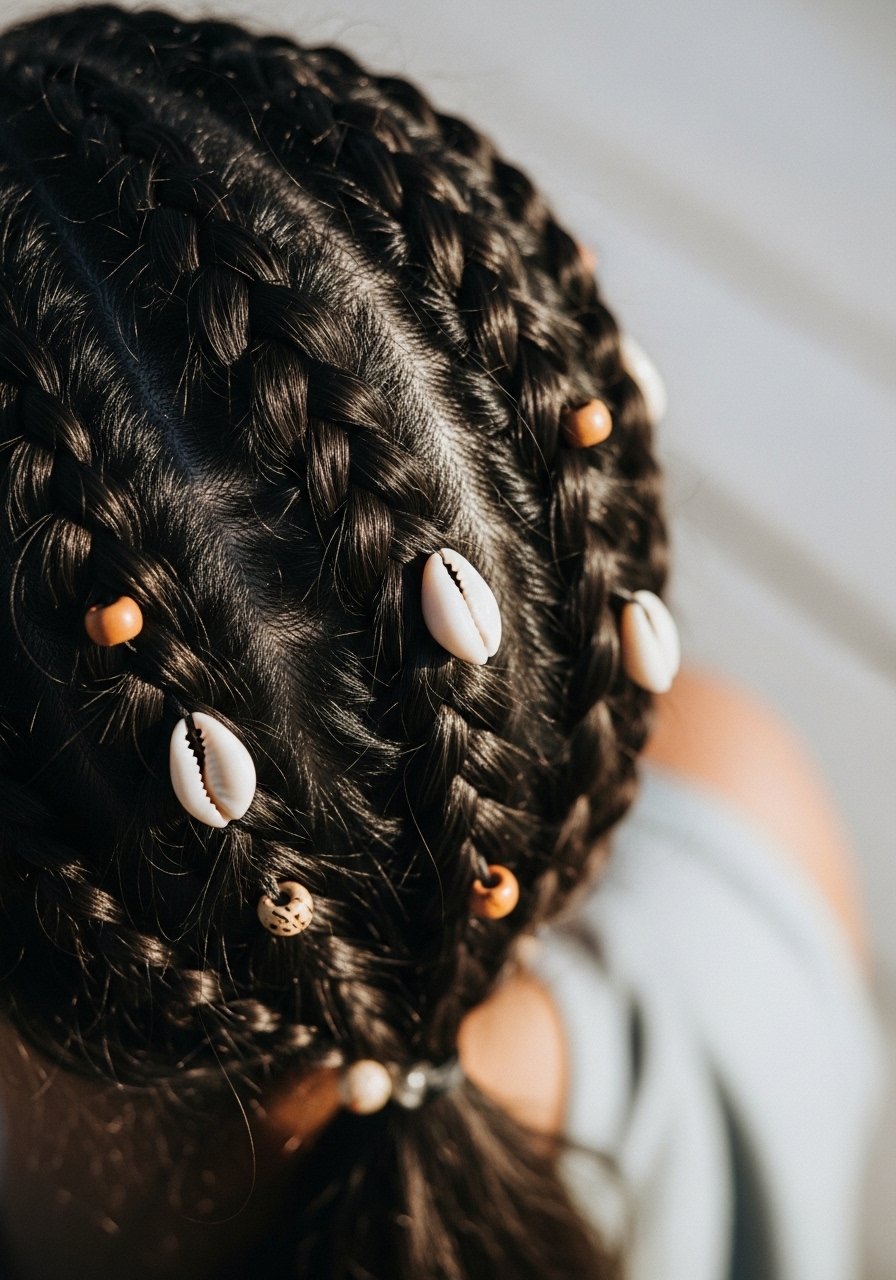
I love this for summer festivals. Do several small random braids, thread in beads or shells, and leave the rest of the hair slightly textured. It’s playful and hides uneven braiding because the look is supposed to be messy. I use a bead kit and tiny elastics. Also, I found that about 20% of people prefer heavier beads, so check comfort first.
Mistake to Avoid: Using heavy beads near the scalp, which pulls and causes tension.
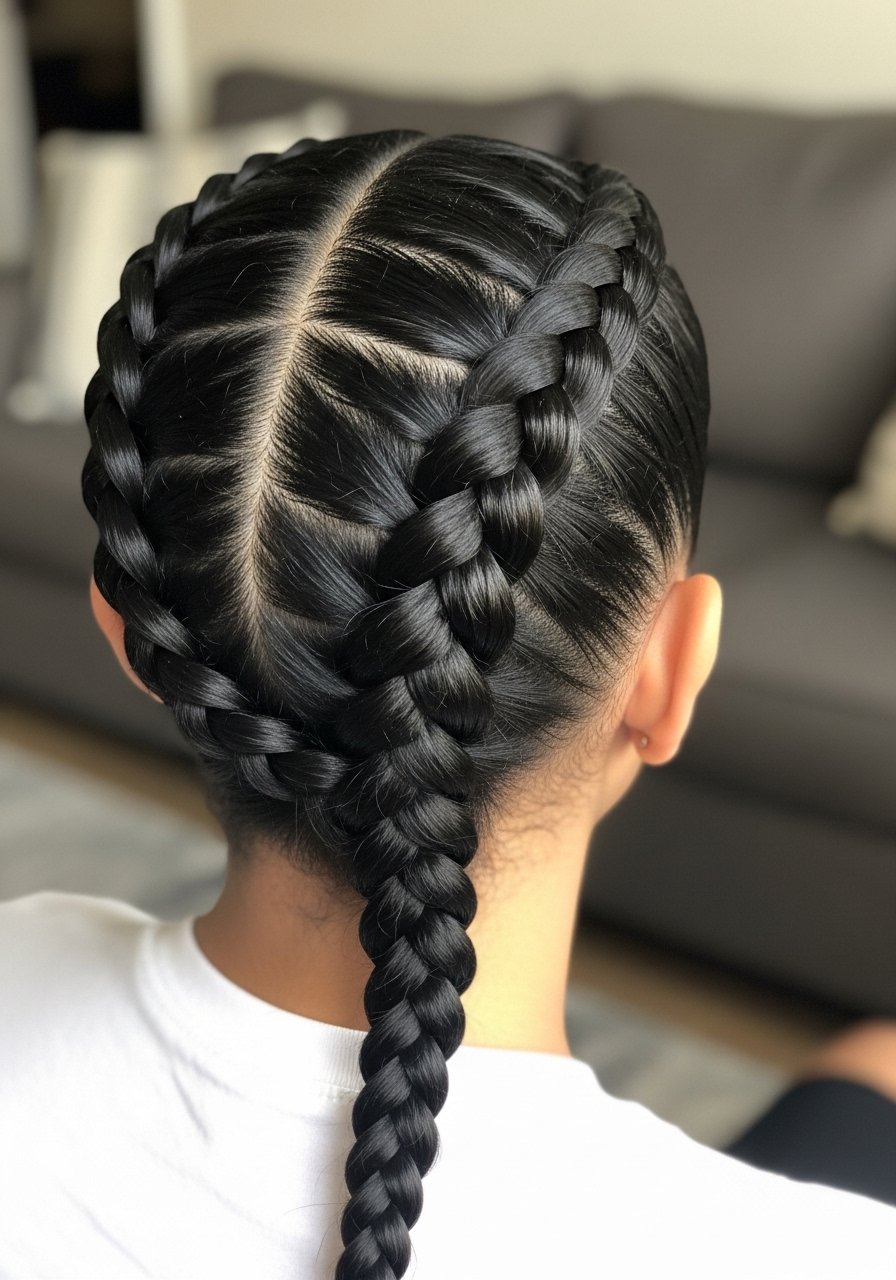
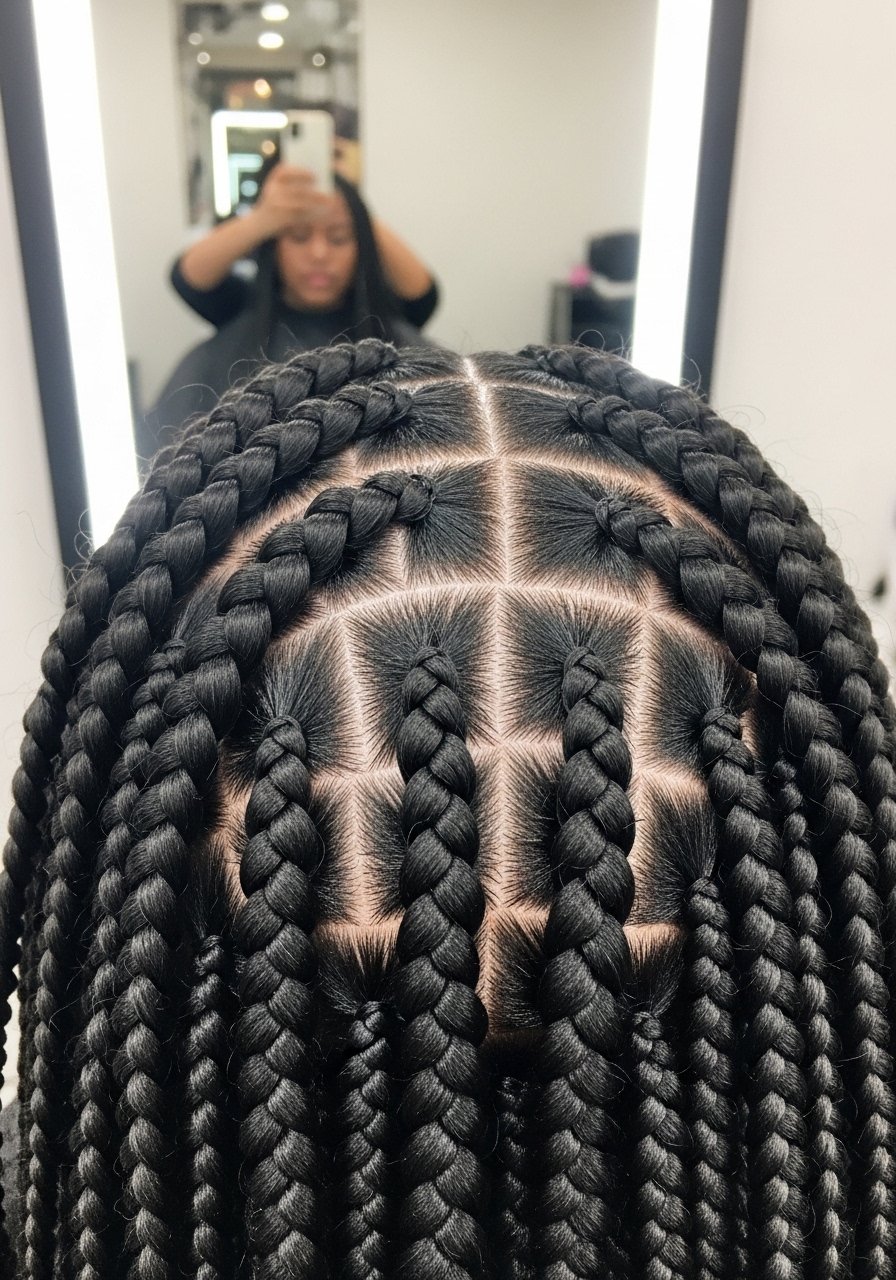
19. Cornrows
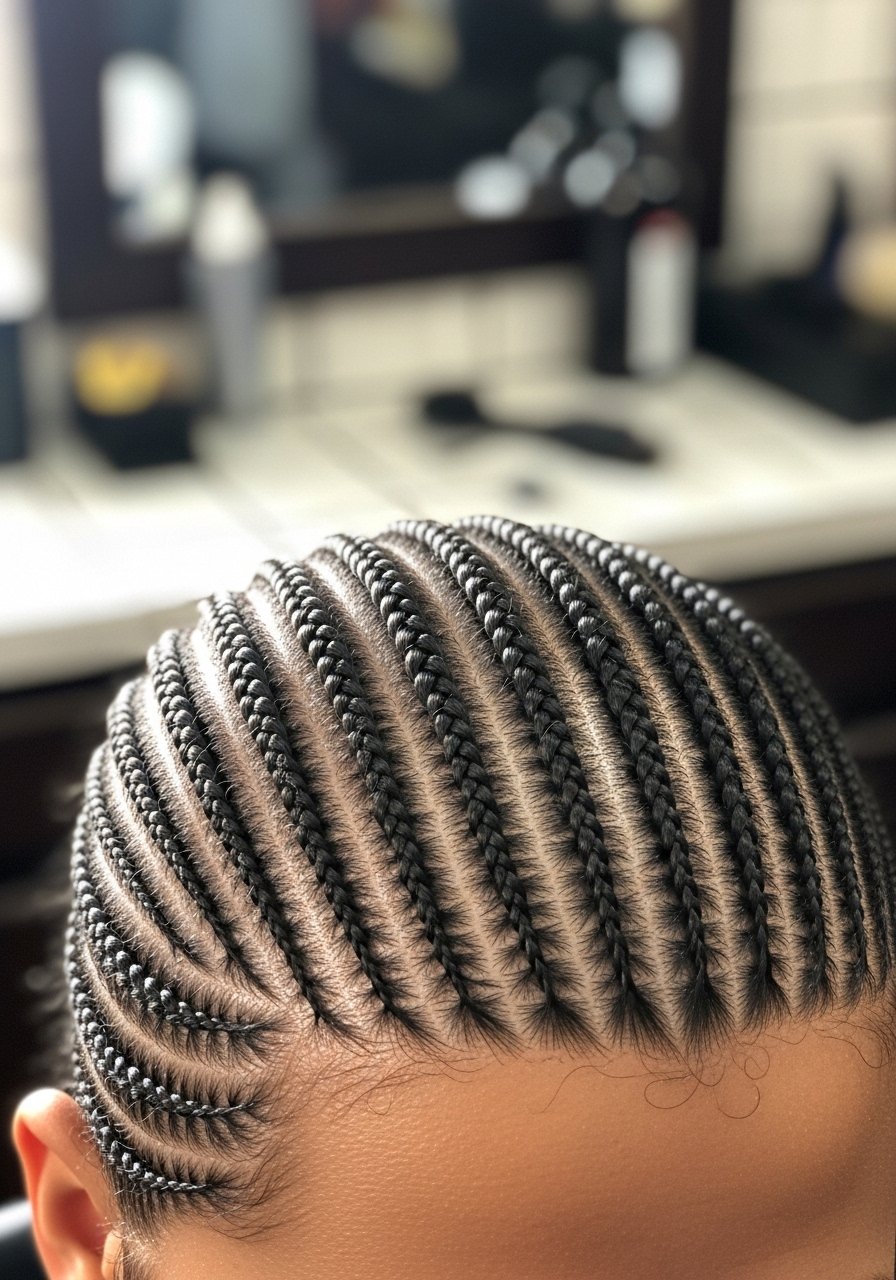
I practiced cornrows for a client who wanted a sleek sports style. Tight, close-to-the-scalp braiding works best when parting is precise. Use a tail comb for straight lines and apply a little gel to keep edges smooth. These last longer on thicker hair, and I noticed they survive workouts better than loose styles. Finish with edge control for a polished look.
Mistake to Avoid: Uneven parting, which makes rows appear crooked.
20. Micro Braids
I once sat through a full-day install for micro braids and learned patience. These are tiny, protective braids that can last for months if cared for. They’re low-manipulation but require nightly silk protection and occasional scalp oiling. I recommend them for people who want long-term styling options. They also take up less product per braid, so they feel lighter overall.
Mistake to Avoid: Skipping regular scalp care, which leads to buildup and itching.
21. Dutch Box Braids
This hybrid gives box braid longevity with a raised, sewn-in look at the base. Start braids by crossing strands under for a flat, raised start before continuing the box pattern. I used this when I wanted bulk without tension. Use small rubber bands at the start if needed and keep the scalp conditioned.
Mistake to Avoid: Leaving ends too thin, which makes the braid look unfinished.
22. Halo Twist
I invented this for an evening when I wanted something neat without pins showing. Twist two large sections around the crown, pin discreetly, and smooth with a serum. It’s faster than multiple braids and looks refined. I often use this on medium-length hair, and it holds well with a couple of pins and light hairspray.
Mistake to Avoid: Not securing the ends well, leading to the halo loosening during the day.
23. Waterfall Crown with Braid
I combined two favorites for a friend’s wedding rehearsal and liked the result. Start a waterfall along one side, collect the cascading pieces into a braid at the back, then wrap into a crown. It looks complex but is forgiving if some pieces slip, which actually adds texture. Use light flexible spray to keep things in place without stiffness.
Mistake to Avoid: Over-smoothing the cascading pieces, which removes the soft texture.
24. Halo Fishtail

I tried this for an outdoor event when I wanted something light. Create a fishtail on long hair and wrap it around the head, pinning hidden ends. The fishtail texture brings subtle detail to the halo silhouette. I recommend using a small elastic at the end and pancaking the fishtail to widen it slightly.
Mistake to Avoid: Leaving the end unsecured, which makes the halo unravel.
25. Butterfly Braid
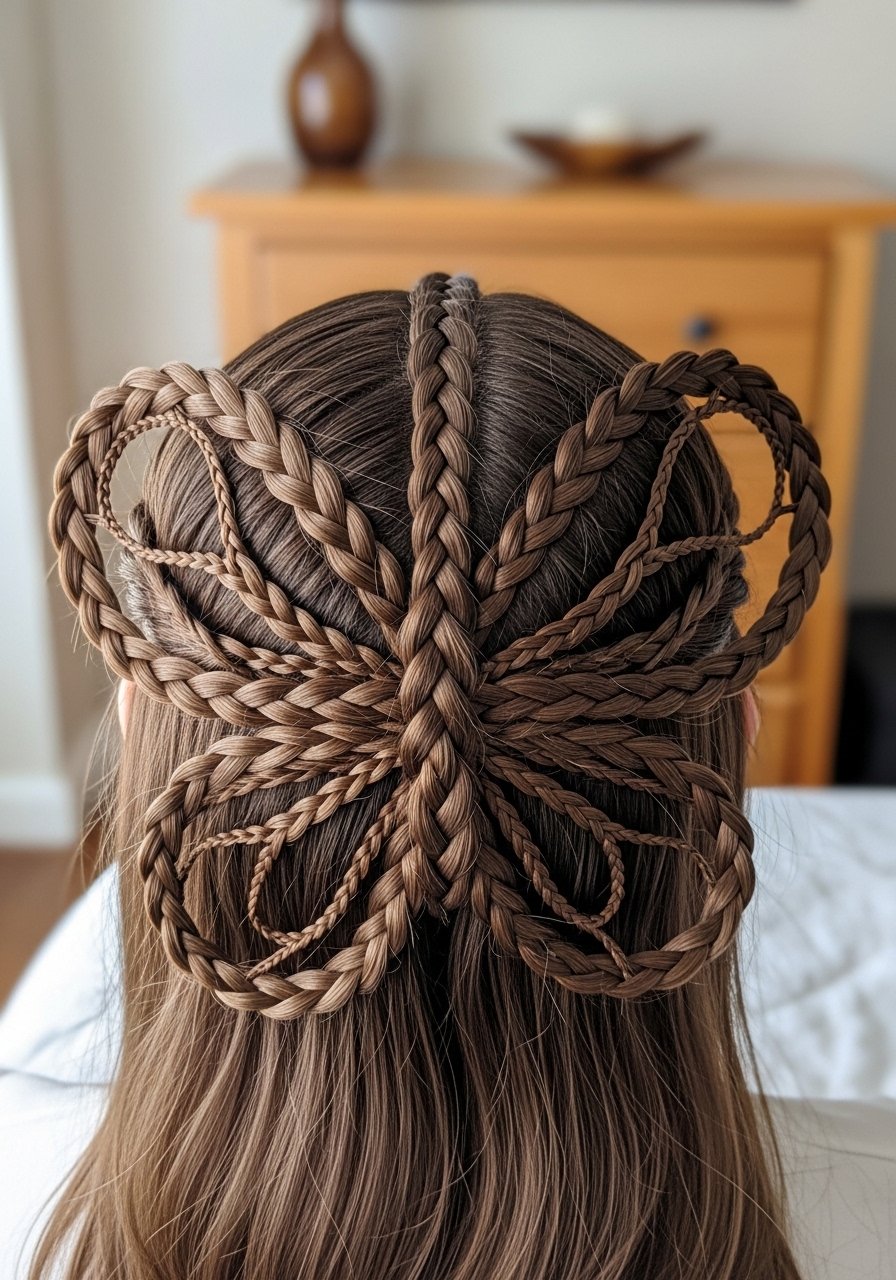
This is one of my playful experiments that actually works for short-to-medium hair. Create two small braids and loop them into wing shapes, pinning each loop and hiding the ends inside. It gives an intricate look without a full-day commit. It held up for a casual night out when I used a few extra pins and light holding spray.
Mistake to Avoid: Making loops too large, which flattens the butterfly shape when pinned.
26. Elastic Braid (Bubble-Braid Hybrid)
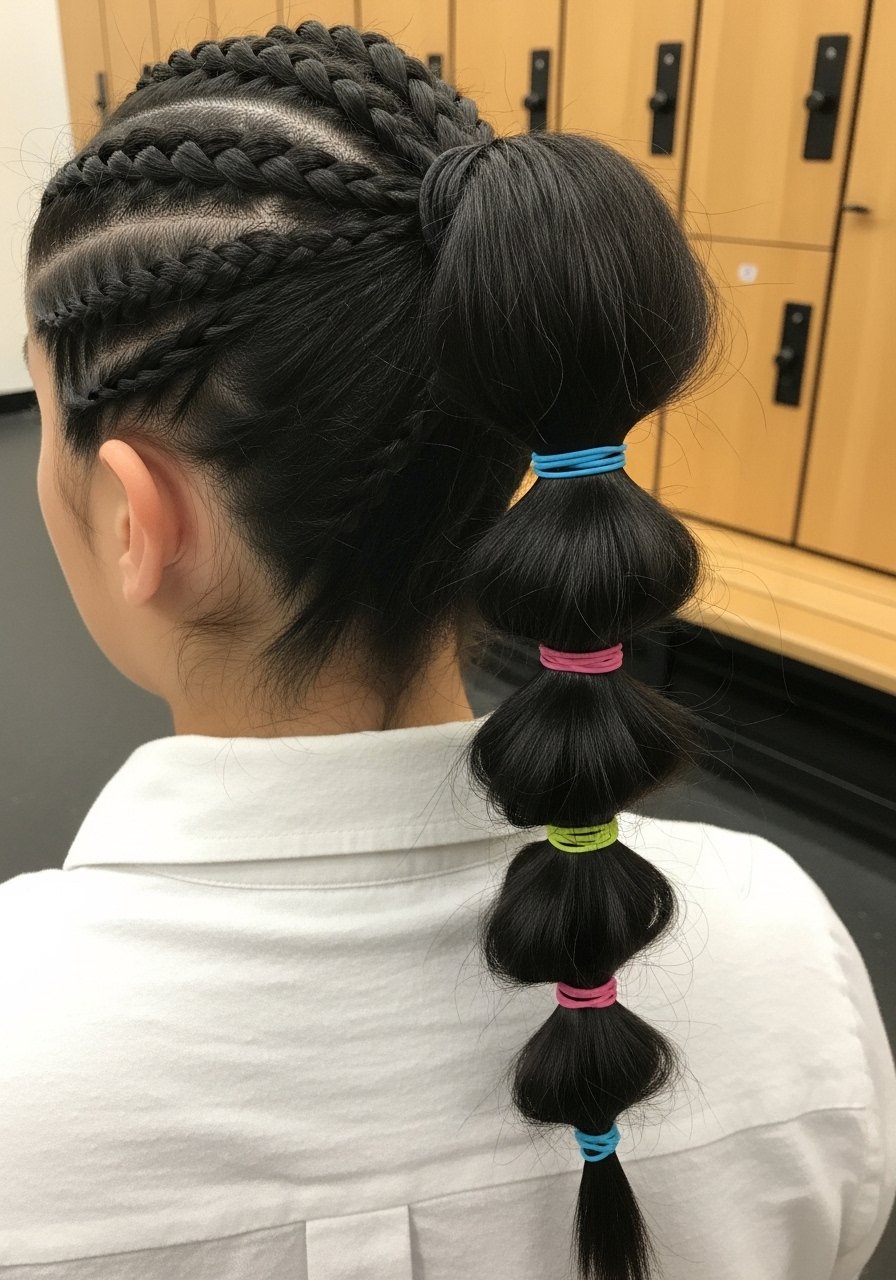
I started using elastics to segment a regular braid for more drama. Braid normally but add elastics every few inches, then gently pull at each section to create "bubbles." It’s quick, great for active days, and easier than elaborate braids. I grabbed a pack of clear elastics and used a bit of texturizer to make pulling easier.
Mistake to Avoid: Using colored elastics that clash with your outfit if you want a subtle look.
27. Halo Rope Twist
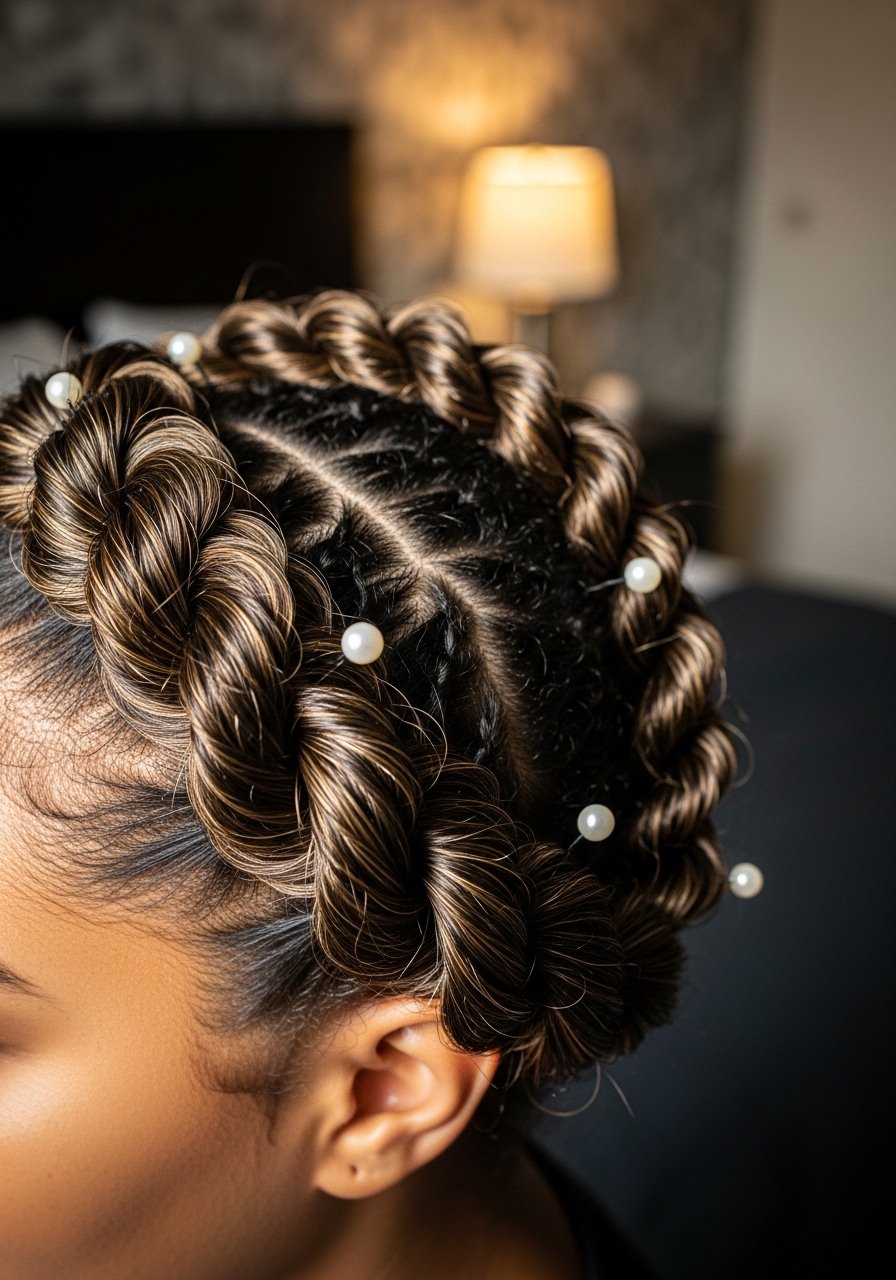
I used this when I wanted something structured but soft. Divide hair into two sections, twist each strand inwards, then twist both together and wrap around the head. It’s gentler than tight braids, and I noticed clients with sensitive scalps preferred this style for events. Secure with small pins and smooth flyaways with a serum.
Mistake to Avoid: Skipping smoothing at the seams, which reveals pin clusters.
28. Accent Braid with C-Shaped Wave
I used an accent braid to keep hair away from my face during concerts. Braid a narrow section along a curved part, fasten, and let the rest of the hair wave freely. It acts like a decorative headband. I often spice it up with a bead or tiny clip at the end for interest.
Mistake to Avoid: Making the accent braid too thick, which overwhelms the rest of your hair.
29. Micro Halo with Twists

This was the finish for a bridal trial where we wanted delicate detail. Create tiny two-strand twists around the hairline and wrap them into a thin halo, pinning neatly. It reads refined in photographs and is lighter than a full crown. I recommend using a silk scarf overnight to keep the twists smooth and using a drop of oil to tame frizz.
Mistake to Avoid: Using heavy products that weigh down micro twists and flatten the halo.
Hair Styling Tips
Prep Matters: Start with a detangling spray like detangling-spray to save time and prevent breakage, I use it on nearly every client.
Grip and Texture: If your hair is super silky, a texturizing spray or powder helps, try texturizing-spray to keep braids from sliding out.
Protect Ends: Use a lightweight oil such as hair-oil-serum on braid ends to prevent split ends and frizz.
Secure Smart: Favor small snag-free elastics and bobby pins, like snag-free-hair-ties, they hold without damage.
Night Care: Wrap braids in a silk scarf or use a silk pillowcase to extend wear, I saw styles last twice as long this way.
Practice Short Sessions: I practiced five minutes a day for a week and got faster, about a 50% speed improvement for complex braids.
Tool Upgrade: Invest in a good tail comb for parting, tail-comb, it made a noticeable difference in neatness for me.
