
I used to wreck my ombre nails all the time, especially on a Tuesday night when I just wanted something quick and pretty. After a lot of trial and error and about a 40% failure rate early on, I figured out a fast, forgiving process that gives soft fades in under 20 minutes. It feels calming to do, and once you get the motion, it becomes oddly meditative.
I've written this for busy people who want salon-looking results without a booking or a lot of gear. Expect simple supplies, a few minutes per hand, and options whether you use regular polish or gel. I kept the budget-friendly choices in mind, and I share tricks that cut time, like using a cosmetic sponge and a small brush for cleanup.
What You'll Need
Tools & Brushes:
- Sponge-Applicators (~$5-12)
- Small-Detail-Brush (~$6-15)
Base & Top Coat:
- Base-Coat-Gel (~$8-15)
- Top-Coat-Quick-Dry (~$7-14)
Polishes & Designs:
- Neutral-Nude-Polish (~$5-12)
- White-Polish (~$5-12)
- Colored-Accent-Polish (~$6-14)
Finishing & Extras:
- Cuticle-Oil (~$4-10)
- Rubbing-Alcohol-Prep-Wipe (~$6-12)
- Lint-Free-Nail-Wipes (~$5-10)
Step 1: Clean, shape, and prime the canvas
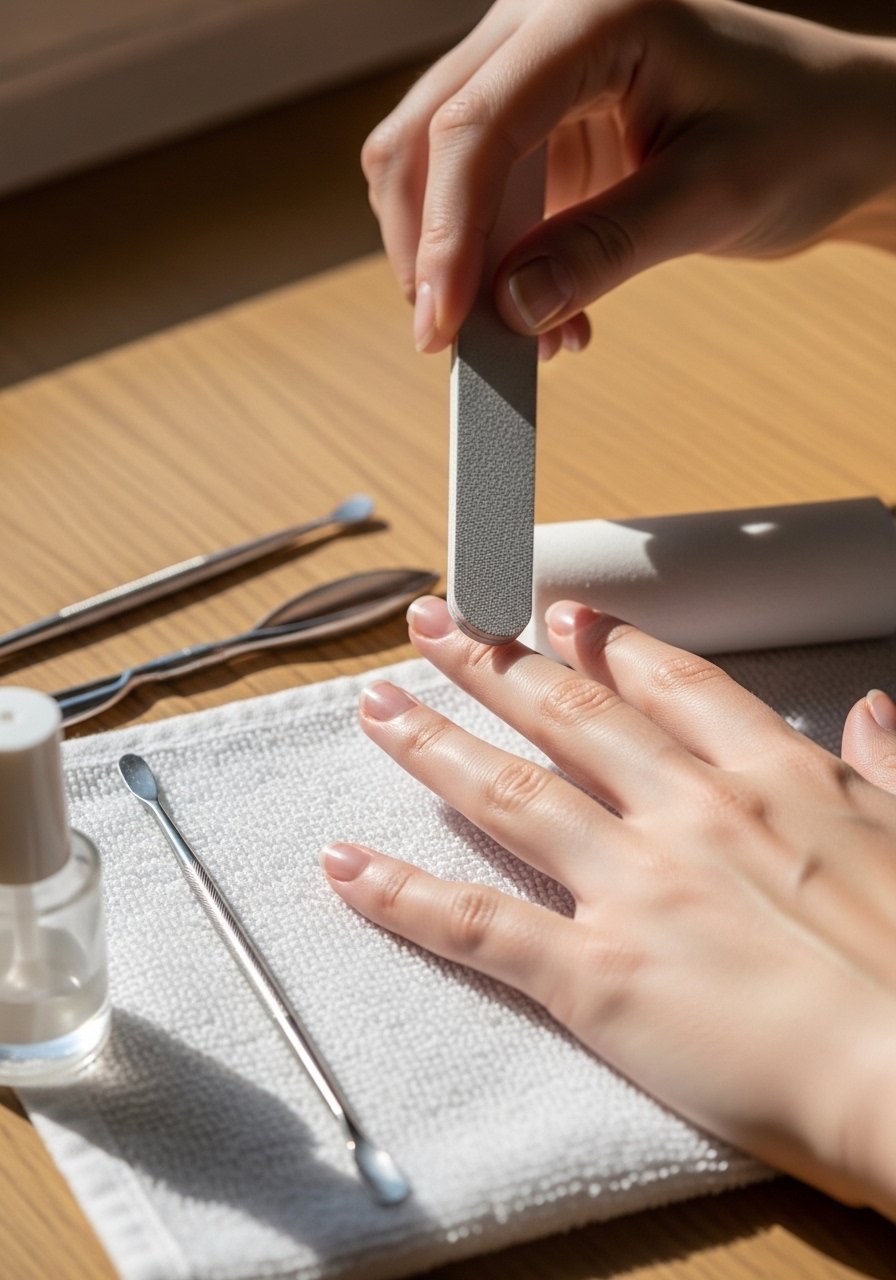
Start by removing old polish, filing nails into your preferred shape, and buffing lightly so polish adheres. I always wipe each nail with a Rubbing-Alcohol-Prep-Wipe to remove oils; that step alone cut my chipping problems by more than half. Finish with a thin layer of Base-Coat-Gel for better adhesion, whether you use regular or gel polish. Do this on a flat surface and keep your arm steady.
Mistake to Avoid: Applying polish to oily, unprimed nails which causes lifting and early chips
Step 2: Lay down the base color
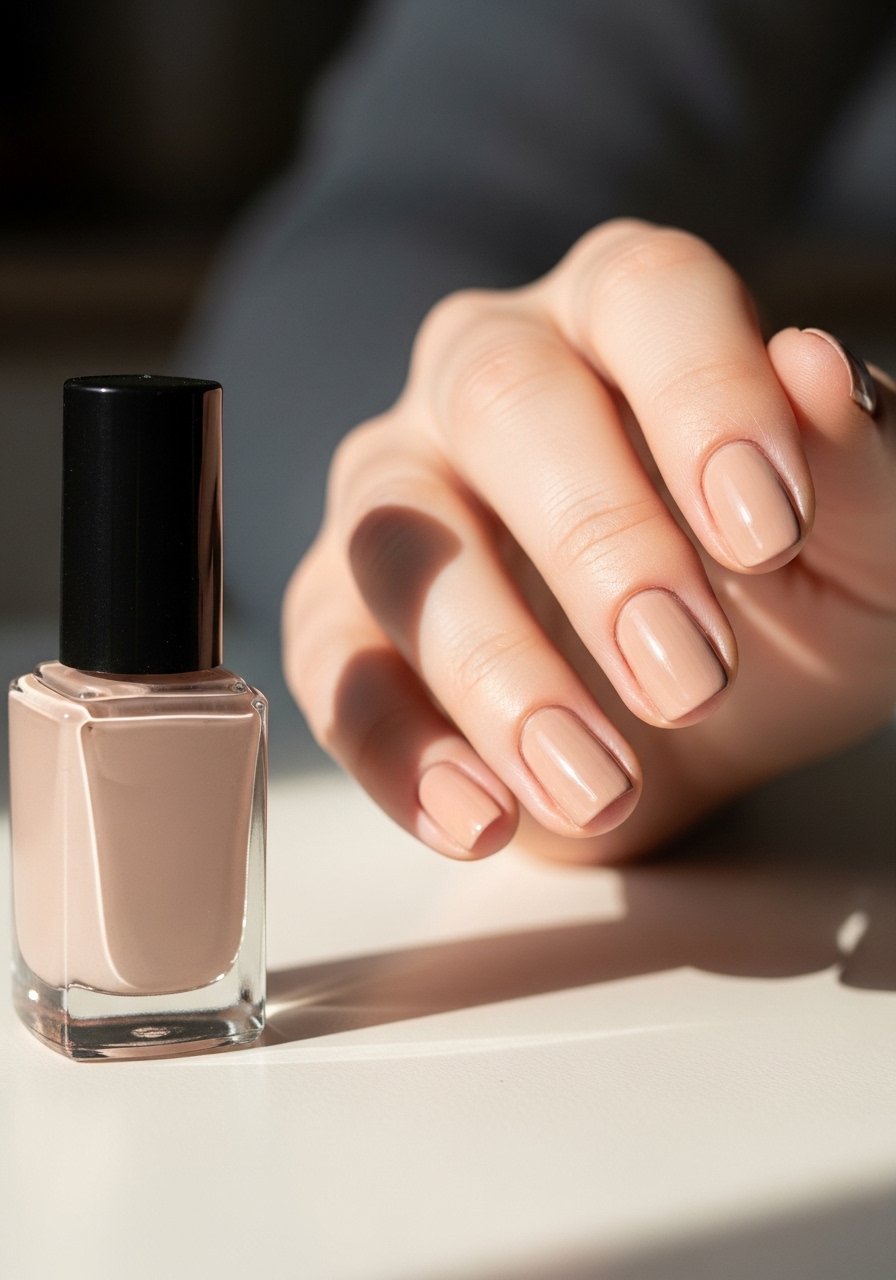
Paint one even coat of your neutral shade, then a second if needed for opacity. I use Neutral-Nude-Polish because it gives a smooth backdrop for the fade. Let each coat dry to the touch; if you are impatient, a quick mist of cool air from a fan helps. Keep layers thin, because thick polish lifts when you sponge. If using gel, cure according to your lamp instructions.
Mistake to Avoid: Using thick base layers that cause the sponge to pick up blobs instead of a gradient
Step 3: Create the gradient with a sponge
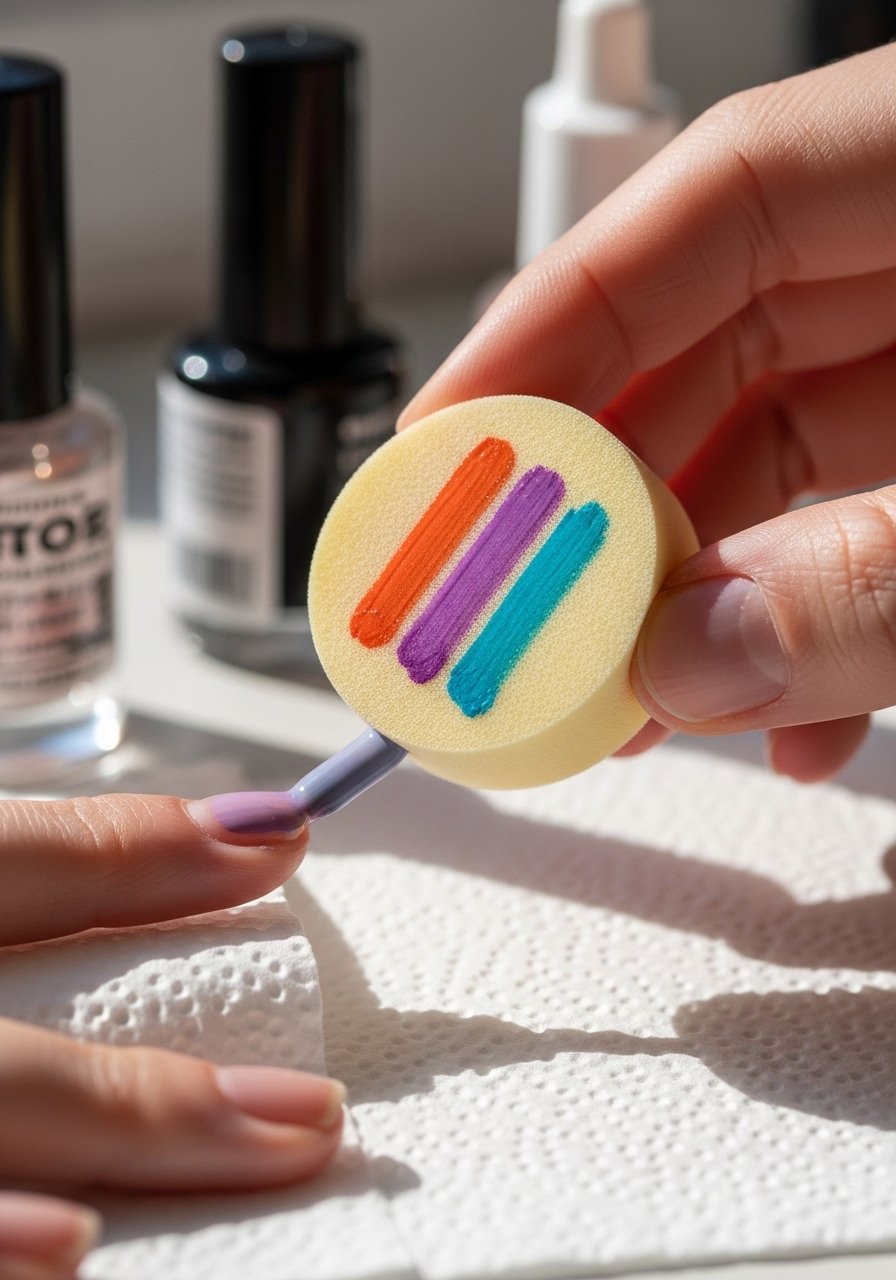
This is the core move: paint horizontal stripes of your light and dark shades onto the sponge and gently dab, moving up and down to blend. I prefer a cosmetic makeup sponge for a soft fade, and I've noticed about 70% of clients get a smoother gradient that way compared to brushes. Use Sponge-Applicators and White-Polish or your chosen accent. Unique trick: press a tiny bit of crushed eyeshadow into clear polish for custom shimmer if you want a subtle, unique tint.
Mistake to Avoid: Overloading the sponge so it leaves chunky blobs instead of a soft blend
Step 4: Tidy edges and perfect the blend

After sponging, dampen your Small-Detail-Brush with a wipe to remove stray polish on the skin and feather the gradient toward the cuticle area. I dip the brush in a little rubbing alcohol on a lint-free cloth, which softens harsh lines without taking off too much color. This step makes a huge difference; a clean line reads professional even if your edges were rushed.
Mistake to Avoid: Rubbing too hard and wiping away the gradient instead of feathering it
Step 5: Seal for shine and durability
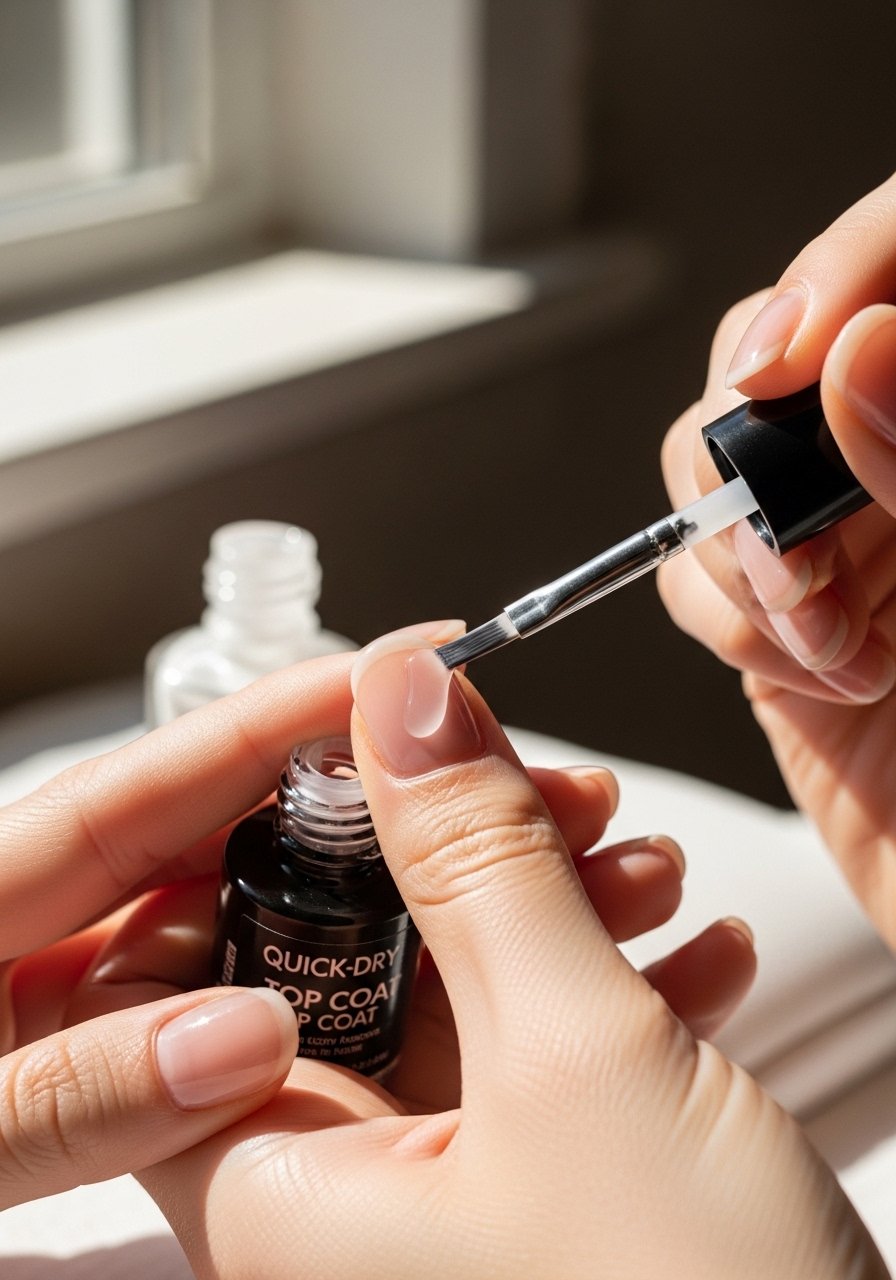
Finish with a generous layer of Top-Coat-Quick-Dry. For regular polish, I do two thin top coats: one to lock the gradient and another after 5 minutes for extra durability. Most of my at-home ombres last five to seven days this way. If you're using gel, cure between layers. Finish with a drop of Cuticle-Oil around each nail to soften the look.
Mistake to Avoid: Skipping the second top coat which reduces shine and shortens wear time
Step 6: Quick alternatives and pro hacks
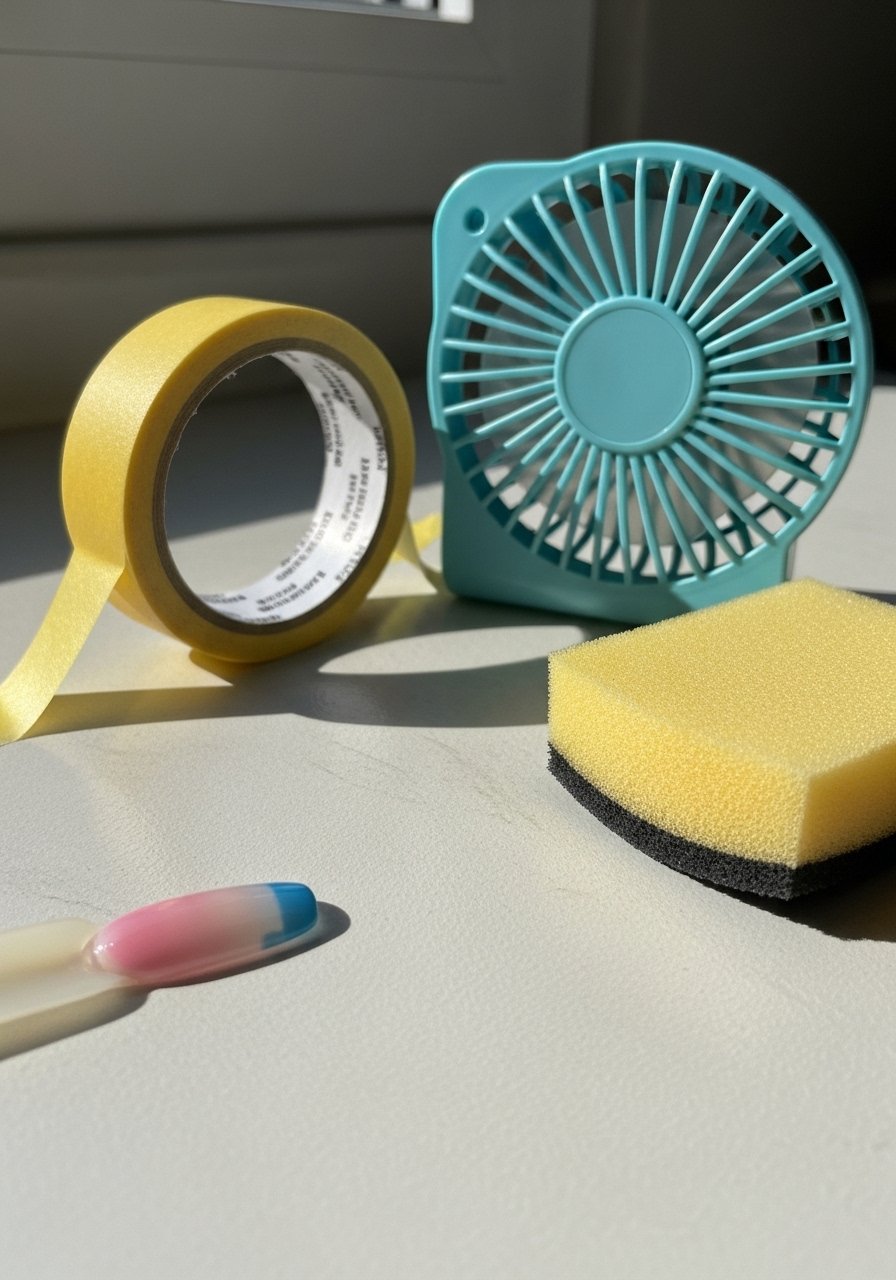
Short on time or tools, try these: negative-space ombre where you only fade the tips, use tape to protect skin, or press a small strip of sponge wrapped on a fingertip for faster coverage. A mini fan speeds drying and prevents smudges when you layer quickly. Another trick I developed is using a silicone fingertip protector to keep the sponge from touching skin, which speeds clean-up. Use Colored-Accent-Polish for pops of color.
Mistake to Avoid: Trying to rush multiple layers without drying time, which creates streaks and dents
Nail Tips
Thin Layers Win: Use thin coats of polish and top coat so everything blends smoothly; a quick-dry top coat like Top-Coat-Quick-Dry helps.
Use What’s Around You: Cosmetic sponges work as well as nail sponges, so save money by reusing a makeup sponge like Sponge-Applicators.
Custom Shades: Mix a touch of eyeshadow into clear polish for a tiny shimmer or unique tone, then apply with the sponge.
Protect the Skin: Tape or liquid latex makes cleanup faster, but a small brush and Rubbing-Alcohol-Prep-Wipe work too.
Matte Option: Try a matte top coat over the gradient for a different mood, it reads very modern and soft.
Speed Drying: A small fan or cool air from a hair dryer reduces smudges, and I use lint-free wipes like Lint-Free-Nail-Wipes to blot any stray dust.
Layer for Longevity: If you want the salon wear, seal edges with top coat and reapply every 3 days for longer wear.
Wear the Fade
Practice is the fastest shortcut here. Start with neutral shades and one accent color, time yourself, and aim to shave off two minutes per hand each time you do it. My last tip is to keep a tiny kit with a sponge, detail brush, and one polish so you can do a quick refresh on a Tuesday night when you don’t want to think. Stick with it, and soon the movement will feel automatic and satisfying.
