
I used to dread Easter craft time because my eggs either looked too fussy or fell apart. Over the years I learned to mix quick techniques with durable finishes so eggs survive handling and still look handcrafted. I’ll share approachable projects for table displays, hunts, and keepsakes—most need basic supplies and cost between $10–$60 depending on finish choices.
I collected ideas that work for dyed, painted, and embellished eggs, with budget ranges from simple ($10) to premium ($60+) and setup time from 10 minutes to a couple of hours. I’ll note tools and supplies, and why each method lasts through handling. I’ve found about 3 in 4 guests comment first on metallics; that’s guided how I mix finishes.
What You'll Need
Main Decorations:
- easter-egg-dye-kit (~$8-20)
- metallic-acrylic-paint-set (~$10-25)
- gold-leaf-sheets (~$6-15)
Lighting & Ambiance:
- battery-tea-lights (~$6-15)
- mini-string-lights (~$8-20)
Tableware & Accents:
- natural-dried-flowers (~$8-18)
- decoupage-mod-podge (~$6-14)
- fine-point-permanent-markers (~$6-12)
- clear-plastic-easter-eggs (~$6-15)
Shimmering Metallic Wash — quick luxe finish
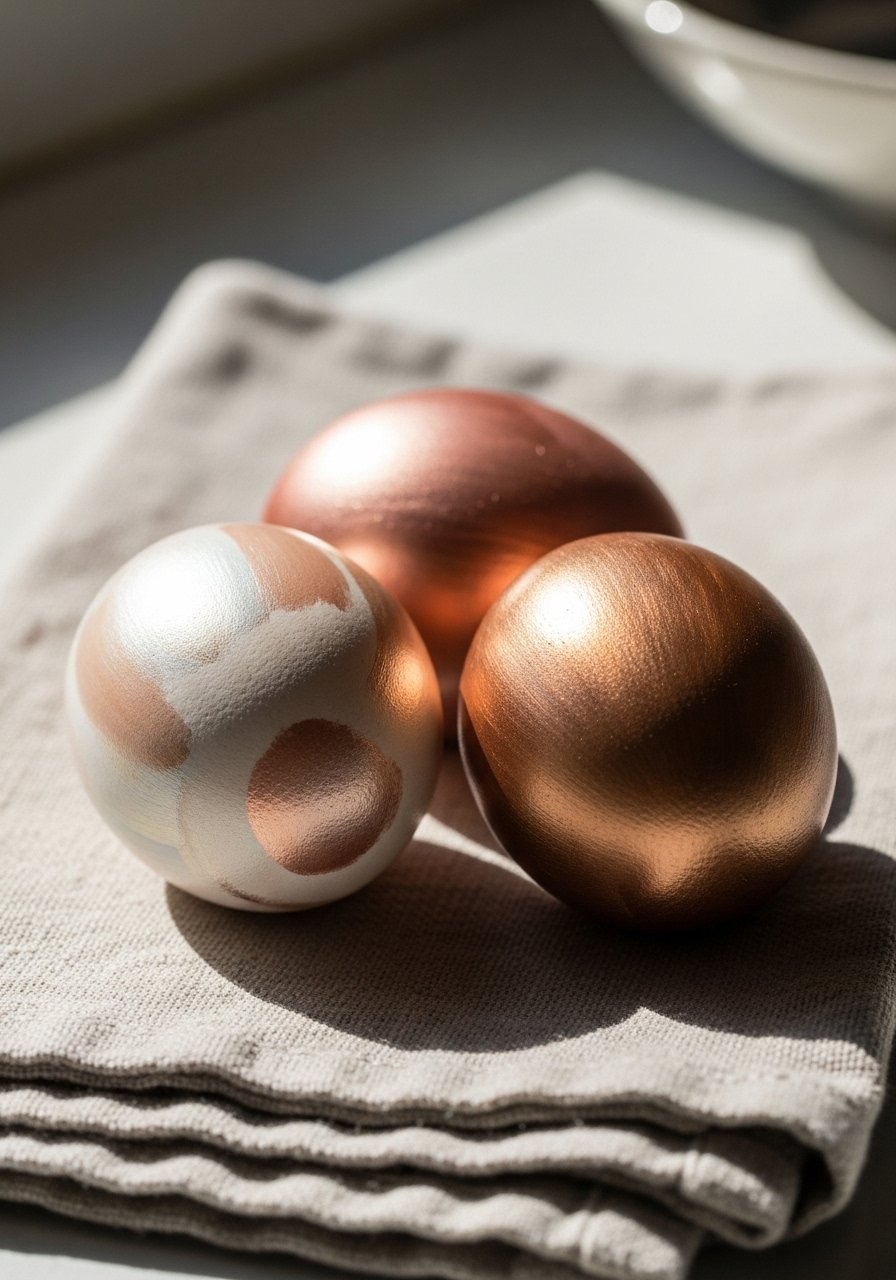
I thin metallic acrylics with a few drops of water for a translucent wash that lets shell texture show. I use metallic-acrylic-paint-set and a soft brush; one thin coat, then a matt varnish keeps sheen but avoids stickiness. I’ve noticed metallics catch the eye first and work for both hunt eggs and centerpiece displays. For durability, let each coat dry fully.
Mistake to Avoid:
Applying thick paint—causes drips and dulls the metallic sheen.
Botanical Natural Dye — earthy, long-lasting color
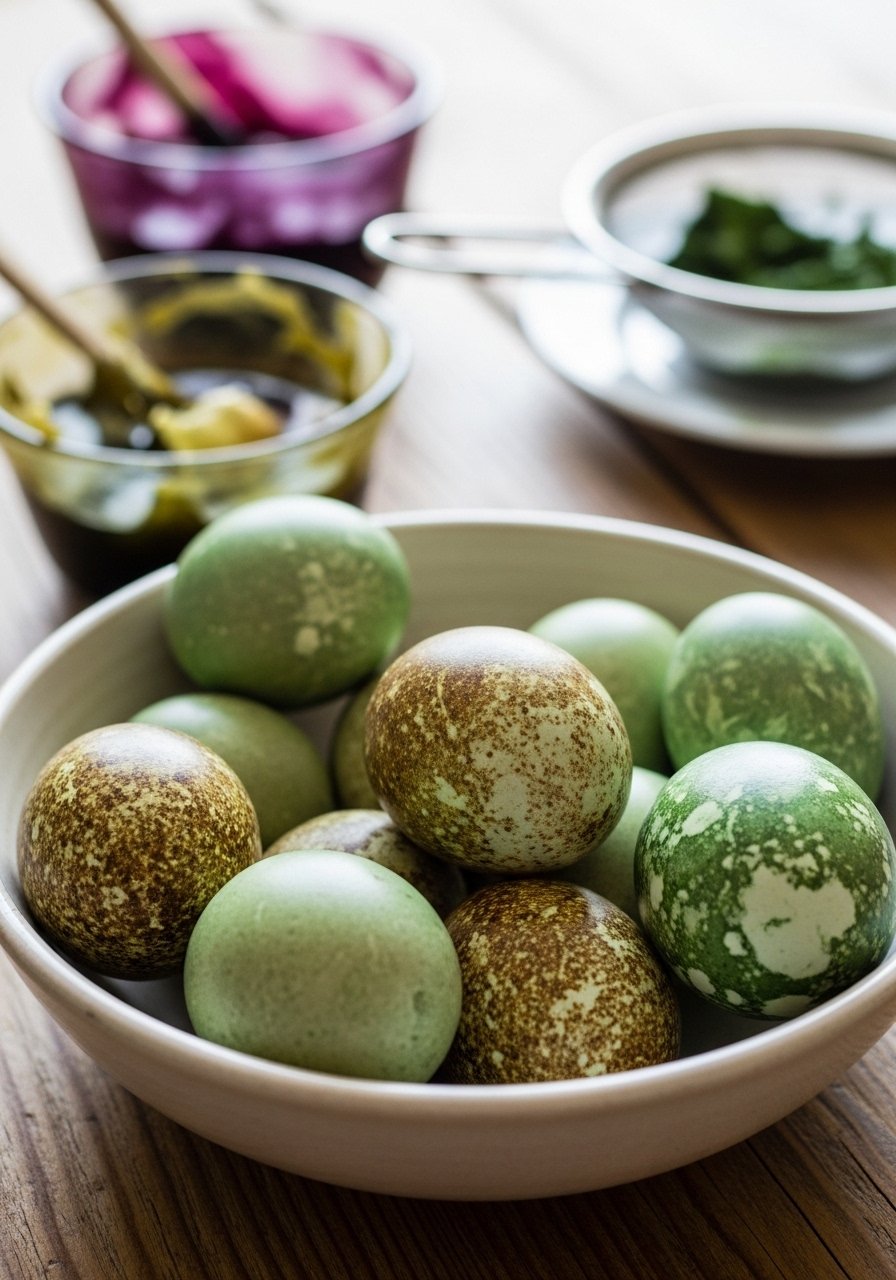
I simmer onion skins, tea, or beet slices for rich, natural tones and strain into dye baths—no chemical smell and compostable waste. I strain through a fine sieve, add a splash of vinegar, and dunk eggs until desired depth. Natural dyes give subtle, layered color that ages nicely and fits a rustic table. I recommend a easter-egg-dye-kit for testing color ratios.
Mistake to Avoid:
Skipping the vinegar—colors won’t set evenly and fade faster.
Marbled Nail-Polish Swirls — glossy, random patterns

Water marbling with nail polish is my go-to when I need fast, glossy patterns. Drop polish into room-temperature water, swirl with a toothpick, and dip the egg. Use nail-polish-set with contrasting hues. I usually blow eggs first for keepsakes—results last when sealed with a clear coat. I’ve found that about 60% of kids pick marbled eggs for their color alone.
Mistake to Avoid:
Using cold water—polish won’t spread properly and pattern fails.
Speckled Robin’s Egg — delicate flecking
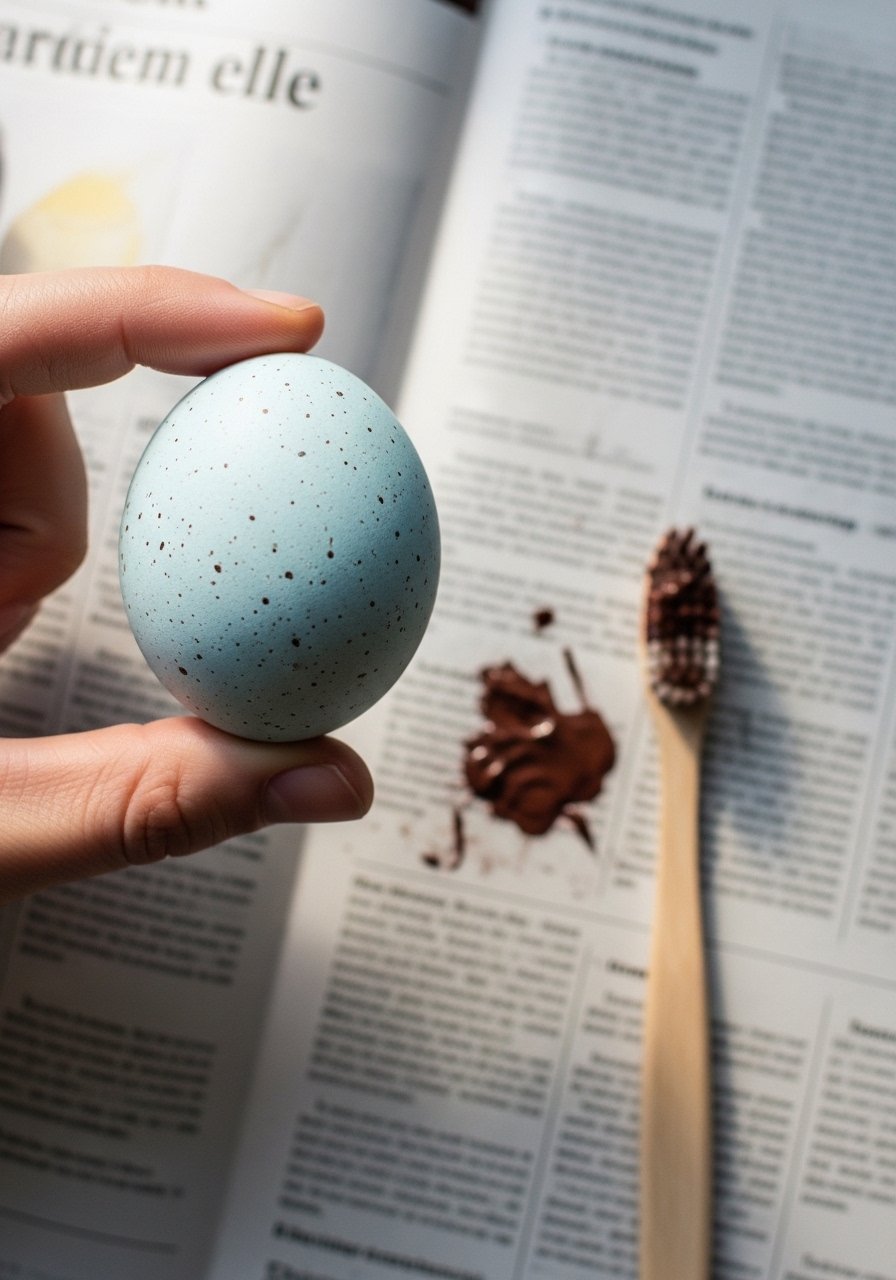
Dilute brown acrylic and flick with an old toothbrush for natural speckles. Start with a pastel base from easter-egg-dye-kit, then practice flicking on scrap paper to control splatter. I use a small fan to speed drying and then a satin seal. It’s an inexpensive way to add depth; these read as hand-made but refined.
Mistake to Avoid:
Flicking too close—creates blobs instead of fine speckles.
Tape-Resist Geometric Patterns — crisp, modern lines
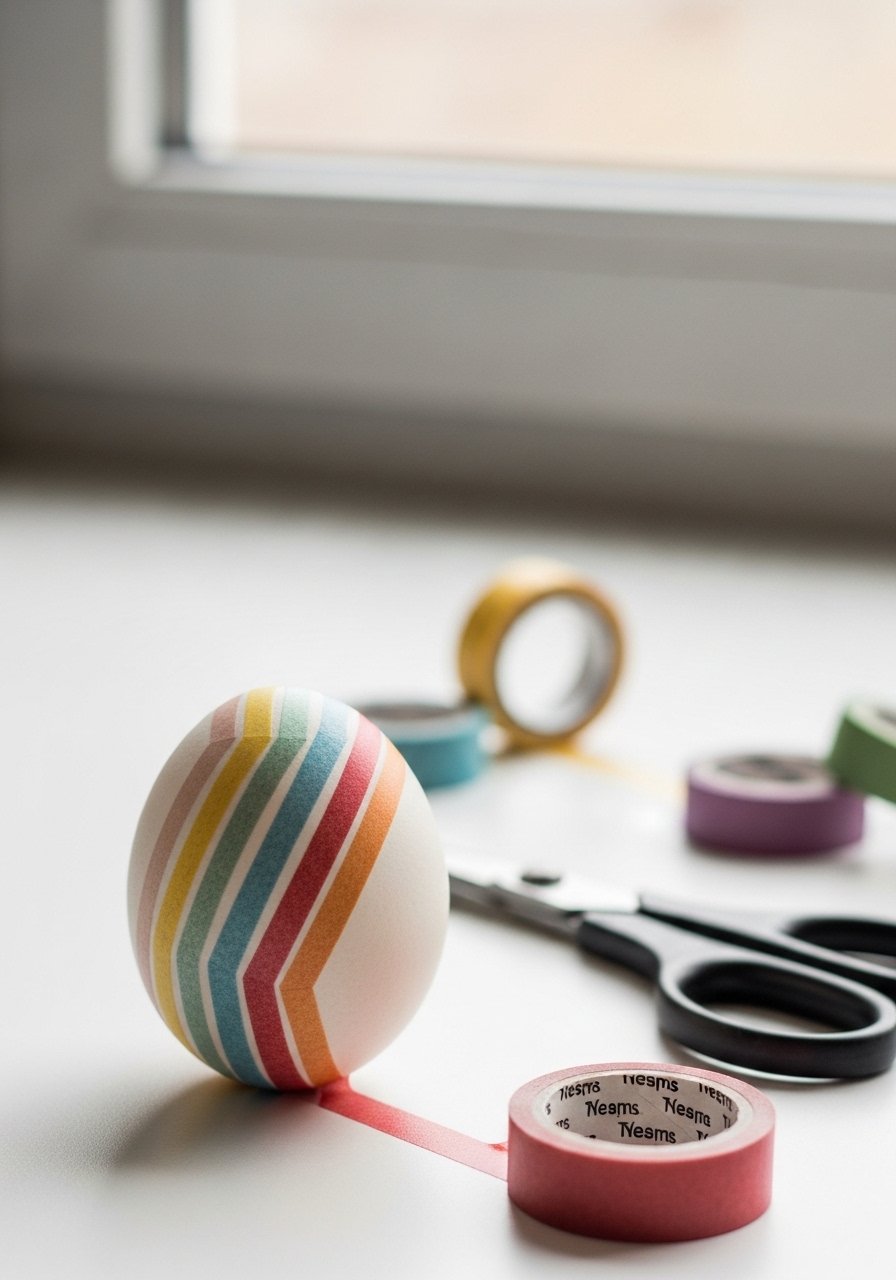
Apply thin washi tape, paint over, and peel while paint is tacky for crisp edges. I pair contrasting colors and use fine-point-permanent-markers for tiny accents. This is fast for making sets that coordinate with table linens. Keep tape pressure even to avoid paint seepage.
Mistake to Avoid:
Waiting too long to remove tape—edges will peel and look ragged.
Gold Leaf Accents — elegant highlights
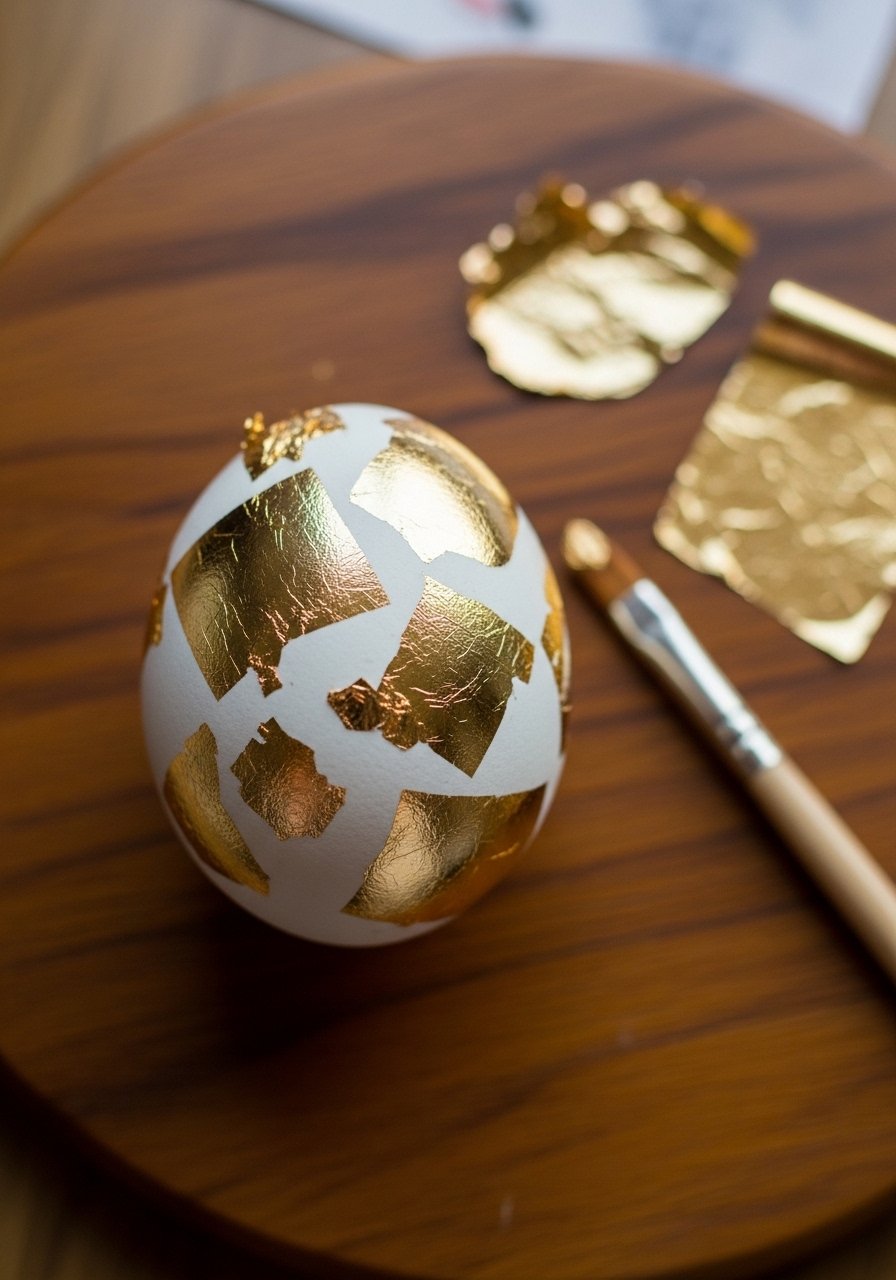
Apply adhesive size in small areas and press gold-leaf sheets, then brush away excess for organic flakes. I use gold-leaf-sheets and a soft brush. A little gold goes a long way; mix with matte shells for contrast. These become conversation pieces on a brunch centerpiece.
Mistake to Avoid:
Touching leaf with bare fingers—oils cause the gold to smudge and lift.
Chalkboard Painted Eggs — write-and-erase labels

Chalkboard paint lets you write names or notes directly on eggs, which is great for place settings. Use a thin brush and chalkboard-paint for even coverage; let cure a day before writing. I love these for interactive hunts where kids write clues. Wipe with a damp cloth to reuse.
Mistake to Avoid:
Writing before paint cures—letters smear and don’t come off cleanly.
Pressed Flower Capsules — delicate preserves
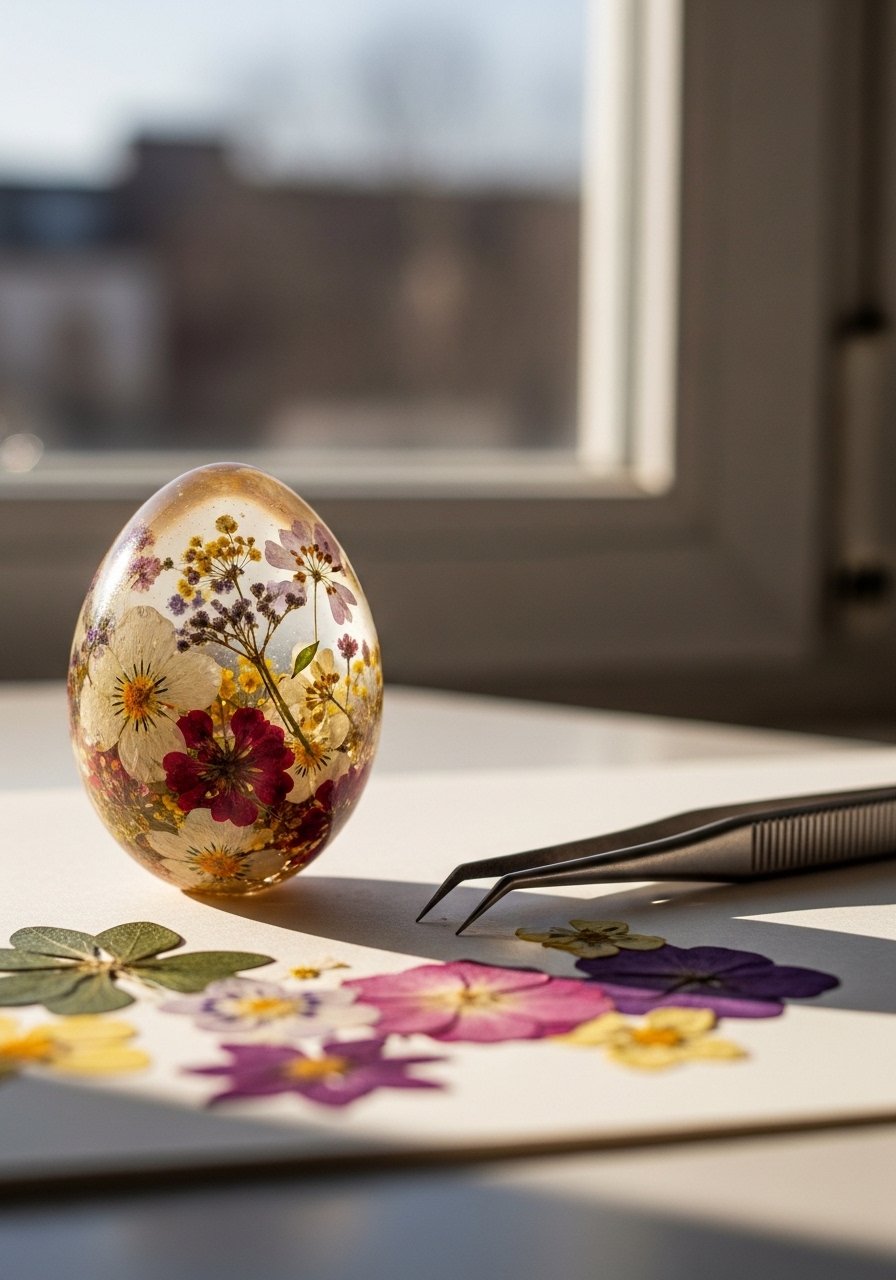
I press tiny flowers for a few days, then embed them under a thin layer of clear-drying decoupage or resin on a blown egg. Use decoupage-mod-podge and tweezers. These feel heirloom-ready and are surprisingly easy if you plan drying time. I usually add a loop for hanging.
Mistake to Avoid:
Using fresh flowers—moisture causes clouding and mold over time.
Decoupage Vintage Paper — textured, graphic layers
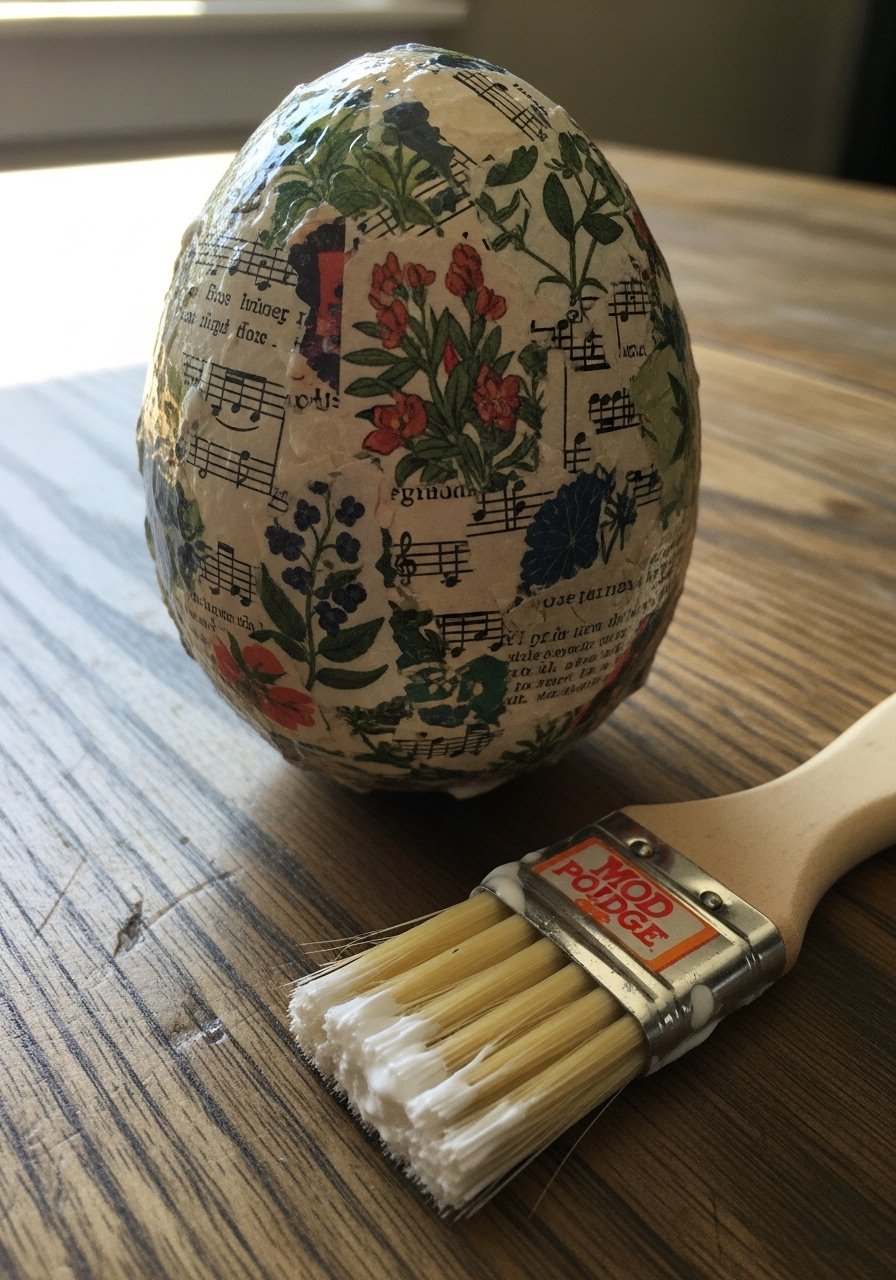
Tear vintage-style paper into small bits and decoupage in overlapping layers for a collage effect. Use decoupage-mod-podge for adhesion and sealing. I like mixing book pages and floral prints for a collected look on a budget. Seal well to prevent edges lifting during handling.
Mistake to Avoid:
Applying large paper pieces—creates bubbles and won’t conform to the curve.
Ombre Dip-Dye — soft graduated color

Dip an egg progressively deeper into dye baths to build a gradient—start shallow and then dip deeper for intense color. I alternate with easter-egg-dye-kit colors and blot between dips for blended transitions. It’s a slow, meditative method that yields refined results for centerpiece displays.
Mistake to Avoid:
Skipping blotting—wet layers pool and cause streaks.
Glitter Gradient — controlled sparkle
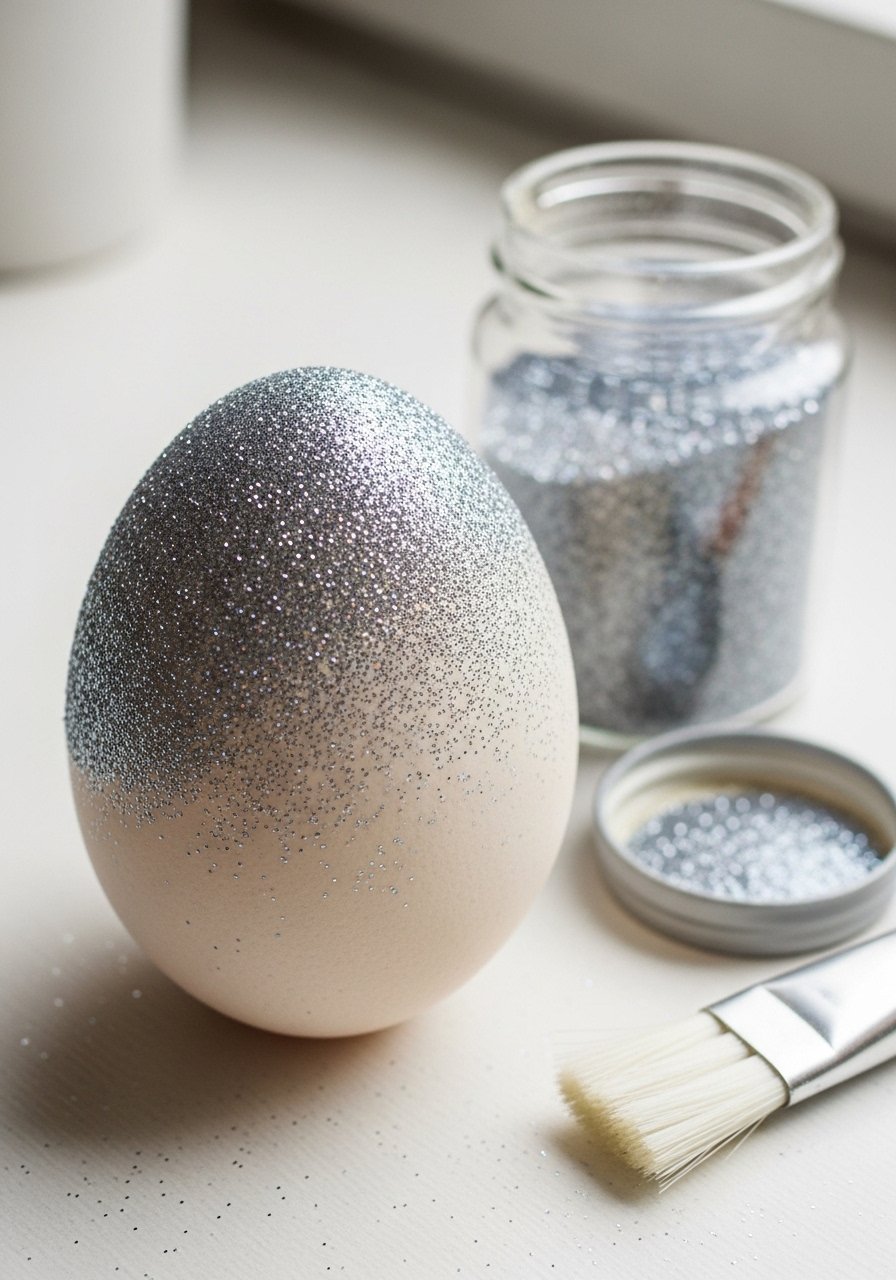
Brush on diluted glue, sprinkle fine glitter, and press gently for a fade. Use glitter-glue-pen for precise gradients and a final sealer to stop shedding. I save heavy sparkle for display eggs, not hunts, because kids prefer shake-free finishes.
Mistake to Avoid:
Using coarse glitter—it catches and peels off easily.
Wax-Resist Batik — layered pattern depth
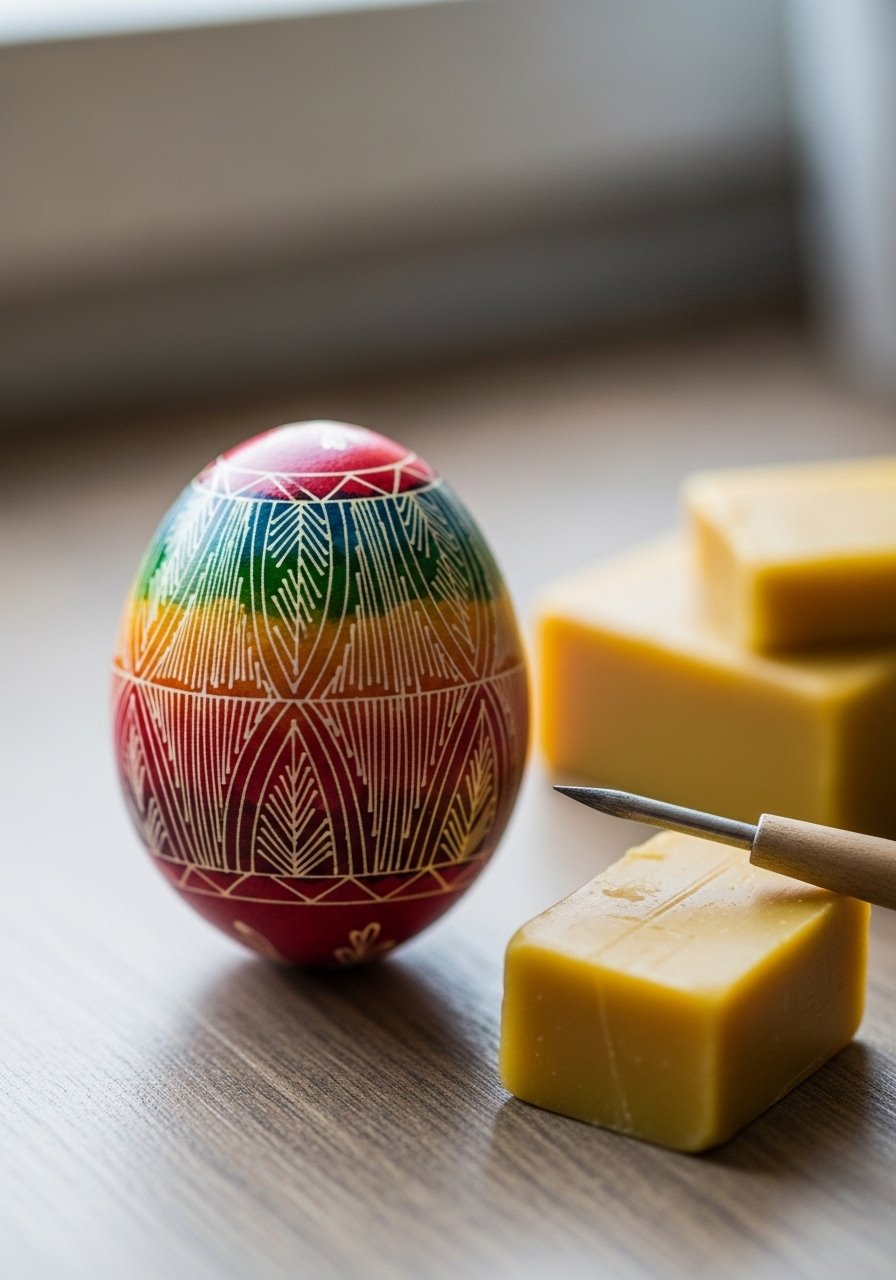
Draw with melted wax, dye the egg, then remove wax by gently warming and wiping for crisp batik patterns. I use beeswax and a stylus; fine lines read as handcrafted detail. This takes practice but rewards with complex layered patterns impossible with tape alone. Seal with satin varnish.
Mistake to Avoid:
Overheating wax—too thick and it won’t peel cleanly off the shell.
Silk Tie-Dye — fabric-pattern transfer
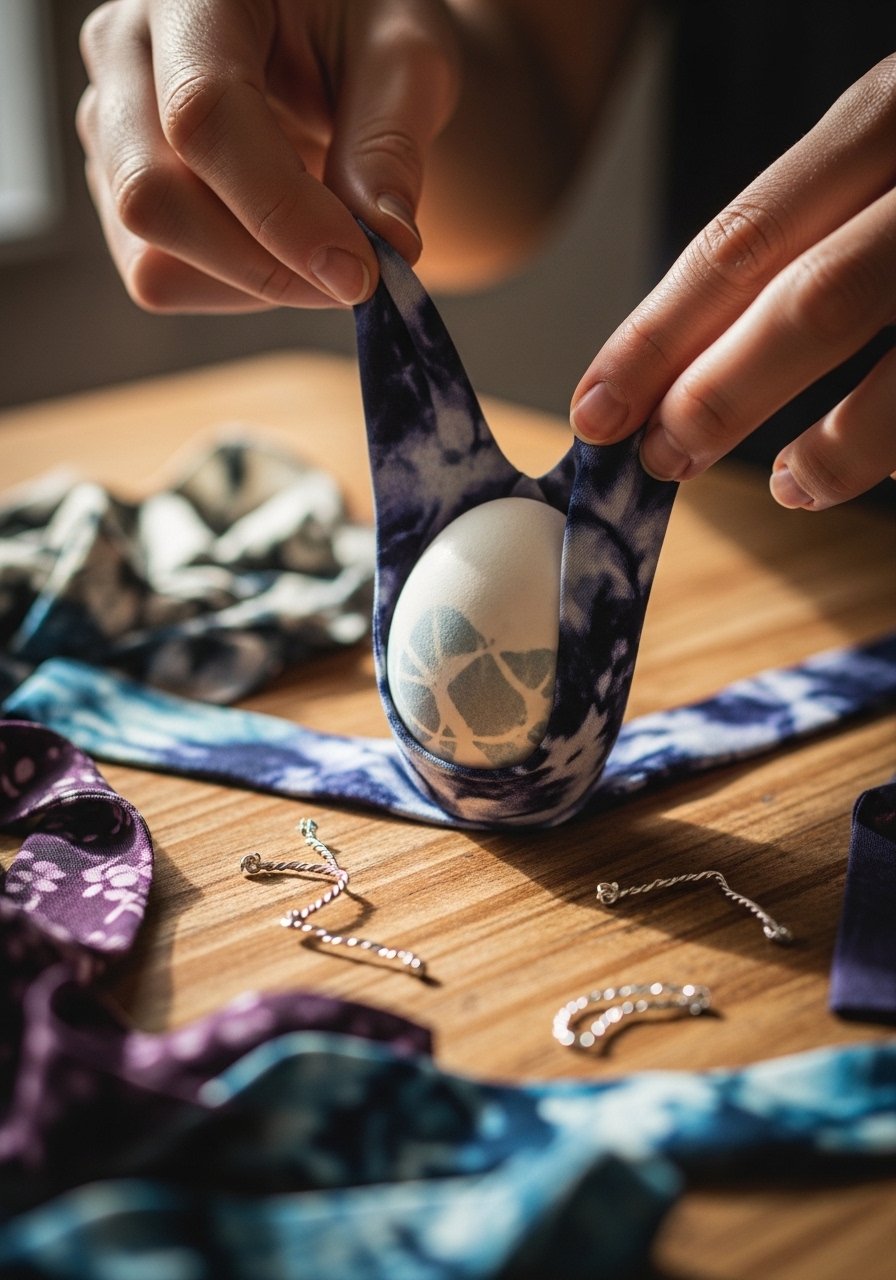
Wrap eggs in silk scraps, secure tightly, simmer in dye for rich, irregular prints transferred from the fabric. I use thrifted silk for unexpected patterns and a small pot; this creates soft, watercolor-like motifs. Use silk-scrap-tie-dye supply pieces to experiment without spending much.
Mistake to Avoid:
Using synthetic fabric—pattern won’t transfer well.
Mosaic Eggshell Inlay — crushed-shell collage (unique)
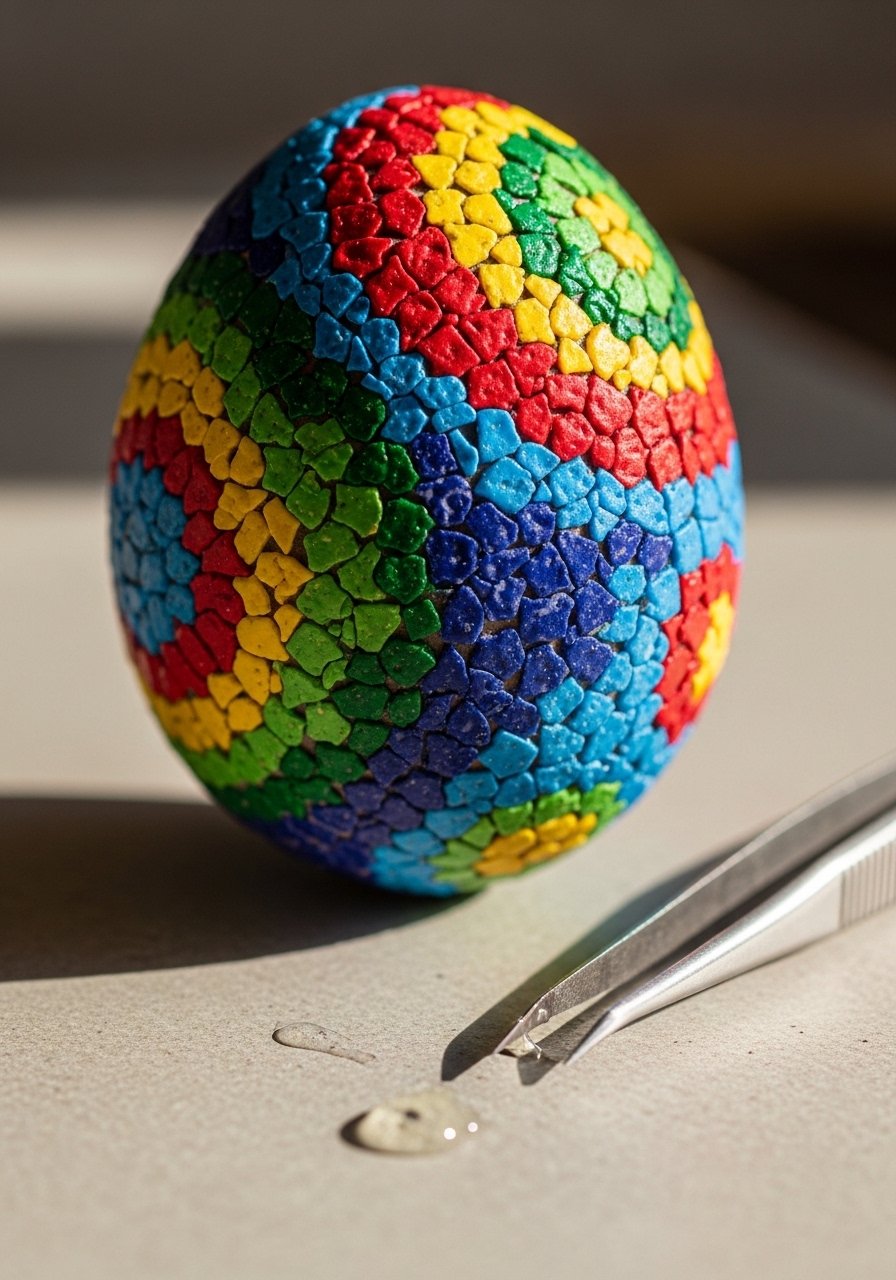
I crush colored eggshells and glue them as tiny tiles onto a base egg, creating mosaic shapes and gradients. Use leftover dyed shells for sustainable texture and mosaic-art-glue for hold. The result reads handcrafted and tactile—perfect for display bowls and keepsakes. It’s a slow process but yields museum-like detail on a budget.
Mistake to Avoid:
Applying big shell pieces—use small fragments for smooth curves and even adhesion.
Thermochromic Heat-Reactive Paints — color-change surprise (unique)
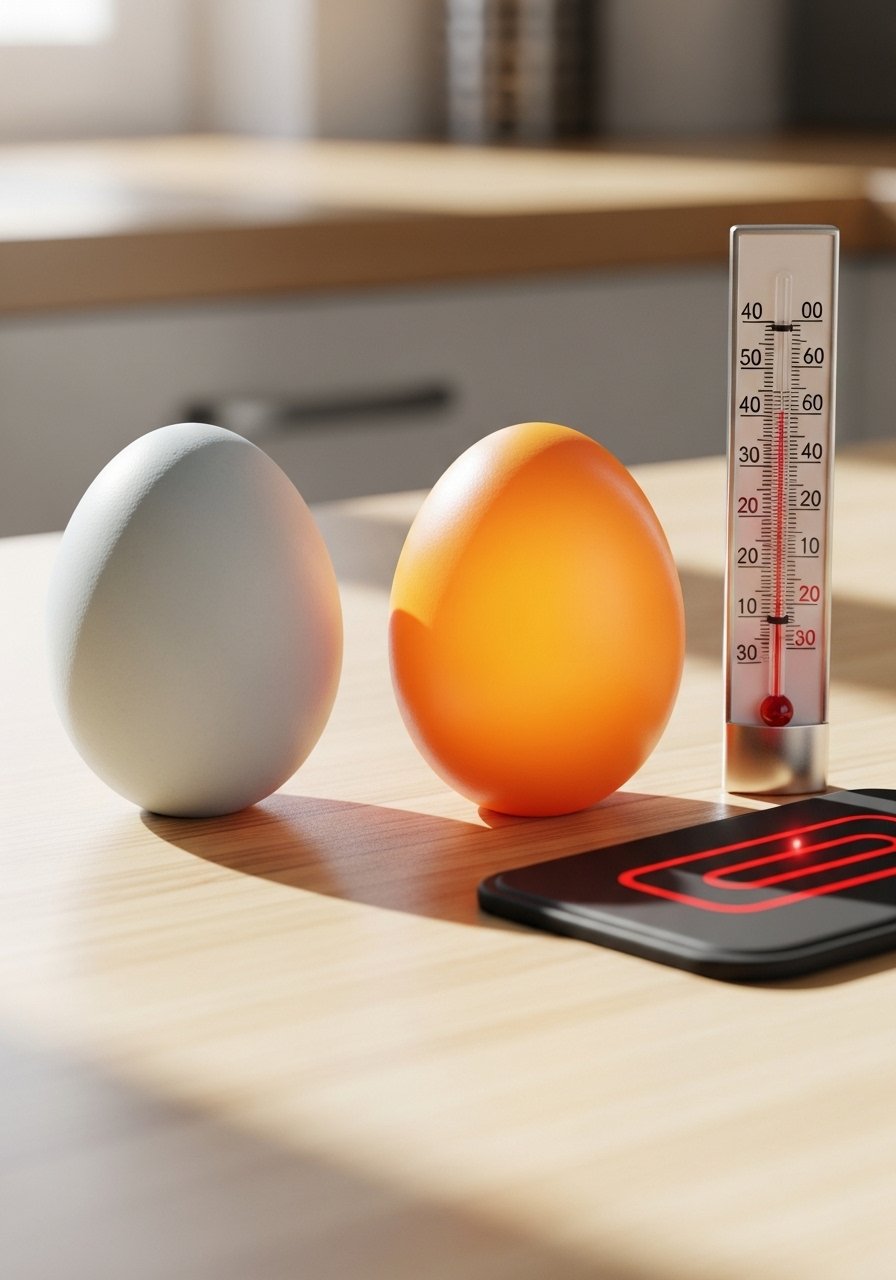
Use thermochromic paint that changes color with touch or warmth for playful reveal eggs. I paint patterns that appear when kids hold the egg, using thermochromic-paint made for craft surfaces, sealed with a clear topcoat. This creates interactive decor that’s memorable at brunch or hunts.
Mistake to Avoid:
Sealing with solvent-based varnish—can interfere with color-change properties.
Glow-in-the-Dark Stars — evening magic
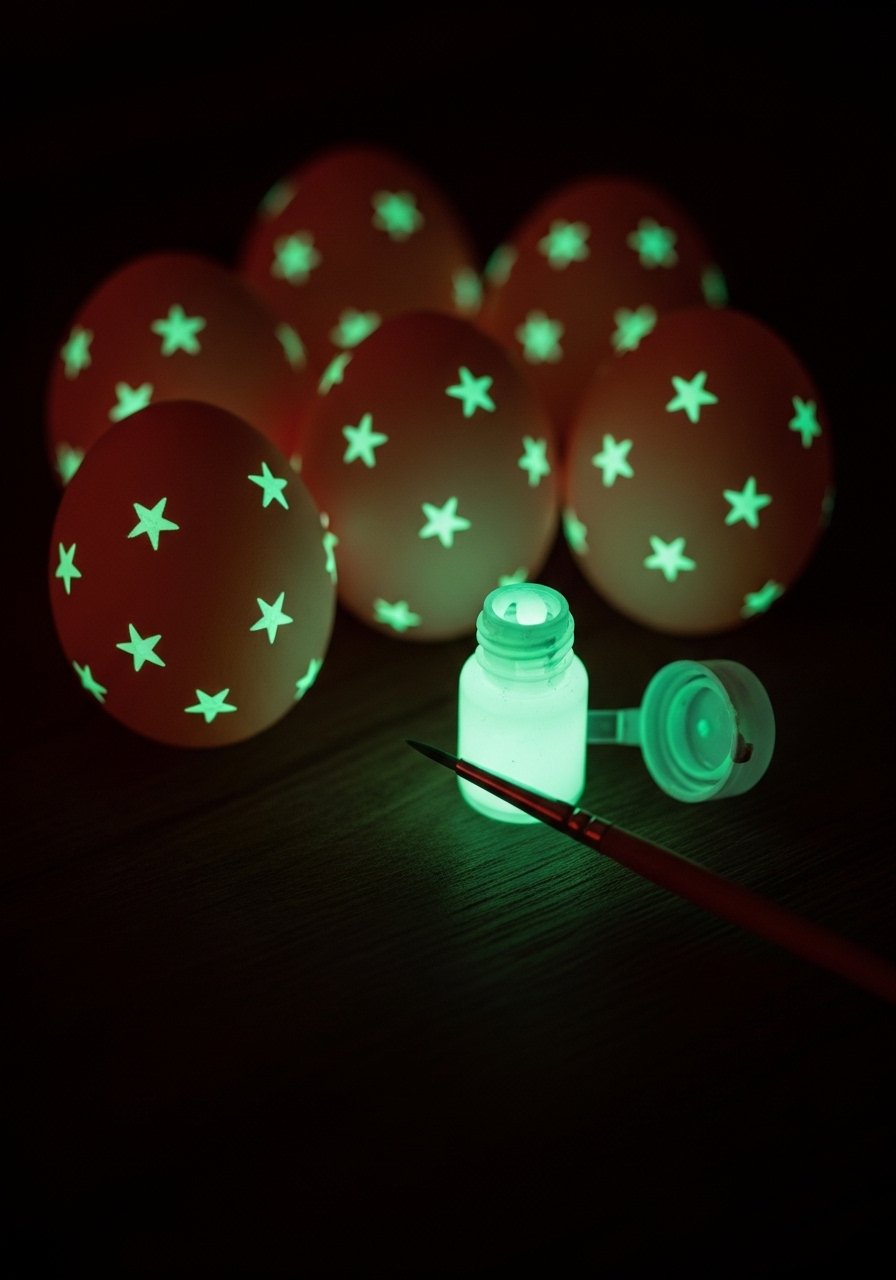
Apply a few coats of glow-in-the-dark paint in star shapes or patterns for eggs that light up at dusk. Use glow-in-the-dark-paint with multiple charge cycles for brightness. These are a hit for evening hunts and create a whimsical table accent after sunset.
Mistake to Avoid:
Using a single thin coat—glow pigments need multiple layers to charge and shine.
Alcohol-Ink Marble — luminous, saturated swirls
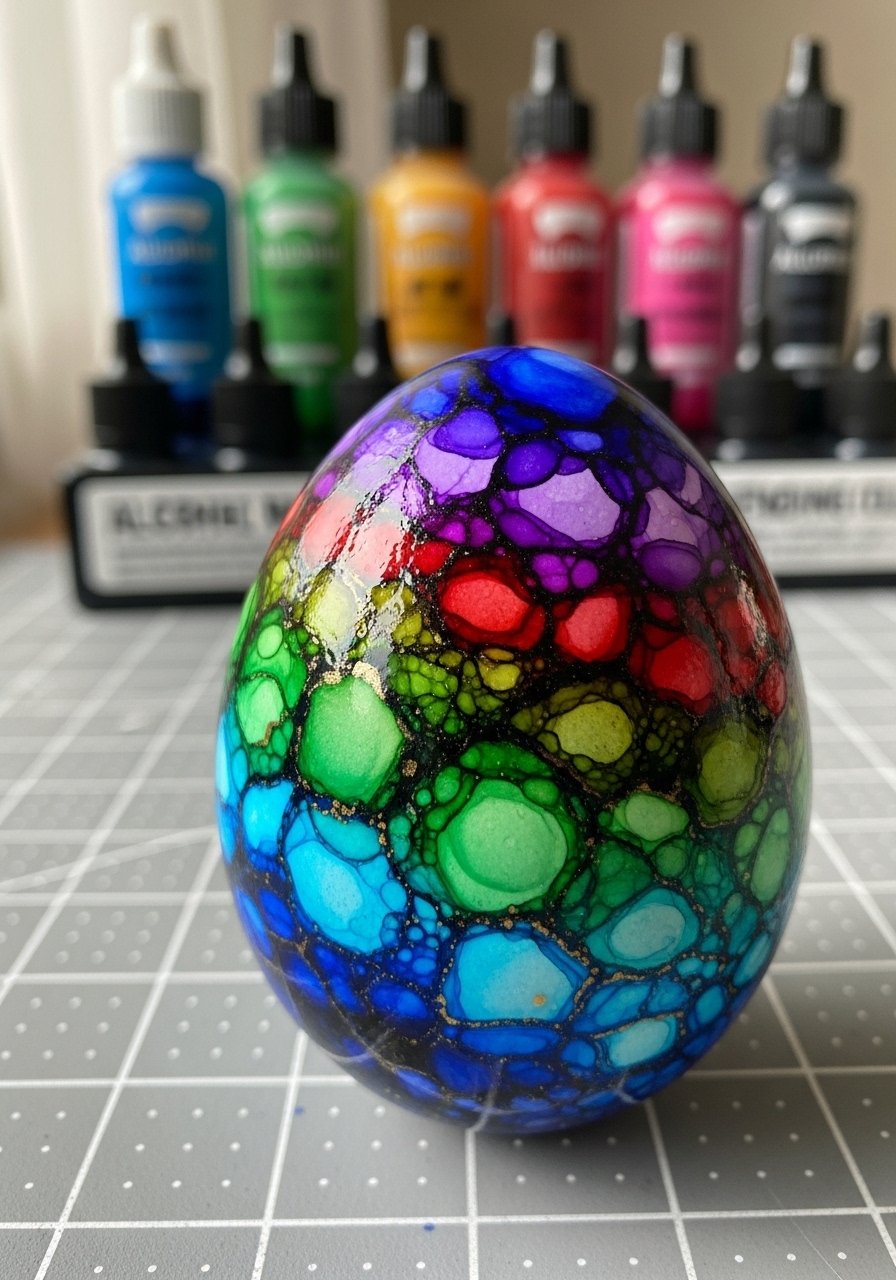
Alcohol inks produce saturated, translucent marbling on blown or plastic eggs. Apply inks with a felt-tip applicator and tilt to move colors; blot gently to lift highlights. I work on a craft mat and then seal with a UV-protective spray. These read as modern art and are great when you want high-impact color.
Mistake to Avoid:
Overworking the ink—colors muddy quickly if blended too much.
Lace-Wrapped Eggs — soft texture and silhouette
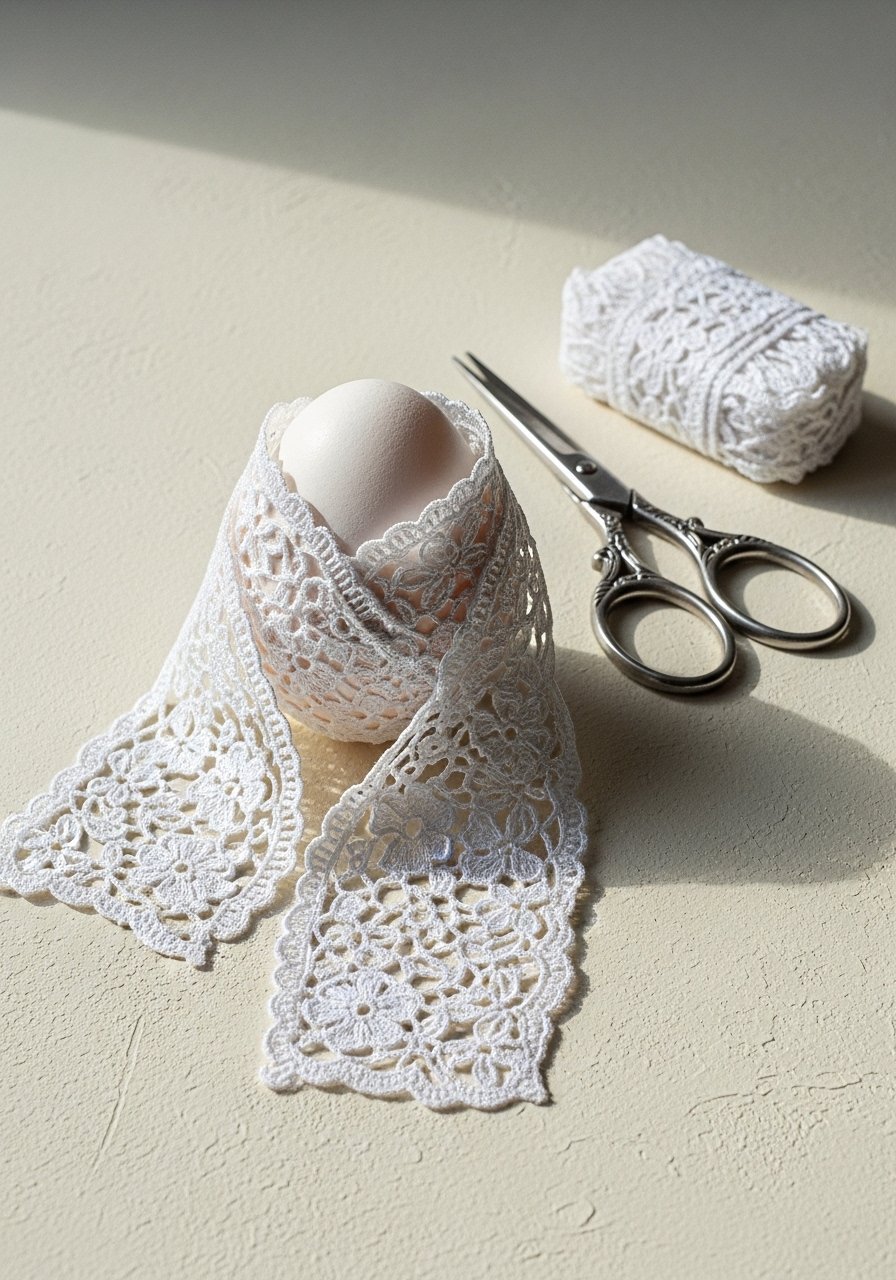
Stretch lace around dyed eggs and secure with a dab of glue at the seam for delicate patterns. Use contrast: dark base with light lace or vice versa. I keep trimming neat and add a tiny pearl pin for a vintage accent. These work well for tiered displays.
Mistake to Avoid:
Using bulky lace—choose fine lace to show delicate patterning.
Miniature Scene Dioramas — tiny keepsake vignettes (unique)
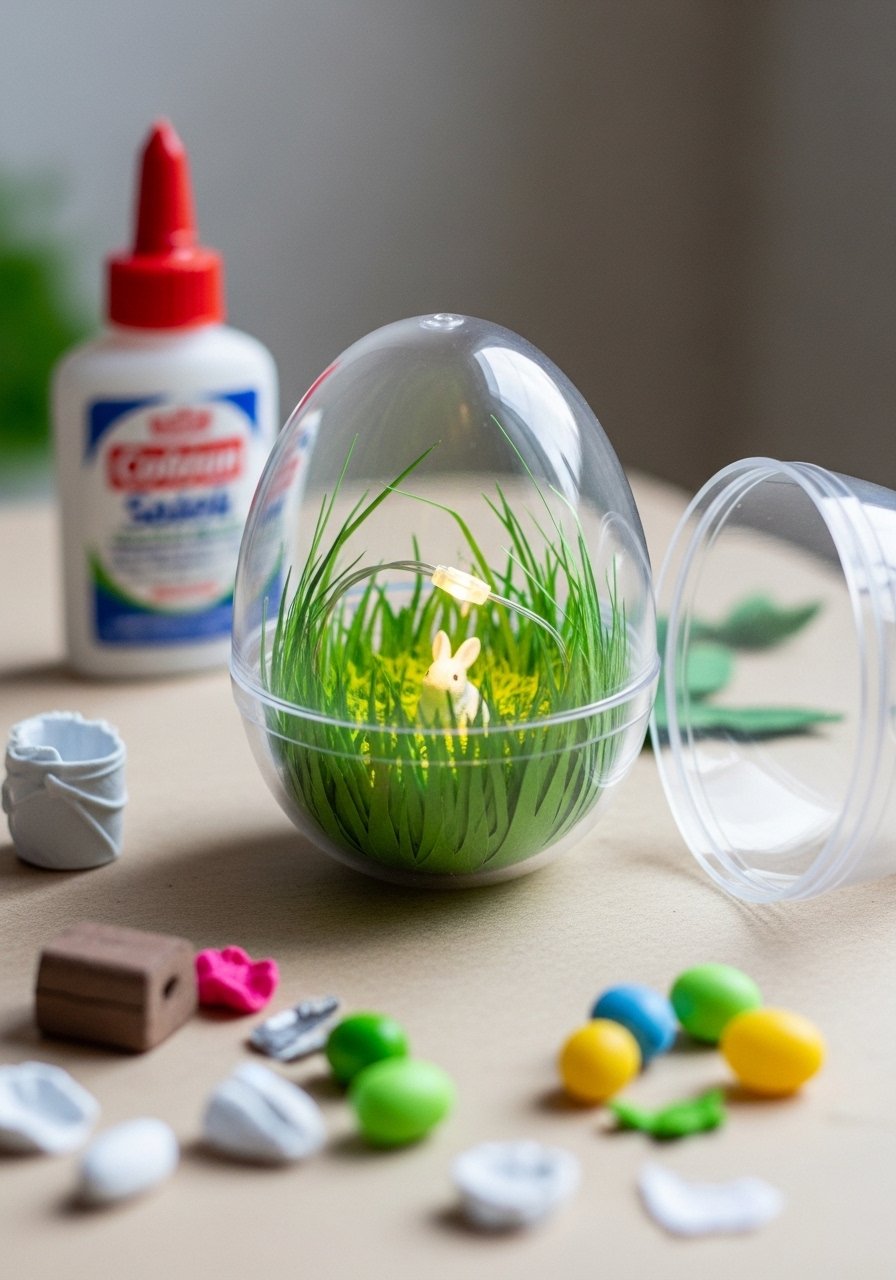
Hollow clear eggs become tiny terrariums—glue miniature figures, paper trees, and a bit of moss to create pocket-sized scenes. I use clear-plastic-easter-eggs and tiny LED lights for a magical glow. These are time-consuming but make meaningful gifts and table place-scene favors.
Mistake to Avoid:
Overstuffing interiors—leave breathing room so scenes read clearly.
Thread-Wrapped Color Blocks — tactile color fields
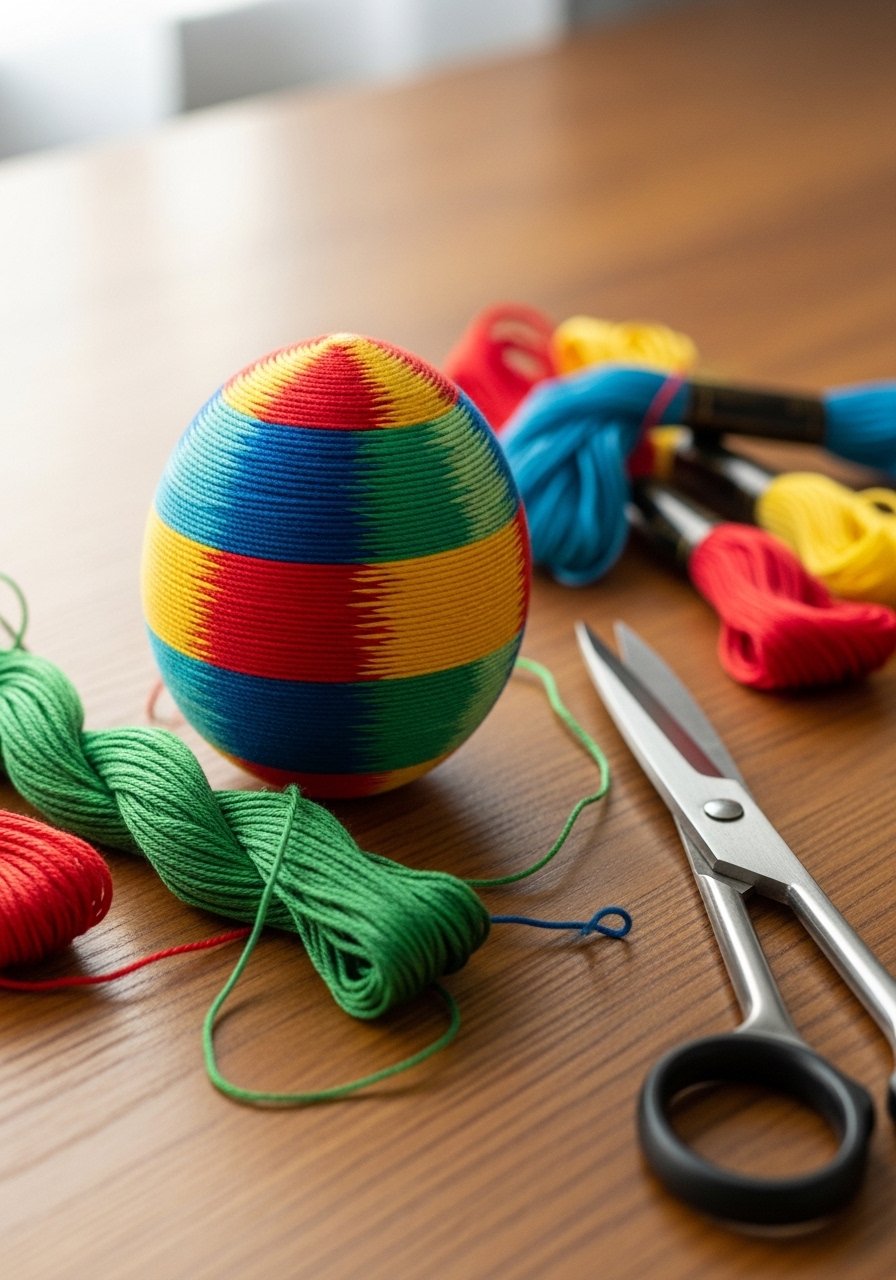
Wrap sections of an egg with embroidery thread for clean blocks of color and texture. Secure ends with a tiny dab of craft glue and trim. I use embroidery-thread-multi sets to coordinate with table linens. These eggs are sturdy and kid-friendly.
Mistake to Avoid:
Leaving loose ends—tuck and glue securely or threads unravel.
Tassel & Ribbon Hangs — quick ornament-style eggs

Add tassels and ribbon loops for ornament-style eggs perfect for door wreaths or branches. I knot a loop into a small drilled hole or attach to glued hardware. Use tassel-kit-ribbon materials for matching palettes. These are instant hanging accents.
Mistake to Avoid:
Using heavy tassels on real eggs—use lightweight materials or plastic eggs for durability.
Sharpie Mandala Doodles — precise linework
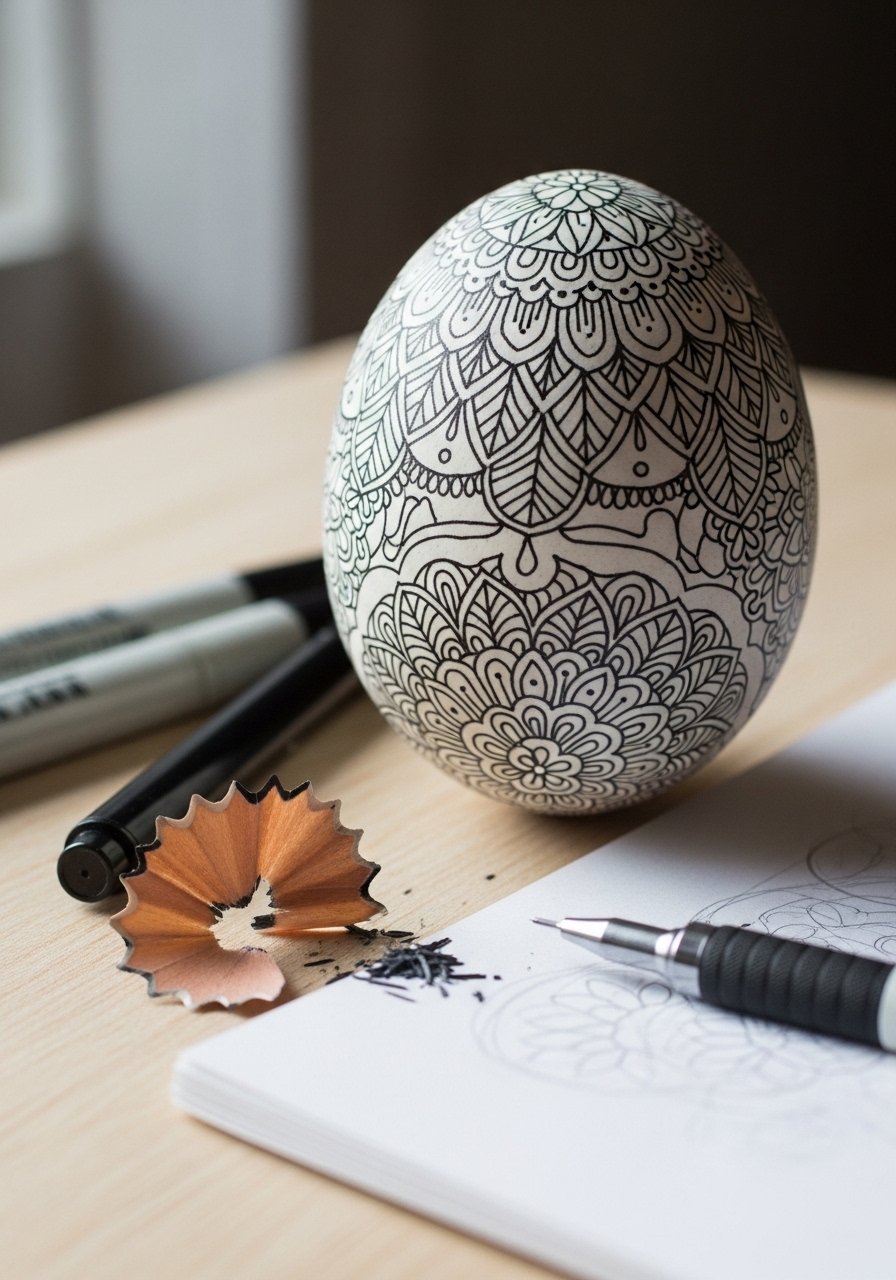
Fine-point permanent markers are perfect for detailed doodles and mandalas. I sketch lightly with pencil, then ink with fine-point-permanent-markers. This technique is inexpensive, travel-friendly, and great for intricate adult crafting sessions. Finish with a clear matte coat.
Mistake to Avoid:
Skipping a pencil guide—freehand can lead to uneven symmetry.
Watercolor Pastel Wash — soft, painterly finish
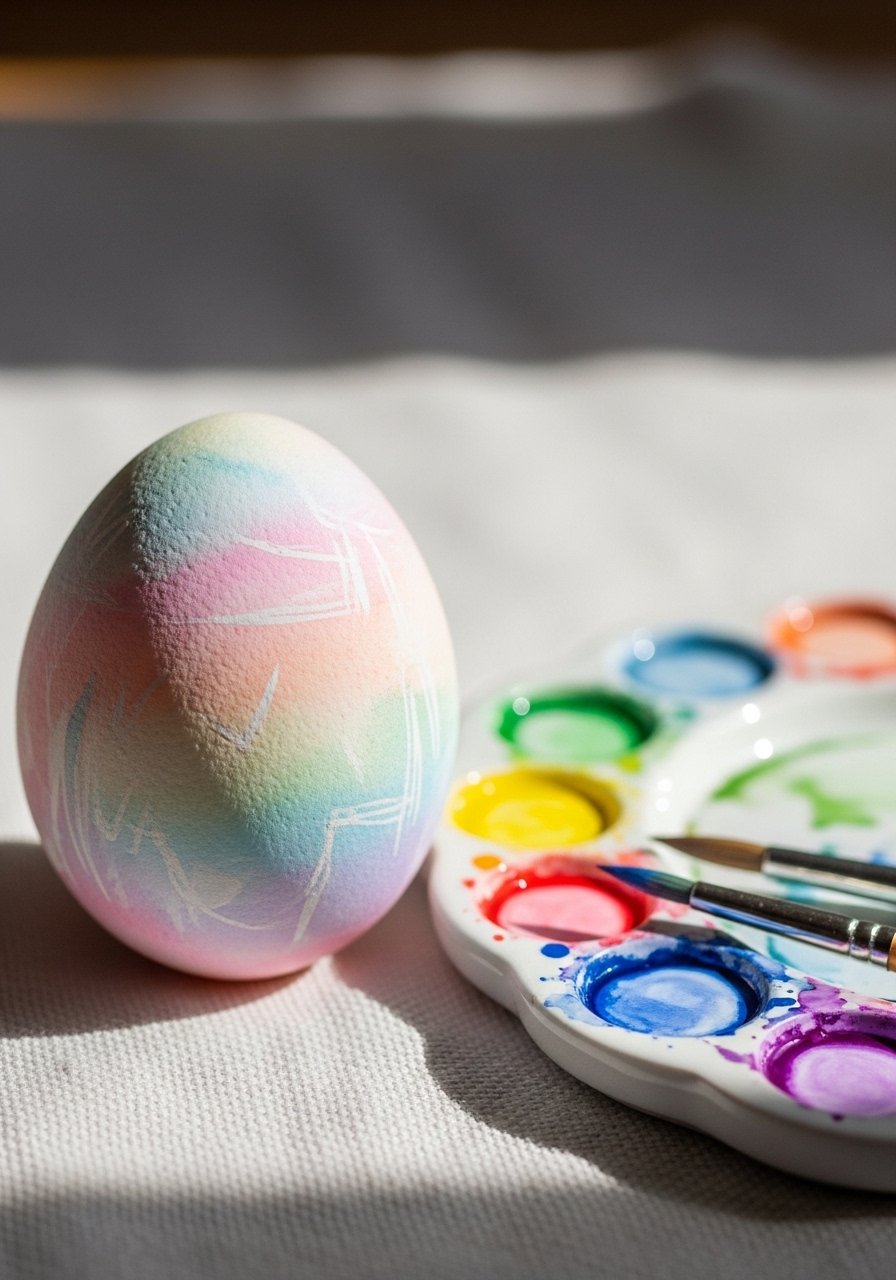
Watercolor paints on hard-boiled or blown eggs give airy, layered color. Use a dry brush technique and work in passes with a sealed base to prevent blotting. I prefer watercolor-paint-set with a fine sable brush for smooth gradations. Seal gently to preserve subtle washes.
Mistake to Avoid:
Using too much water—colors run and weaken shell adhesion.
Stamped Pattern Eggs — repeatable, graphic motifs
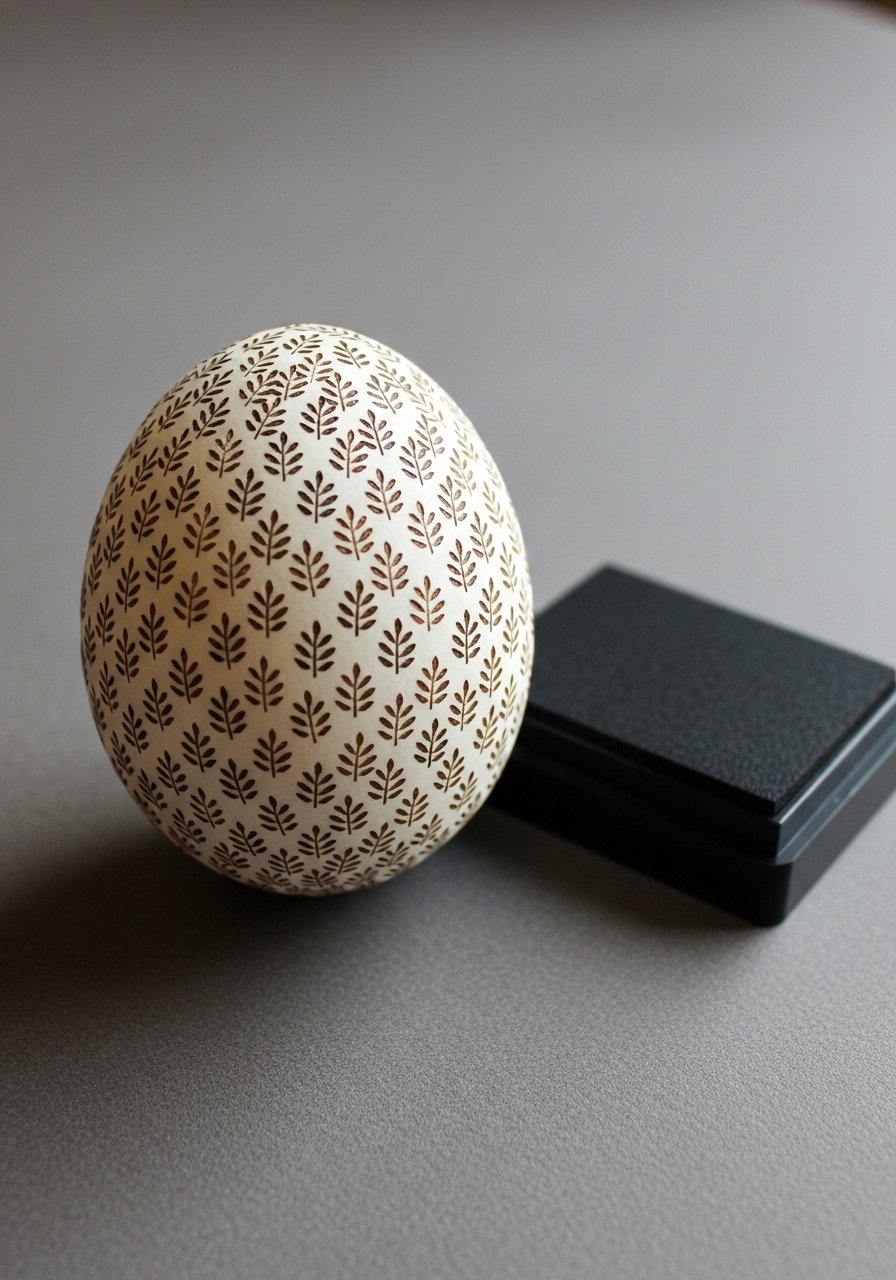
Mini rubber stamps and ink pads make consistent, repeatable patterns quickly. Lightly press to avoid smudges and rotate stamp for rhythm. I use rubber-stamp-set combinations and pick archival ink for longevity. This is a fast way to create a coordinated set.
Mistake to Avoid:
Pressing too firmly—stamps bleed and lose crispness.
Cartoon Character Faces — playful and bold
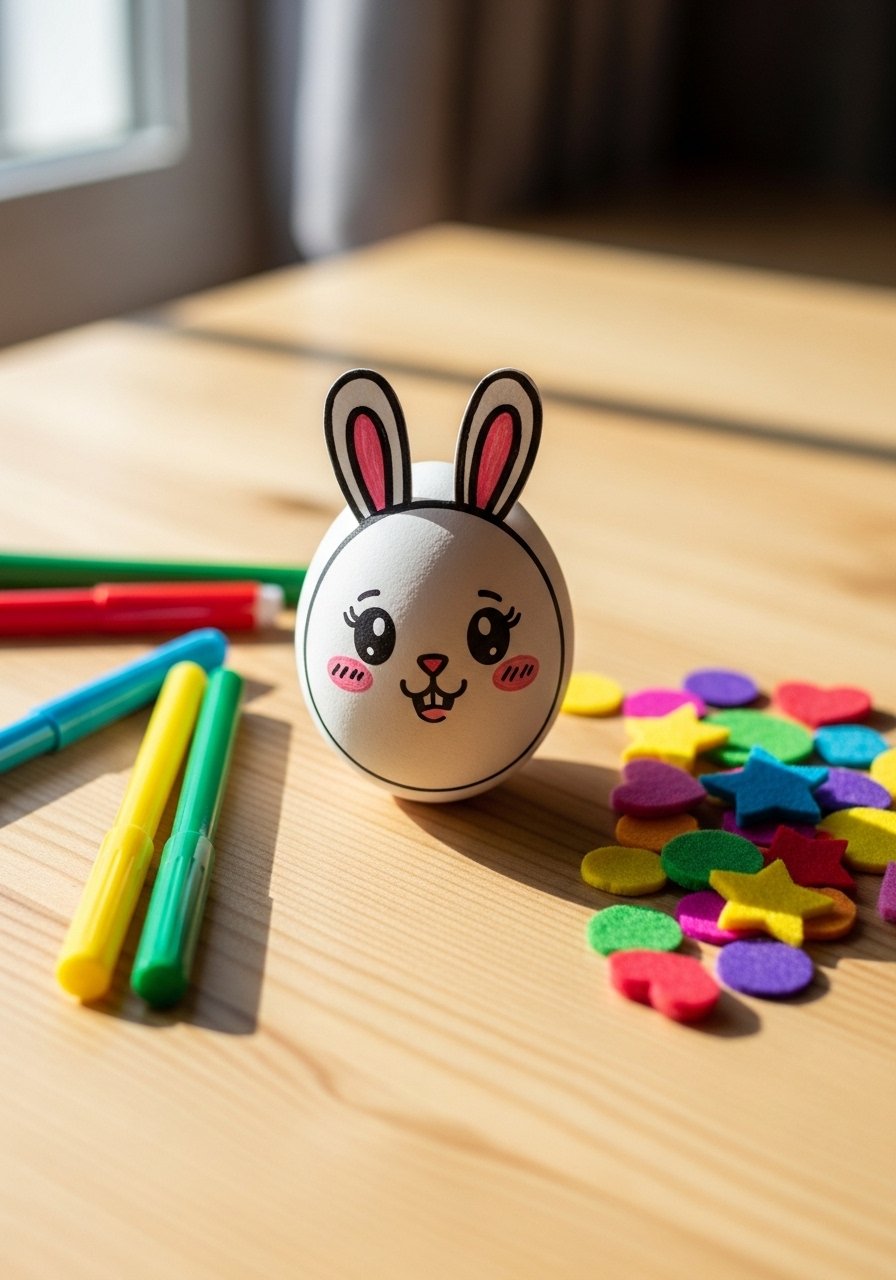
For kid-friendly eggs, draw simple faces and add felt ears or paper hats. Use washable markers for younger kids and fine-point-permanent-markers for keepsakes. These are a fast win at parties and make great hunt prizes.
Mistake to Avoid:
Overcomplicating faces—simple shapes read best from a distance.
Photo Transfer Portrait Eggs — personalized keepsakes
Use photo transfer paper to apply tiny portraits or photos to smooth eggs—great for family place settings or memory eggs. I use photo-transfer-paper and keep images high-contrast for clarity. These are delicate but become treasured mementos when sealed and handled gently.
Mistake to Avoid:
Using low-res images—transfers blur and lose detail on the curve.
Pressed Leaf Imprint — subtle botanical silhouettes
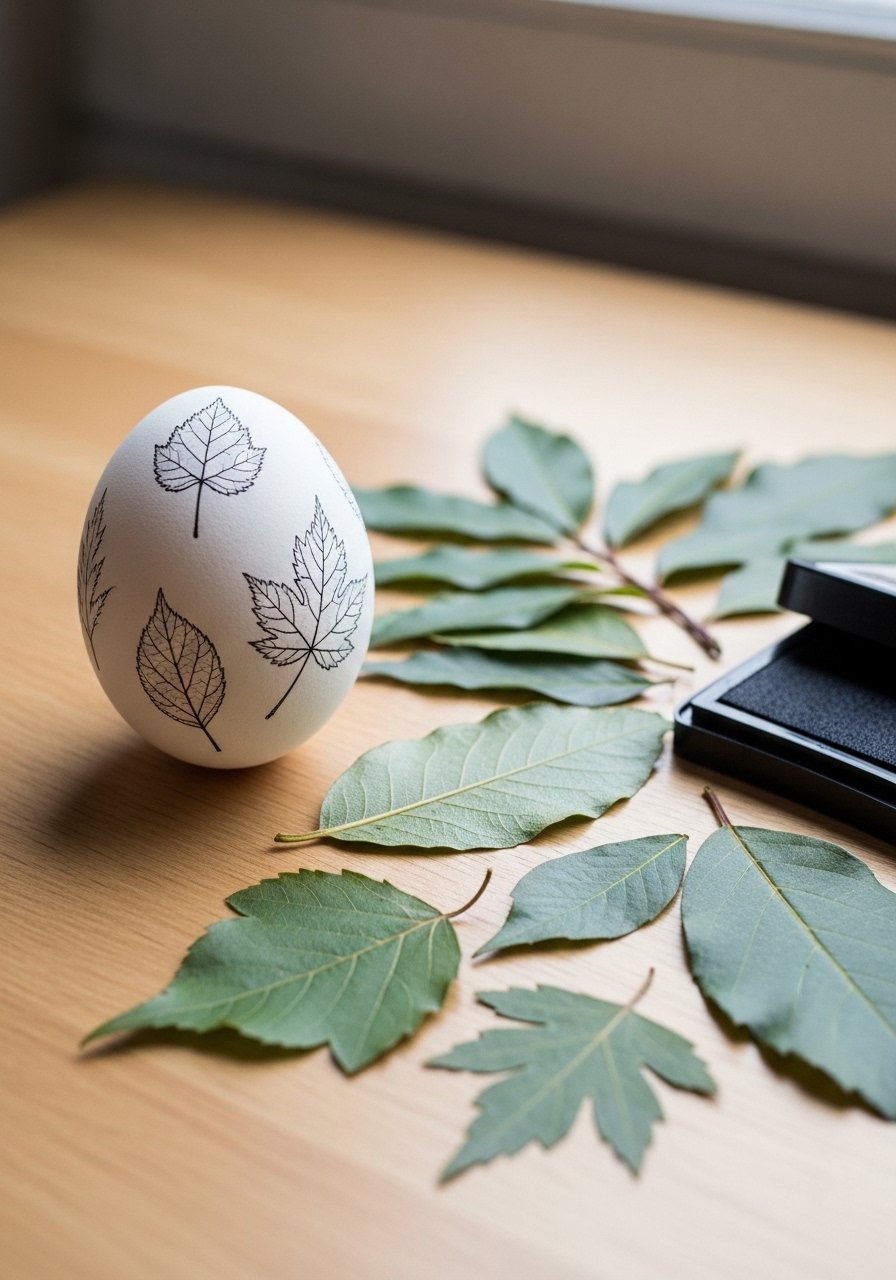
Press small leaves onto lightly inked eggs or use real leaves as stencils with spray dye for crisp silhouettes. I love this for minimalist tables; try natural-dried-flowers to source consistent shapes. These read as calm and collected on a linen runner.
Mistake to Avoid:
Using large leaves—too much overlap hides the egg’s shape.
Royal Icing Edible Decor — sweet display treats
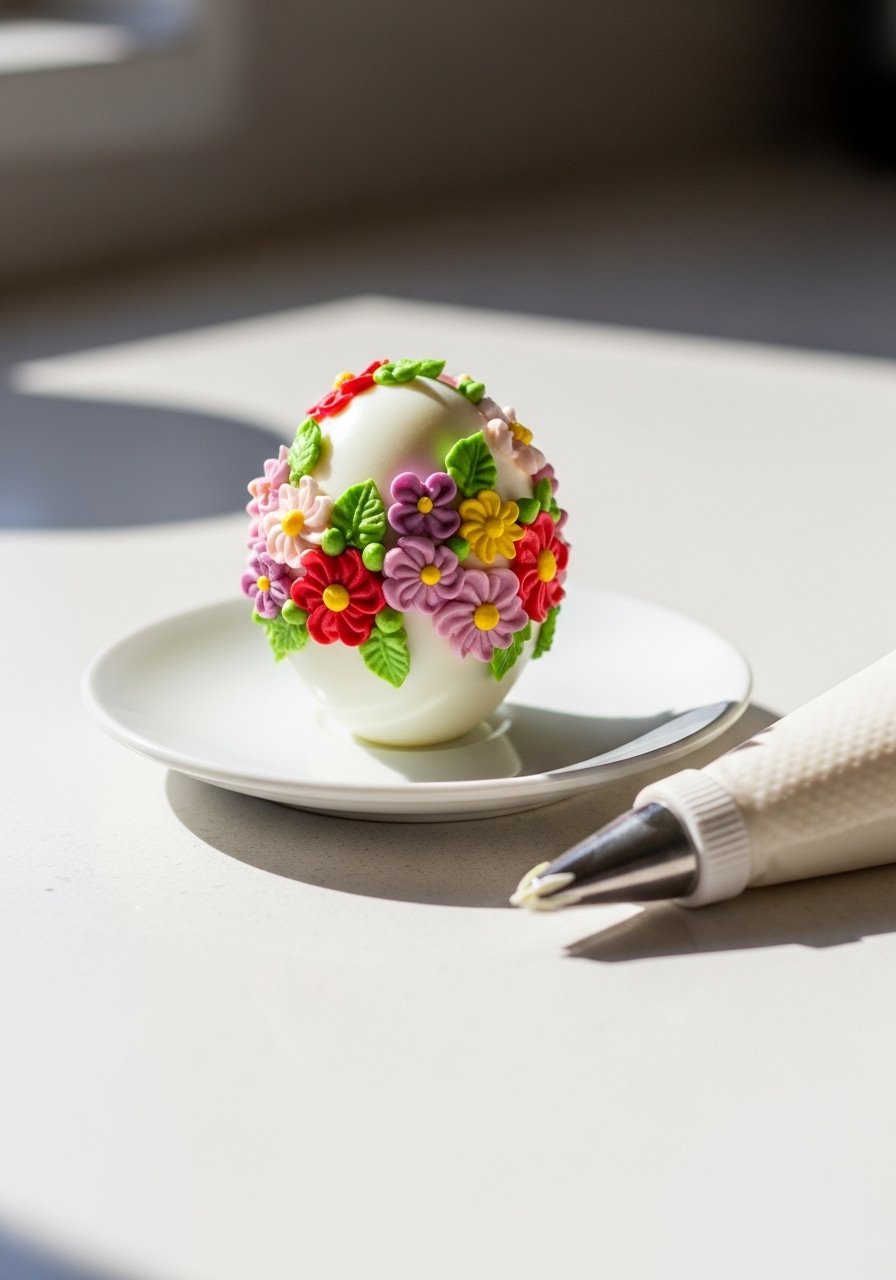
Pipe royal icing for edible decorative eggs for brunch. Use royal-icing-powder and small piping tips to add raised dots, lace, or borders. These are best used fresh and kept chilled until serving—great for dessert tables where guests can nibble a keepsake.
Mistake to Avoid:
Leaving icing at room temperature too long—softens and loses definition.
Painted Chalk Pastels — soft matte texture
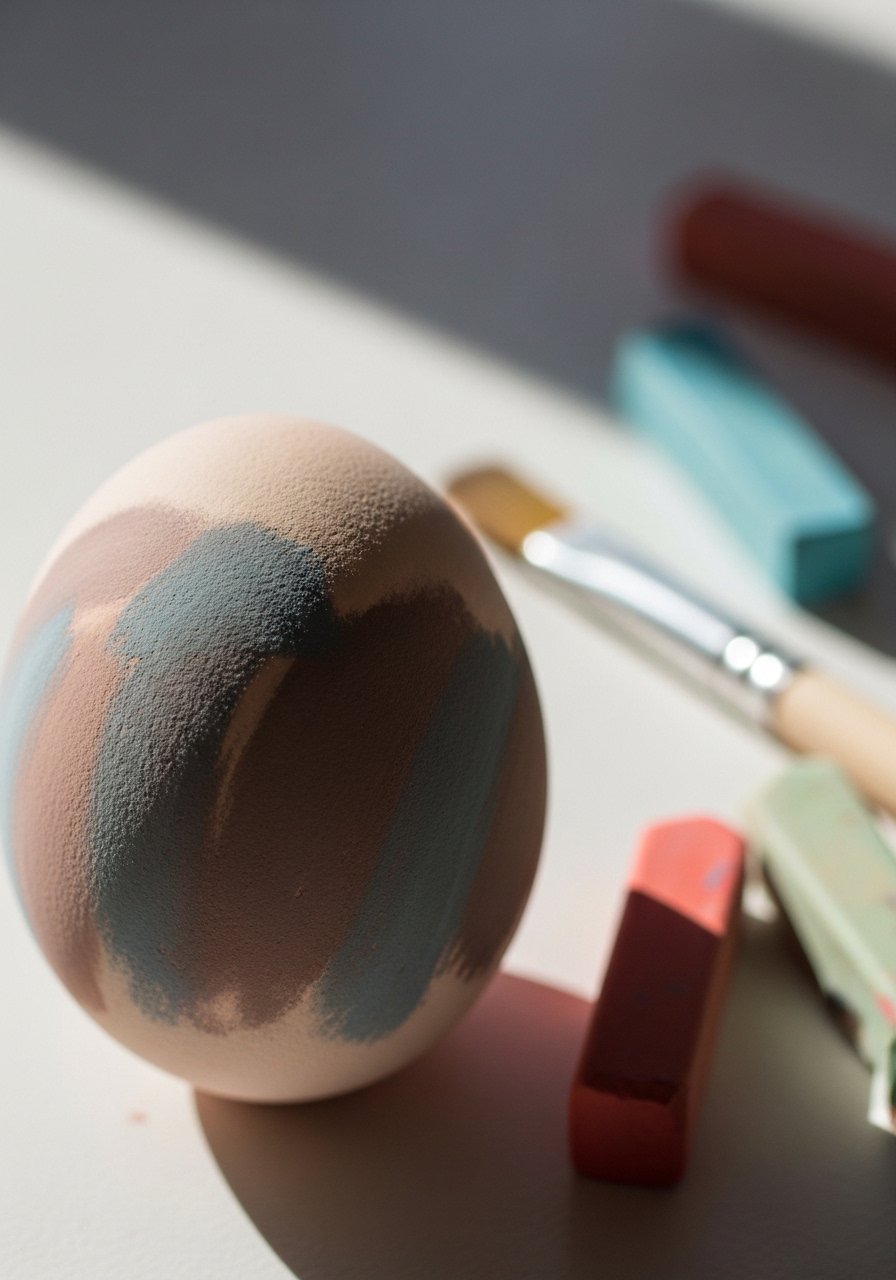
Crushed chalk pastels mixed with water or a binder create a velvety, matte finish distinct from glossy paints. I keep layers thin and blend with a soft brush for gentle tonal shifts. Use a fixative spray to prevent smudging when handling.
Mistake to Avoid:
Rubbing before fixative dries—colors smear easily.
Metallic-Stamped Foil Seals — easy luxe dots
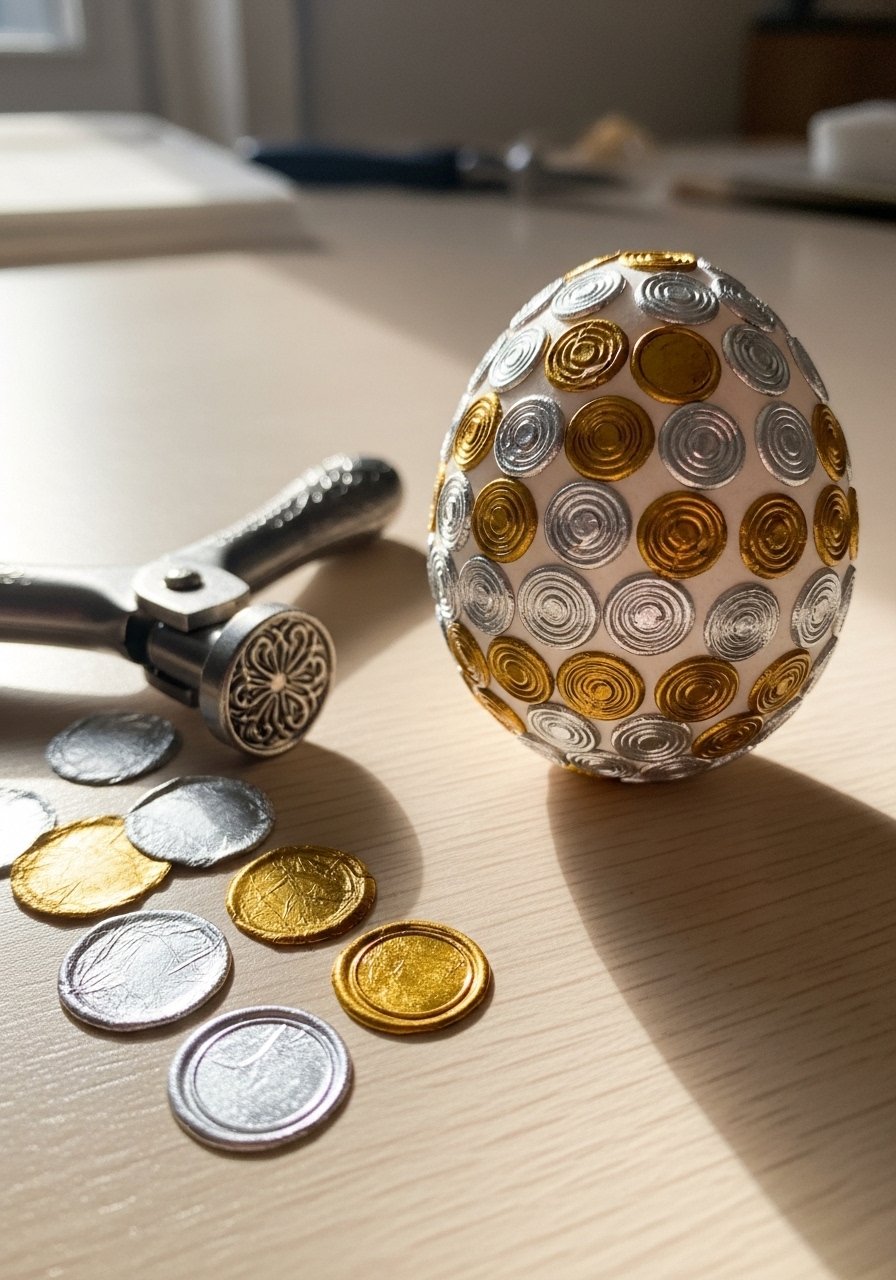
Punch small foil shapes and adhere with craft glue for uniform metallic accents. I use gold-leaf-sheets repurposed into tiny circles for consistent highlights. This is a fast way to add polish to many eggs without complex gilding.
Mistake to Avoid:
Using too-large foil pieces—overpowers the shell and looks heavy.
Painted Fabric-Wrapped Eggs — cozy, textile contrast

Paint small fabric patches then wrap and glue to eggs for a tactile contrast between paint and textile. I combine with thread wraps and use decoupage-mod-podge to secure edges. These fit well into baskets and feel handcrafted.
Mistake to Avoid:
Using thick fabric layers—creates bulk and uneven appearance.
Dye-Resist Tape Letters — custom word eggs

Spell names or short words with adhesive letter stickers, dye the egg, then peel to reveal crisp negative-space lettering. I use easter-egg-dye-kit and pre-test sticker adhesion. This is perfect for guest names or short messages on place eggs.
Mistake to Avoid:
Using stickers that aren’t sticky enough—dye bleeds under and ruins edges.
Metallic Pen Calligraphy — tiny hand-lettered notes
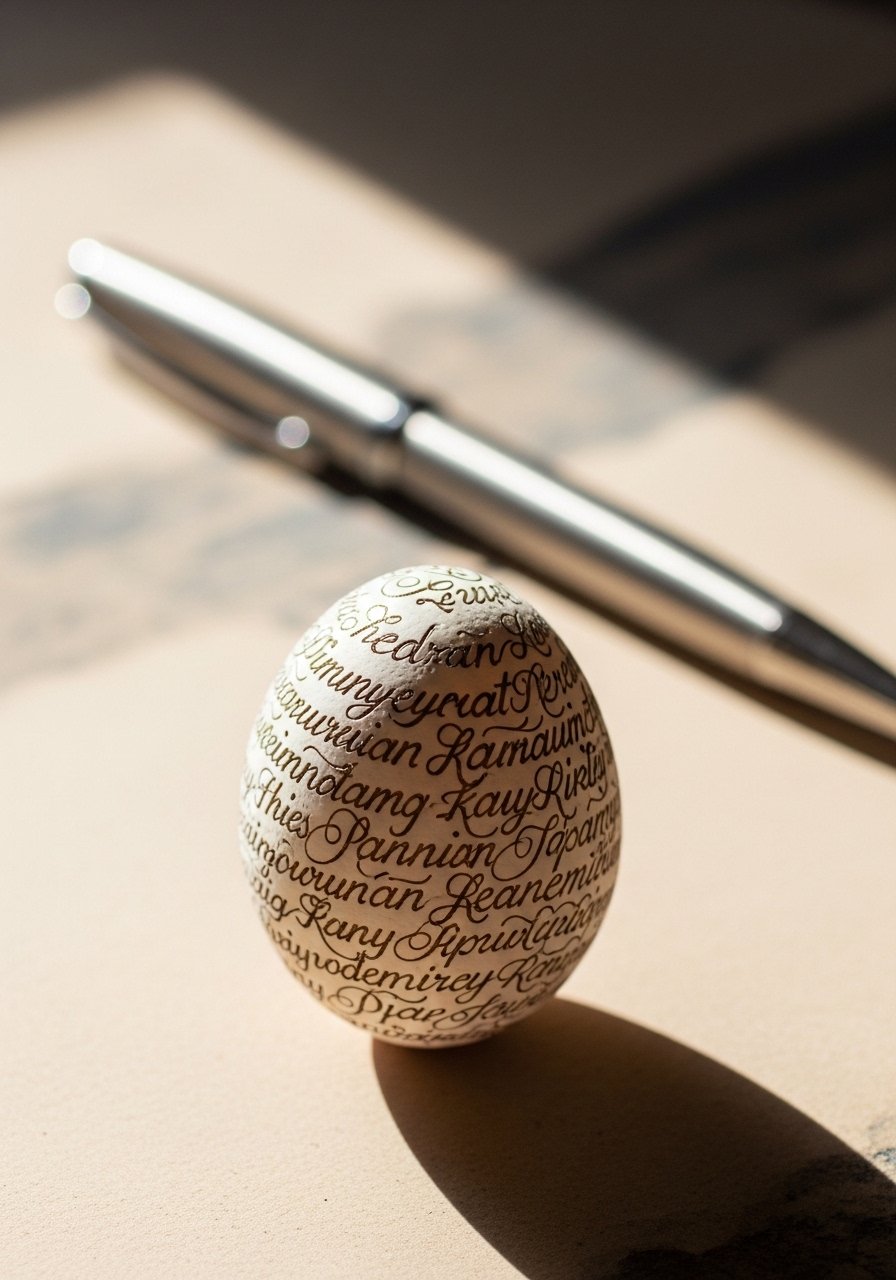
Use fine metallic pens for tiny hand-lettered names or phrases; they show beautifully against dark bases. I prefer metallic-calligraphy-pen sets for a consistent stroke. These are fast to execute and work well on gift eggs.
Mistake to Avoid:
Writing without practicing strokes—ink blobs can appear on curved surfaces.
Stenciled Floral Medallions — repeatable botanical motifs
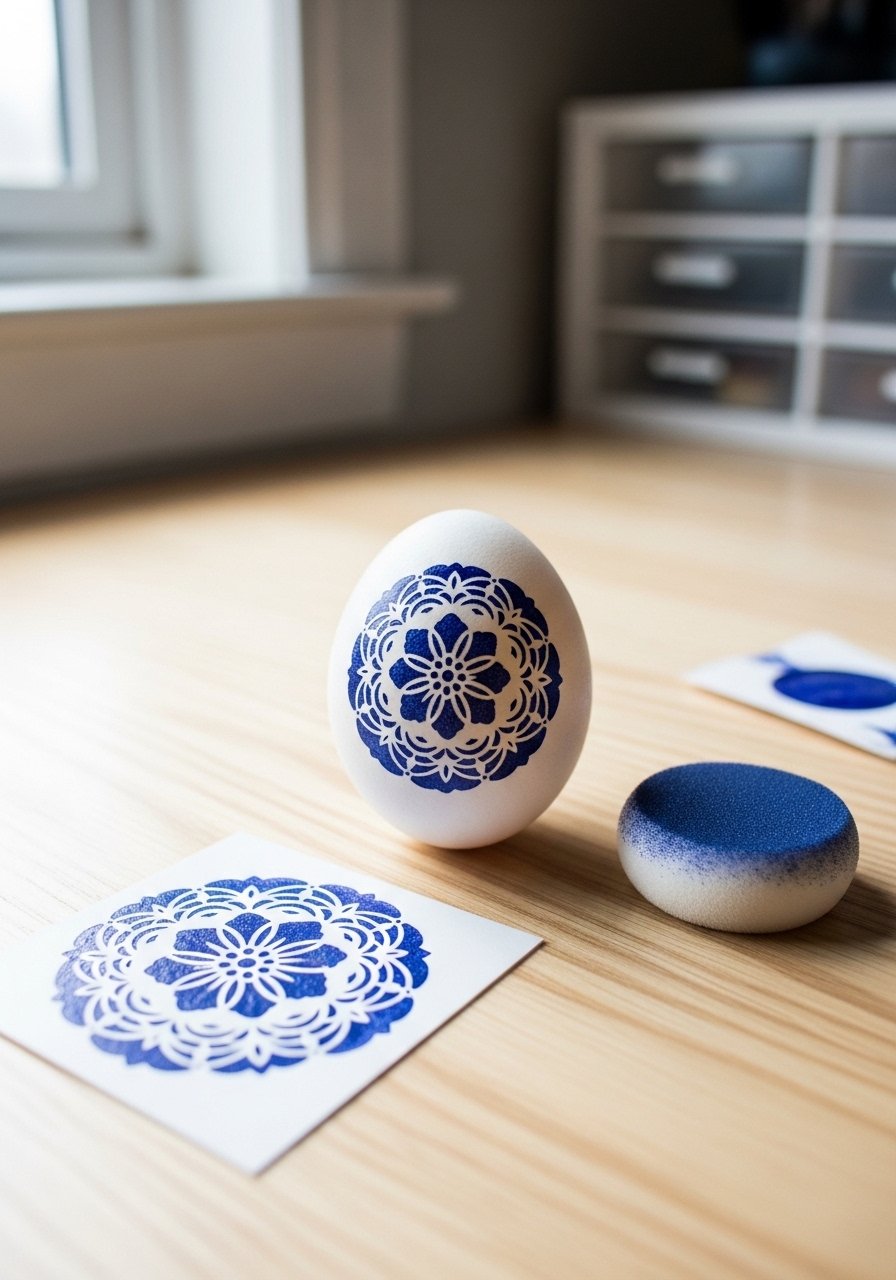
Use small stencils and dabbing sponges for neat floral medallions and repeatable motifs. I secure stencils with low-tack tape and use small-stencil-set and quick-dry paint for clean application. Great for making coordinated sets quickly.
Mistake to Avoid:
Rubbing paint—stenciled edges will smudge; dab lightly.
Holiday Decorating Tips
Plan a color story: Choose 3–4 colors and repeat them across techniques—use metallic-acrylic-paint-set for accents to unify mixed styles.
Prep a drying station: I use egg cartons and a mini clothespin rack to keep work steady—clear-plastic-easter-eggs are great to practice on first.
Seal appropriately: Match sealant to technique—use satin varnish for metallics and a food-safe finish for edible decorations.
Mix textures: Combine matte, metallic, and natural elements on the same tray to create depth; I’ve found guests notice texture more than pattern.
Make a few extras: Prepare 25–30% more display eggs than you need—handling and small accidents are common.
Test one first: Always trial a technique on a plastic egg or a spare shell to avoid surprises during production; keep decoupage-mod-podge handy for small fixes.
Use sustainable scraps: Save dyed shells and fabric scraps—I've repurposed many into mosaic inlays and trims, cutting waste and adding charm.
